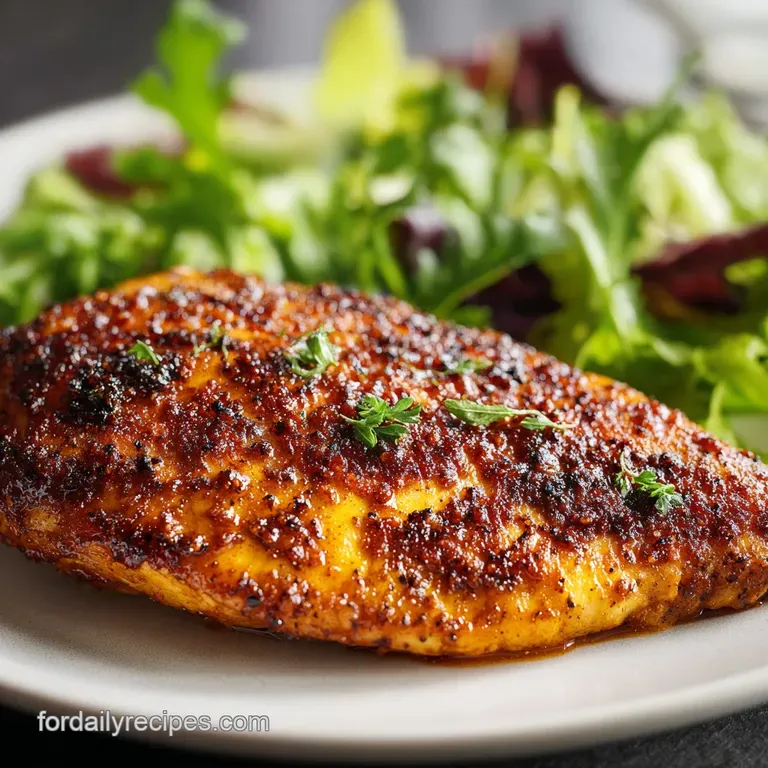
How to Cook Chicken Breast: Pan Seared
- Time: Active 10 minutes, Passive 12 minutes, Total 22 minutes
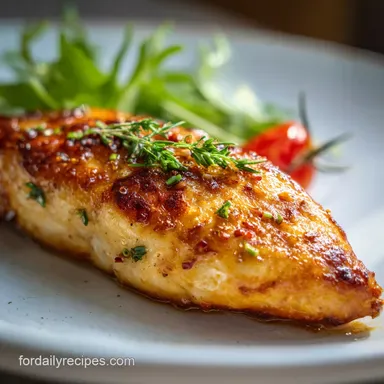
- Flavor/Texture Hook: Golden brown crust with a silky, herb infused finish
- Perfect for: High protein meal prep and hectic Tuesday nights
- Key Techniques for Pan Searing Success
- Efficient Specs for Perfect Results
- Essential Components for Flavorful Poultry
- Minimal Tools for Maximum Efficiency
- Simple Steps for a Juicy Finish
- Identifying and Fixing Common Mistakes
- Adapting for Different Needs
- Debunking Common Poultry Myths
- Storage and Zero Waste Strategies
- Pairing Suggestions for a Full Meal
- Very High in Sodium
- Recipe FAQs
- 📝 Recipe Card
Honestly, nothing kills my mood faster than biting into a piece of chicken that feels like chewing on a yoga mat. I used to be that person who would toss a breast into a lukewarm pan, check my emails, and come back to find a pale, rubbery mess that required a gallon of ranch to swallow.
It was frustrating because I just wanted a quick, high protein meal without it feeling like a chore to eat.
Then I realized the secret isn't some complicated culinary degree, it's just about managing heat and moisture with a bit of intention. The first time I got that perfect sizzle in a cast iron pan, seeing the edges turn a deep mahogany brown while the inside stayed tender, it changed my entire weeknight routine.
Now, I don't dread the "chicken for dinner" text from my partner, because I know I can have this on the table in under 25 minutes without breaking a sweat.
Key Techniques for Pan Searing Success
Understanding the mechanics of heat helps you avoid the common pitfalls of dry poultry. Here is the logic behind why we use specific moves in the kitchen to ensure your dinner is always a hit.
- Maillard Reaction: High heat transforms the surface proteins into complex, savory flavor compounds that simple boiling or steaming can't touch.
- Protein Denaturation: Applying heat slowly at first or using a cold pan causes fibers to tighten and squeeze out moisture, leading to a dry result.
- Thermal Momentum: Letting the meat rest allows the internal temperature to stabilize, ensuring the juices stay inside the fibers instead of spilling onto your plate.
- Emulsified Pan Sauce: Using a liquid like chicken broth to deglaze the pan captures the "fond" (brown bits), creating a flavorful coating that masks any slight overcooking.
| Method | Time | Texture | Best For |
|---|---|---|---|
| Pan Sear (This Recipe) | 12 minutes | Crispy crust, juicy center | Quick weeknight dinners |
| Oven Roast | 25 minutes | Uniformly tender, no crust | Large batch meal prep |
| Poaching | 15 minutes | Soft, pale, shredded | Salads and tacos |
This comparison highlights why the pan searing method is my go to for speed. If you are looking for a different vibe, you might enjoy this Roasted Chicken Recipe for that classic Sunday dinner feel.
Efficient Specs for Perfect Results
When you're trying to beat the clock, knowing the exact numbers is a lifesaver. These specifications are designed for 225g breasts, which are the standard size you'll find at most butchers.
| Thickness | Internal Temp | Rest Time | Visual Cue |
|---|---|---|---|
| 1.5 cm (pounded) | 74°C | 5 minutes | Juices run clear |
| 2.5 cm (natural) | 74°C | 8 minutes | Firm to the touch |
| 3.5 cm (thick) | 74°C | 10 minutes | Opaque throughout |
Having these benchmarks helps me stay on track when I'm juggling multiple tasks. It's much like the precision needed for a Crockpot Turkey Breast recipe, where timing is the difference between succulent and sandy.
Essential Components for Flavorful Poultry
We are using a mix of dry spices and fresh aromatics to build layers of flavor quickly. Each ingredient serves a specific purpose in the chemistry of the pan.
| Ingredient | Science Role | Pro Secret |
|---|---|---|
| Kosher Salt | Denatures surface proteins | Dry brine for 10 mins to improve browning |
| Avocado Oil | High smoke point | Won't burn or turn bitter at high searing temps |
| Unsalted Butter | Adds milk solids for browning | Add at the end to prevent the fat from burning |
| Dijon Mustard | Emulsifier for sauce | Bonds the oil and broth for a velvety finish |
Ingredients & Substitutes
- 2 boneless, skinless chicken breasts (approx. 225g each): Why this? Standard size ensures even cooking across the pan surface.
- Substitute: Chicken thighs (increase cook time by 4 minutes).
- 1 tsp (6g) Kosher salt: Why this? Larger grains are easier to sprinkle evenly than fine table salt.
- Substitute: 1/2 tsp Sea salt.
- 1/2 tsp (1g) Coarse black pepper: Why this? Adds a punchy heat that lingers on the palate.
- Substitute: White pepper for a more subtle, earthy heat.
- 1/2 tsp (1g) Garlic powder: Why this? Won't burn as easily as fresh garlic during the initial over high heat sear.
- Substitute: Onion powder.
- 1/2 tsp (1g) Smoked paprika: Why this? Provides a deep, wood fired color and subtle smokiness.
- Substitute: Sweet paprika or a pinch of chipotle powder.
- 1.5 tbsp (22ml) Avocado oil: Why this? Safe for searing at 200°C without smoking out your kitchen.
- Substitute: Grapeseed oil or Light olive oil.
- 1 tbsp (14g) Unsalted butter: Why this? Adds a rich, nutty finish to the pan sauce.
- Substitute: Ghee (for a higher smoke point).
- 2 sprigs Fresh thyme or rosemary: Why this? Infuses the butter with herbal oils during the basting phase.
- Substitute: 1/2 tsp dried herbs (added to the spice rub).
- 1/4 cup (60ml) Low sodium chicken broth: Why this? Provides the liquid base for a quick pan reduction.
- Substitute: Dry white wine (like Sauvignon Blanc).
- 1 tsp (5ml) Fresh lemon juice: Why this? Acid cuts through the richness of the butter and chicken fat.
- Substitute: Apple cider vinegar.
- 1 tsp (5g) Dijon mustard: Why this? Thickens the sauce and adds a sharp, tangy bite.
- Substitute: Yellow mustard for a milder flavor.
Minimal Tools for Maximum Efficiency
You don't need a mountain of dishes to get a great result. I prefer keeping it simple so I spend less time at the sink and more time enjoying my dinner.
- Heavy bottomed skillet: Cast iron or stainless steel is best for heat retention. Avoid thin non stick pans for searing.
- Tongs: These give you the best control when flipping the meat without piercing the surface.
- Meat thermometer: The only way to be 100% sure about doneness without cutting into the meat.
- Small whisk or spoon: For stirring the Dijon and broth into a cohesive sauce.
Chef's Tip: Freeze your butter for 10 minutes before adding it to the pan. It melts more slowly, giving the milk solids more time to brown without burning.
Simple Steps for a Juicy Finish
This process is all about timing. Once the chicken hits the pan, stay close. You want to hear that consistent sizzle—it's the sound of the moisture evaporating and the crust forming.
- Prep the meat. Pat the chicken completely dry with paper towels. Note: Excess moisture causes the meat to steam rather than sear.
- Season generously. Combine the salt, pepper, garlic powder, and smoked paprika in a small bowl, then coat both sides of the chicken.
- Heat the oil. Place the avocado oil in the skillet over medium high heat until it shimmers and wisps of smoke appear.
- Initial sear. Carefully lay the chicken in the pan, laying it away from you to avoid splatters. Cook for 5 to 6 minutes without moving it.
- The flip. Turn the chicken over until the underside is deeply golden and releases easily from the pan.
- Butter baste. Drop the butter and herb sprigs into the pan. Tilt the skillet slightly and spoon the foaming butter over the chicken for 2 minutes.
- Check temperature. Use your thermometer to check the thickest part. Remove the chicken once it reaches 72°C (it will rise to 74°C while resting).
- Deglaze the pan. Pour the chicken broth into the hot skillet, scraping up the brown bits with a spoon.
- Finish the sauce. Whisk in the Dijon mustard and lemon juice. Simmer for 2 minutes until the liquid reduces by half and looks glossy.
- Rest and serve. Let the chicken sit for 5 minutes, then slice against the grain and drizzle with the pan sauce.
For a variation on this technique, check out my Garlic Herb Chicken recipe, which uses a slightly different herb blend for a brighter flavor profile.
Identifying and Fixing Common Mistakes

Even the best of us have bad kitchen days. If things aren't looking right, usually it's a simple fix involving heat management or prep.
The Chicken is Tough and Dry
This is almost always a result of overcooking. Chicken breast is lean, meaning there's no fat to protect it once it passes 74°C. If you keep it on the heat "just to be safe," you're essentially turning it into wood. Always pull the meat slightly early and let the carry over heat do the work.
The Crust is Burnt but the Inside is Raw
If your pan is screaming hot, the outside will char before the heat can penetrate the center. This often happens if the chicken is very thick. You can solve this by pounding the breast to an even thickness before cooking or by lowering the heat slightly after the initial flip.
| Problem | Root Cause | Solution |
|---|---|---|
| Pale Surface | Pan was not hot enough | Wait for the oil to shimmer before adding meat |
| Soggy Crust | Crowding the pan | Use a larger skillet or cook in batches |
| Juices on Plate | Cutting too soon | Let the meat rest for a full 5 minutes |
Common Mistakes Checklist
- ✓ Pat chicken completely dry before seasoning (prevents steaming).
- ✓ Preheat the pan for 3 full minutes before adding the oil.
- ✓ Don't move the chicken once it hits the pan; let the crust form.
- ✓ Use a thermometer instead of guessing or "cutting to check."
- ✓ Always rest the meat to allow the fibers to reabsorb the juices.
Adapting for Different Needs
If you are cooking for a larger group or need to swap ingredients for dietary reasons, these adjustments will keep the quality high.
- Scaling Up (4 Servings): Use 4 breasts but cook them in two separate batches. Adding too much meat at once drops the pan temperature, and you'll lose that shatter-crisp crust.
- Scaling Down (1 Serving): Use a smaller 20 cm skillet to ensure the pan sauce doesn't evaporate too quickly.
- Keto Friendly Version: Use heavy cream instead of chicken broth for the pan sauce to increase the fat content and create a velvety texture.
- Budget Hack: Buy a whole chicken and break it down yourself; the breasts are significantly cheaper when they aren't pre packaged.
| Problem | Cause | Fix |
|---|---|---|
| Sauce is Broken | Too much heat | Whisk in a teaspoon of cold water off the heat |
| Spices are Burning | Heat is too high | Add a splash more oil to buffer the temperature |
| Chicken is Sticking | Trying to flip too early | Wait 60 seconds; it will release when the crust is ready |
If you are in the mood for something with a bit more structure, this Stuffed Chicken Breast recipe is a fantastic way to scale up a weeknight dinner into something special.
Debunking Common Poultry Myths
- Rinsing chicken prevents illness: This is actually dangerous. Washing chicken splashes bacteria around your sink and counters. The heat of the pan is what kills pathogens, not a rinse in the sink.
- Searing seals in the juices: Science shows that seared meat loses just as much moisture as unseared meat. We sear for the flavor (Maillard reaction), not for a "moisture seal."
- Pink near the bone means it's raw: Sometimes the marrow can stain the meat or the juices. If the thermometer reads 74°C, it is safe to eat regardless of the slight color near the bone.
Storage and Zero Waste Strategies
To keep your chicken fresh, place it in an airtight container in the fridge for up to 4 days. If you want to freeze it, wrap each breast tightly in plastic wrap and then place them in a freezer bag; they will stay good for up to 3 months.
To reheat, I suggest slicing the chicken first and warming it gently in a pan with a splash of broth to prevent it from drying out in the microwave.
Zero Waste Tip: Don't throw away those herb stems! You can toss them into a bag in the freezer to use later when making a homemade stock. Also, that leftover pan sauce can be frozen in an ice cube tray and popped into a future stir fry or pasta dish for an instant flavor boost.
Pairing Suggestions for a Full Meal
Since this chicken has a savory, slightly tangy profile from the mustard and lemon, it pairs beautifully with light, fresh sides. I love serving it over a bed of quinoa or with roasted asparagus.
If you want a more hearty meal, this Garlic Herb Chicken recipe pairs excellently with mashed potatoes or a crusty piece of sourdough to soak up that pan sauce. The key is to find something that doesn't compete with the herbs in the chicken but rather complements the citrusy finish.

Very High in Sodium
1260 mg mg of sodium per serving (55% of daily value)
The American Heart Association recommends limiting sodium intake to about 2,300mg per day.
Tips to Reduce Sodium in Your Chicken Recipe
-
Broth Swap-30%
Use water instead of low-sodium chicken broth. This will drastically reduce the sodium content without significantly impacting flavor.
-
Salt Reduction-25%
Reduce the amount of Kosher salt used to 1/2 tsp (3g). You can always add more salt later if needed, but it's harder to take it away.
-
Herb Power!
Instead of thyme or rosemary, experiment with sodium free fresh herbs like parsley, oregano, or basil to amplify the flavor of your chicken naturally.
-
Spice It Up-15%
Instead of Dijon mustard, which contains sodium, add a pinch of red pepper flakes to enhance the taste, using more pepper could reduce reliance on Dijon.
-
Lemon Boost-10%
Increase the amount of fresh lemon juice to 2 tsp (10ml). The acidity will enhance the other flavors and reduce the need for salt.
-
Unsalted Butter-5%
Ensure the butter used is unsalted. Even small amounts of salted butter can contribute to the overall sodium content.
Recipe FAQs
What is the absolute minimum internal temperature for safe chicken breast?
Yes, 74°C (165°F). This temperature guarantees pathogen destruction, but you should pull the chicken off the heat around 72°C to account for carry over cooking during the rest period.
How to achieve a golden brown crust without drying out the inside?
Sear aggressively on high heat first, then finish gently. Use a high smoke point oil, get the pan shimmering hot, and do not touch the meat for the first 5-6 minutes to allow the Maillard reaction to occur.
Should I pound the chicken breast to an even thickness before cooking?
Yes, this is highly recommended for speed and evenness. Pounding helps thinner areas cook at the same rate as thicker parts, preventing dry edges while you wait for the center to finish. If you enjoy cooking techniques that demand precision, see how the same principle of thermal control works in our Easy Dinner Idea with Roasted Chicken in 20 Min.
Is it true that seasoning chicken the night before prevents it from searing well?
No, dry brining overnight actually improves searing and flavor. Salting early allows the salt to draw moisture out, dissolve, and then be reabsorbed, seasoning the meat deeper while drying the surface for a better crust formation.
How do I make a quick pan sauce after searing the chicken?
Deglaze the pan with a liquid and whisk in an emulsifier. After removing the meat, pour in broth or wine, scrape up the browned bits (fond), and then whisk in Dijon mustard or a knob of cold butter to create a glossy sauce.
What is the best way to check if the chicken is done without cutting it open?
Use an instant read thermometer inserted into the thickest part. The probe should register 72°C (162°F) before resting, as it will coast up to the required 74°C while resting. If you are learning temperature precision, apply these skills to our Tandoori Chicken Recipe.
Why is my pan sauce separating or looking thin after finishing?
It likely needs more acid or a thickening agent added off the heat. If the sauce is too thin, simmer it longer to reduce; if it looks broken, whisk in a teaspoon of fresh lemon juice or a tiny amount of Dijon mustard to re-emulsify the fats.
Cook Chicken Breast Perfectly
Ingredients:
Instructions:
Nutrition Facts:
| Calories | 418 calories |
|---|---|
| Protein | 52g |
| Fat | 22g |
| Carbs | 2g |
| Fiber | 0.4g |
| Sugar | 0.2g |
| Sodium | 1260mg |
