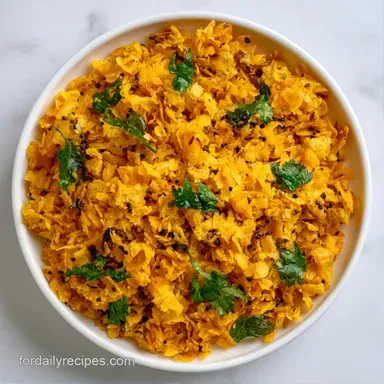
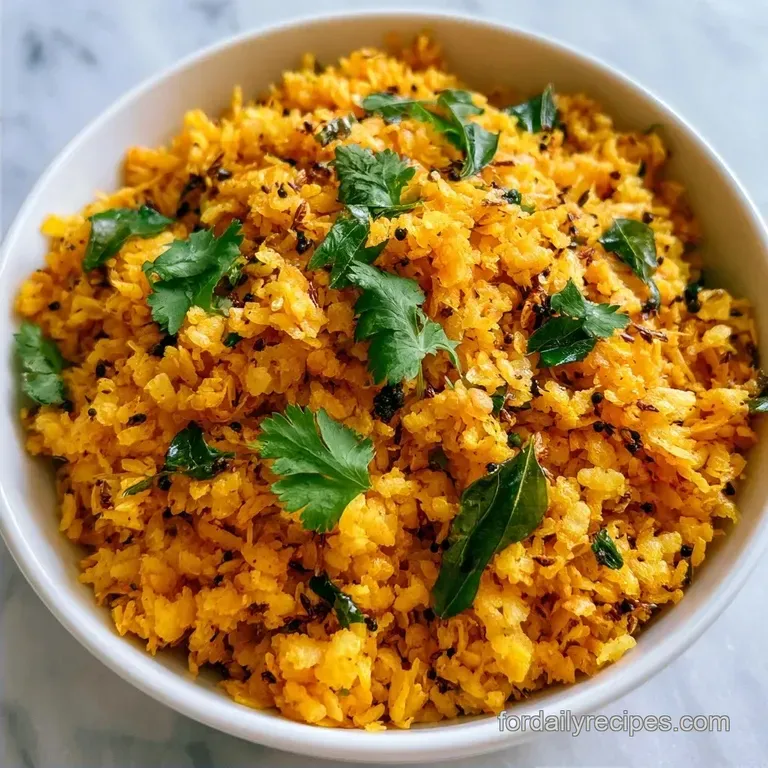
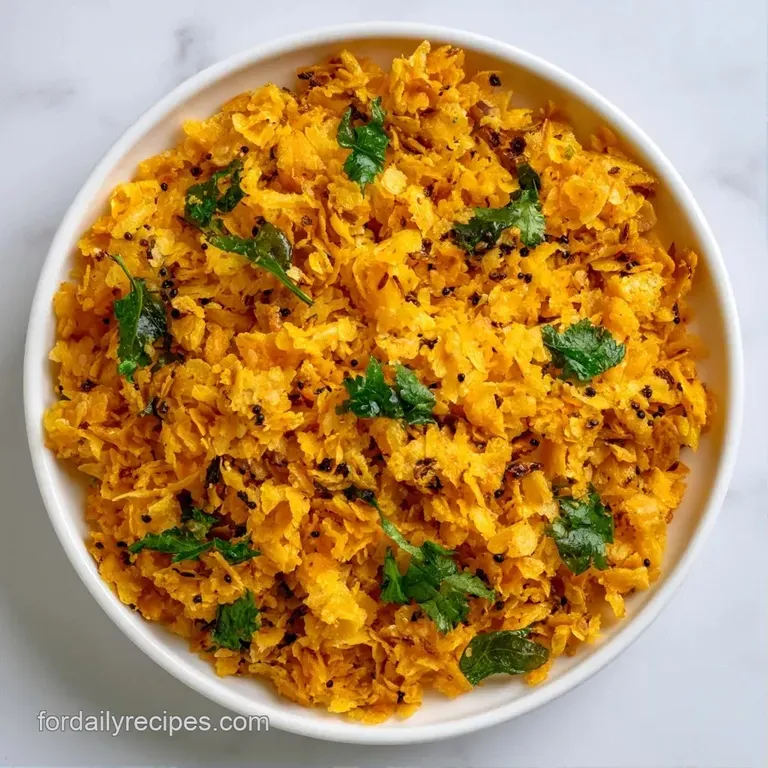
Indian High Fiber Poha
- Time: 10 min prep + 15 min cook
- Flavor/Texture Hook: Tangy and bright with crunchy peanuts
- Perfect for: High energy mornings or a light brunch
- How to actually nail Indian Poha
- The essential Indian Poha specs
- What goes into Indian Poha
- Gear for your Indian Poha
- The Indian Poha cooking process
- Fixing common Indian Poha issues
- Troubleshooting Common Issues
- Indian Poha storage and freshness
- Best pairings for Indian Poha
- Debunking Poha myths
- Recipe FAQs
- 📝 Recipe Card
The smell of mustard seeds popping in hot oil is the only alarm clock I need. It’s a sharp, pungent aroma that cuts through the morning fog and tells me the kitchen is finally alive. I remember the first time I tried making this at home, I treated the rice like regular grains and soaked them in a bowl of water.
I ended up with a sticky, pale porridge that looked nothing like the fluffy, golden mounds I'd seen in street stalls.
That failure taught me that this dish is all about the contrast. You want the rice to be tender but distinct, paired with vegetables that still have a bit of a snap. The goal is a bright, yellow dish that feels light but tastes deep.
You're getting a version of Indian Poha that focuses on these textures. We're talking about the crunch of toasted peanuts against the softness of the rice and the zing of fresh lemon hitting the earthy turmeric.
It’s a straightforward process that brings those global, extraordinary flavors right into your weekday routine.
How to actually nail Indian Poha
The real magic happens in the tempering, or "tadka." If you rush the spices, you lose the depth. I've found that letting the mustard seeds fully dance and pop in the oil before adding the cumin and curry leaves creates a base that transcends borders. It turns a simple grain into something that feels intentional.
Then there is the moisture balance. Too much water during the rinse and you get a clump. Too little, and the rice stays hard. The sweet spot is a 30 to 60 second rinse where the water just barely penetrates the outer layer of the grain.
Finally, don't skip the sugar. It isn't there to make the dish a dessert, but to act as a foil to the lemon juice. That tiny bit of sweetness pulls the savory elements together and makes the turmeric pop.
- - Bright
- Fresh lemon and chopped cilantro
- - Earthy
- Turmeric and toasted cumin
- - Savory
- Sautéed onions and fried peanuts
- - Pungent
- Fresh ginger and curry leaves
The essential Indian Poha specs
Since we are focusing on a high fiber version, the veggie to rice ratio is higher than usual. This makes the Indian Poha more satisfying and adds a range of colors to the plate.
| Detail | Specification |
|---|---|
| Texture | Fluffy, non sticky grains |
| Primary Profile | Tangy and savory |
| Heat Level | Mild (adjustable via chilies) |
| Key Cue | Grains turn uniform yellow |
Right then, let's look at the difference between doing this the traditional way versus taking a few shortcuts. While frozen veggies save time, the fresh crunch changes the experience.
| Component | Fresh Method | Shortcut Method | Impact |
|---|---|---|---|
| Vegetables | Freshly diced | Frozen mix | Fresh has better "snap" |
| Peanuts | Raw, toasted in pan | Pre roasted | Home toasted is more fragrant |
| Rice | Thick Poha | Thin Poha | Thin rice mushies faster |
What goes into Indian Poha
For this Indian Poha, you need specific ingredients to get that authentic balance. Using thick rice poha is the best way to ensure the grains stay separate.
- 2 cups (200g) Thick Rice Poha Why this? Holds shape better than thin flakes
- 1 tsp (5ml) Lemon juice (for rinsing)
- 1/2 tsp (3g) Turmeric powder Why this? Provides the signature gold color
- 2 tbsp (30ml) Vegetable oil
- 1 tsp (5g) Mustard seeds
- 1 tsp (5g) Cumin seeds
- 12 Fresh curry leaves Why this? Essential for the nutty, citrus aroma
- 2 Green chilies, slit lengthwise
- 1 tbsp (15g) Fresh ginger, finely minced
- 1 medium (110g) Onion, finely diced
- 1 small (80g) Potato, peeled and cut into 1/2 inch cubes
- 1/2 cup (60g) Carrots, finely diced
- 1/2 cup (75g) Green peas
- 1/4 cup (40g) Raw peanuts Why this? Adds crucial protein and crunch
- 1 tbsp (15ml) Lemon juice, freshly squeezed
- 1 tbsp (5g) Sugar
- 1/2 tsp (3g) Salt
- 1/4 cup (10g) Fresh cilantro, chopped
If you can't find curry leaves, a tiny bit of lime zest can mimic the brightness, though it won't have the same earthy depth. For the peanuts, any raw nut will work, but cashews make the Indian Poha feel a bit more indulgent.
| Original Ingredient | Substitute | Why It Works |
|---|---|---|
| Thick Rice Poha | Rolled Oats | Similar bulk. Note: Texture becomes mushier |
| Vegetable Oil | Coconut Oil | Traditional in South India. Note: Adds tropical aroma |
| Green Peas | Chopped Beans | Similar color and fiber. Note: Needs 2 extra mins to cook |
Gear for your Indian Poha
You don't need a fancy kitchen for this, but a few specific tools make the Indian Poha process a lot cleaner.
- Fine mesh sieve: This is non negotiable. You cannot rinse poha in a bowl without losing half the grains down the drain.
- Wide skillet or Kadai: A wide pan allows the potatoes to brown properly instead of steaming in a crowd.
- Small mixing bowl: For tossing the turmeric into the damp rice.
- Chef's knife: For those tiny, uniform vegetable cubes.
The Indian Poha cooking process
Let's crack on with the actual cooking. Pay attention to the smells and sounds, as they tell you exactly when to move to the next step.
Phase 1: The Precision Prep
Place the rice poha in a fine mesh sieve. Rinse under running cool water for 30-60 seconds, gently tossing with your hand. Drain completely and stir in the turmeric and one teaspoon of lemon juice. Let it sit while prepping vegetables. Note: The lemon juice prevents the grains from sticking together.
Phase 2: The Aromatic Sizzle
Heat vegetable oil in a skillet over medium heat. Fry peanuts until deep golden brown and fragrant, then remove and set aside. In the remaining oil, add mustard seeds. Once they pop, stir in the cumin seeds, curry leaves, chilies, and ginger. Sauté for 30 seconds until the leaves crackle.
Phase 3: Building the Fiber Base
Add the diced potatoes and sauté for 3-4 minutes until edges are lightly browned. Stir in onions, carrots, and peas, cooking for another 4-5 minutes until tender but slightly crisp. This is where you build the bulk of your High Fiber Poha.
Phase 4: The Final Fold
Gently fold in the prepared poha, salt, and sugar. Mix until the turmeric color is uniform and the Indian Poha is well combined with the vegetables. Turn off the heat. Stir in the freshly squeezed lemon juice, toasted peanuts, and chopped cilantro before serving.
Chef's Note: If you want a more "Indori" style, you can steam the rinsed poha in a steamer basket for 5 minutes instead of folding it directly into the pan. This results in an even softer texture.
Fixing common Indian Poha issues
Even if you follow the steps, things can go sideways. Usually, it comes down to how the rice handled the water.
Troubleshooting Common Issues
| Issue | Solution |
|---|---|
| Why Your Poha is Mushy | This usually happens if you soak the rice or use "thin" poha instead of "thick." According to Serious Eats on the side makes this a powerhouse meal. |
For a Weight Loss Twist: Increase the carrots and peas while reducing the rice poha to 1 cup. Use a non stick pan to cut the oil down to 1 tablespoon. This keeps the Indian Poha satisfying but lowers the calorie density.
For the No Mush Texture: Avoid any contact with water after the initial rinse. Don't let the poha sit in the sieve for too long, but make sure it isn't dripping wet when it goes into the pan.
For Sustained Energy: Mix in a tablespoon of flax seeds or chia seeds at the very end. They don't change the flavor much but add a hit of Omega-3s to your Indian high fiber poha recipes.
Indian Poha storage and freshness
Indian Poha is definitely best eaten immediately, but you can save leftovers if you're meal prepping.
Fridge Storage: Store in an airtight container for up to 3 days. The rice will firm up in the cold, which is normal.
Reheating: Don't use a microwave if you can avoid it, as it can make the grains rubbery. Instead, toss the poha back into a skillet with a teaspoon of water or oil. Heat on medium for 3-5 minutes until steaming. Add a fresh squeeze of lemon to revive the brightness.
Freezing: I don't recommend freezing Indian Poha. The moisture in the vegetables will cause the rice to turn into mush upon thawing.
Zero Waste Tips: - Potato Peels: Don't toss the peels from your potato. Toss them in oil and salt, then air fry them for a crunchy side. - Leftover Poha: If you have a bowl of Indian Poha left over, mash it up with a bit of cornstarch and salt, shape them into patties, and pan fry them into "Poha Cutlets."
Best pairings for Indian Poha
Because Indian Poha is savory and tangy, it pairs well with things that are either creamy, spicy, or sweet.
The Classic Pairing: A hot cup of Masala Chai is the traditional partner here. The creamy, spiced tea balances the acidity of the lemon. For something different, a Thai Iced Tea provides a cold, sweet contrast that works surprisingly well with the savory spices.
The Pro Garnish: To take your Indian Poha to a cafe level, add "Sev" (crunchy chickpea flour noodles) and a few pomegranate seeds on top. The pomegranate adds a burst of sweetness that cuts through the richness of the fried peanuts.
Savory Sides: If you're serving this for brunch, a side of grilled mushrooms or a small bowl of yogurt with a pinch of roasted cumin powder adds a lovely creamy element to the meal.
Debunking Poha myths
There are a few things people get wrong about this dish that usually lead to bad results.
Myth: Poha needs to be soaked for 30 minutes. Actually, soaking is the fastest way to ruin the dish. The rice is already pre steamed and flattened during processing. A quick rinse is all you need to hydrate the surface.
Myth: You must use a specific "Poha" brand for it to work. The brand doesn't matter as much as the thickness. Always check the label for "Thick" or "Medium" poha. Thin poha is meant for snacks (like Chivda) and will dissolve in this recipe.
Myth: Turmeric is just for color. While the yellow hue is iconic, turmeric provides a mild, earthy bitterness that balances the sugar and lemon. It's a functional part of the flavor profile, not just a dye.
Recipe FAQs
Is poha high in fiber?
Moderate. While the rice itself is not high in fiber, the addition of carrots, peas, and peanuts in this recipe significantly increases the total fiber content.
Is poha good for diabetics?
Yes, if balanced with vegetables. Adding plenty of carrots, peas, and peanuts helps slow down the absorption of carbohydrates from the rice poha.
What Indian dishes are high in fiber?
Vegetable loaded Poha is an excellent choice. Using a variety of legumes and vegetables like peas and carrots makes this a fiber rich breakfast.
Why is poha healthier than white rice?
It is easier to digest and more nutrient dense. The processing of poha retains more nutrients than polished white rice, and this recipe integrates vegetables directly into the grain.
What are some Indian low-calorie breakfast ideas?
Try a modified Poha. Use 1 cup of rice poha instead of 2 and reduce the vegetable oil to 1 tablespoon to lower the calorie density while keeping the volume high.
What is the best protein rich breakfast in India?
Poha with peanuts is a great plant based option. The toasted peanuts provide a significant source of protein to make the meal more satisfying.
How to prevent poha from becoming mushy?
Rinse the thick rice poha in a fine mesh sieve for 30-60 seconds. Avoid soaking the grains in standing water, as this is the primary cause of a mushy texture.
Indian High Fiber Poha