Homemade Pizza Dough: Authentic and Crispy
- Time: Active 15 mins, Passive 70 mins, Total 85 minutes
- Flavor/Texture Hook: Yeasty, bubbly, and incredibly crispy
- Perfect for: Weekend family gatherings or casual pizza nights
- Crafting Your Own Homemade Pizza Dough Recipe
- Why This Dough Stretches Perfectly
- Key Specs for Better Baking
- Selecting the Best Flour Elements
- Tools for a Better Bake
- Mixing and Kneading Like Pros
- Fixing Flat or Sticky Dough
- Customizing Your Pizza Base Flavors
- Storing and Freezing Dough Tips
- Finishing Touches for Visual Impact
- Recipe FAQs
- 📝 Recipe Card
Crafting Your Own Homemade Pizza Dough Recipe
Have you ever wondered why some pizza crusts taste like a dusty cracker while others feel like a cloud with a crispy soul? I used to think the secret was some thousand dollar oven or a hidden Italian grandmother in the basement, but it actually comes down to the way the yeast interacts with the flour during that first hour of rest.
The first time I got this right, the kitchen didn't just smell like bread, it smelled like a street corner in Naples where the air is thick with the scent of toasted grain and bubbling tomato sauce.
That specific aroma is actually the yeast exhaling as it consumes the sugar, creating tiny pockets of carbon dioxide that later become those beautiful charred bubbles we all love. This homemade pizza dough recipe isn't just about mixing things in a bowl; it is about respecting the life inside the dough and giving it the warmth it needs to thrive.
We are going for a crust that stands up to heavy toppings but still has enough personality to be eaten on its own with just a drizzle of oil.
We have all been there, staring at a ball of dough that refuses to stretch or one that sticks to every finger like glue. But honestly, those mistakes are just stepping stones to understanding how hydration works.
Once you feel the dough transform from a shaggy, rough mass into a silky, elastic sphere under your palms, you'll never go back to the store-bought stuff again. It is a tactile experience that grounds you, and the payoff is a crust that shatters perfectly when you take that first bite.
Why This Dough Stretches Perfectly
Understanding the "why" behind the process helps you troubleshoot on the fly without panicking. When we mix the water and flour, we aren't just making a paste; we are initiating a structural change that allows the dough to hold air.
- Protein Alignment: Using bread flour provides a higher protein content, which creates a stronger gluten network that can stretch without tearing.
- Yeast Fermentation: The sugar acts as a direct fuel source, allowing the yeast to produce gas quickly and efficiently within our 75 minutes of prep.
- Starch Gelatinization: As the dough hits the hot oven, the starches set quickly, creating that signature outer crust that stays crispy even under moist toppings.
- Lipid Lubrication: The extra virgin olive oil coats the gluten strands, making the final crumb more tender and easier to bite through.
| Method | Total Time | Texture | Best For |
|---|---|---|---|
| Fast Rise | 85 minutes | Airy and light | Last minute dinner |
| Cold Ferment | 24-48 hours | Sourdough like complexity | Gourmet flavor |
| Thin Crust | 60 minutes | Crackly and firm | Heavy meat toppings |
The difference between a "good" pizza and a "memorable" one often comes down to the temperature of your water. If the water is too cold, the yeast stays asleep; if it is over 120°F, you risk killing the culture entirely, resulting in a flat, dense disc.
Aim for that "baby bath" warmth of 105°F to 115°F to get the most activity.
Key Specs for Better Baking
Getting the numbers right is the first step toward consistency in any kitchen endeavor. This recipe is designed to be approachable but precise, ensuring you get the same bubbly result every single time you fire up the oven.
| Component | Science Role | Pro Secret |
|---|---|---|
| Bread Flour | Provides structure through high gluten | Weigh it for total accuracy |
| Active Yeast | Leavening and flavor development | Bloom in sugar water first |
| Fine Sea Salt | Regulates yeast and enhances taste | Never pour directly onto yeast |
| Warm Water | Hydrates flour and activates yeast | Use filtered water for purity |
If you are looking for a different style of crust, like something thicker and more substantial, you might want to try a Sicilian Pizza recipe. It uses a similar foundation but focuses on a pan baked method that creates a completely different, almost focaccia like crumb.
Selecting the Best Flour Elements
The quality of your ingredients will dictate the final personality of your pizza. While you can use all purpose flour in a pinch, the bread flour specified here is what gives the crust its "chew" and prevents it from becoming soggy under the weight of sauce and cheese.
- 500g bread flour: Why this? Higher protein ensures a strong gluten structure that holds air bubbles effectively.
- 10g fine sea salt: Why this? Fine grains dissolve quickly, ensuring the entire dough is seasoned evenly.
- 5g granulated sugar: Why this? Provides immediate food for the yeast and helps the crust brown beautifully.
- 325ml warm water (105°F - 115°F): Why this? The specific temperature range ensures optimal yeast activation without damage.
- 7g active dry yeast: Why this? A standard packet size that provides a reliable, vigorous rise.
- 15ml extra virgin olive oil: Why this? Adds a hint of fruitiness and improves the dough's elasticity.
| Original Ingredient | Substitute | Why It Works |
|---|---|---|
| Bread Flour | All Purpose Flour | Lower protein. Note: Resulting crust will be softer and less chewy. |
| Active Dry Yeast | Instant Yeast | No blooming needed. Note: Reduce rise time by 15 minutes. |
| Fine Sea Salt | Kosher Salt | Use 1.5x the volume. Note: Larger flakes take longer to dissolve. |
When you are measuring your flour, try to avoid packing it into the cup if you aren't using a scale. Spoon the flour into the measuring cup and level it off with a knife to keep the dough from becoming too dry and heavy.
Tools for a Better Bake
You don't need a professional kitchen to make a world class pizza, but a few specific tools will make the process much smoother and the results more professional.
- Large Mixing Bowl: Plenty of room for the 60 minute rise.
- Wooden Spoon: Ideal for mixing that initial shaggy mass.
- Digital Scale: Essential for getting exactly 500g of flour.
- Damp Cloth: Keeps the dough moist while it doubles in size.
- Pizza Stone or Steel: Mimics the intense heat of a professional oven.
Chef's Tip: If you don't have a pizza stone, flip a large baking sheet upside down and preheat it in the oven. The flat surface provides better heat contact than the inside of a rimmed tray.
Mixing and Kneading Like Pros
This is where the magic happens. We are going to move through these steps with intention, watching the ingredients transform from separate entities into a single, living dough.
- Combine warm water, sugar, and yeast in a small bowl. Let sit for 5 to 10 minutes until foamy and nutty in aroma. Note: If it doesn't foam, your yeast might be expired.
- In a large mixing bowl, whisk together bread flour and fine sea salt. Pour in the yeast mixture and olive oil.
- Mix with a wooden spoon until a shaggy mass forms and no dry flour remains.
- Turn dough onto a lightly floured surface and knead for 8 to 10 minutes by hand until smooth and elastic. Note: Use the heel of your hand to push the dough away, then fold it back.
- Perform the windowpane test by stretching a small piece of dough; it should be translucent without tearing.
- Place dough in a lightly oiled bowl and cover with a damp cloth.
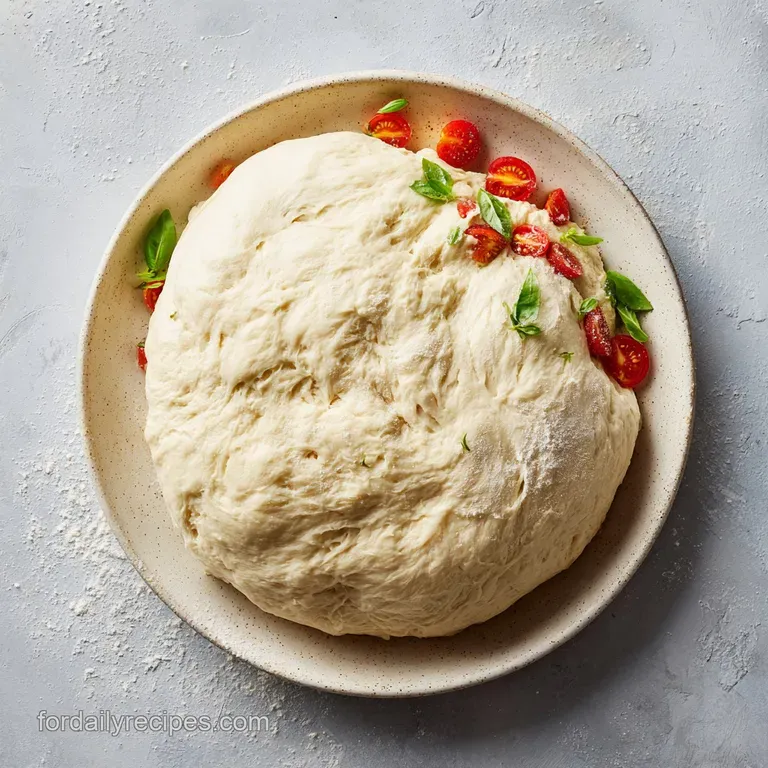
- Let rise in a warm spot for 60 minutes until doubled in size and pillowy.
- Gently punch down the dough to release large air bubbles.
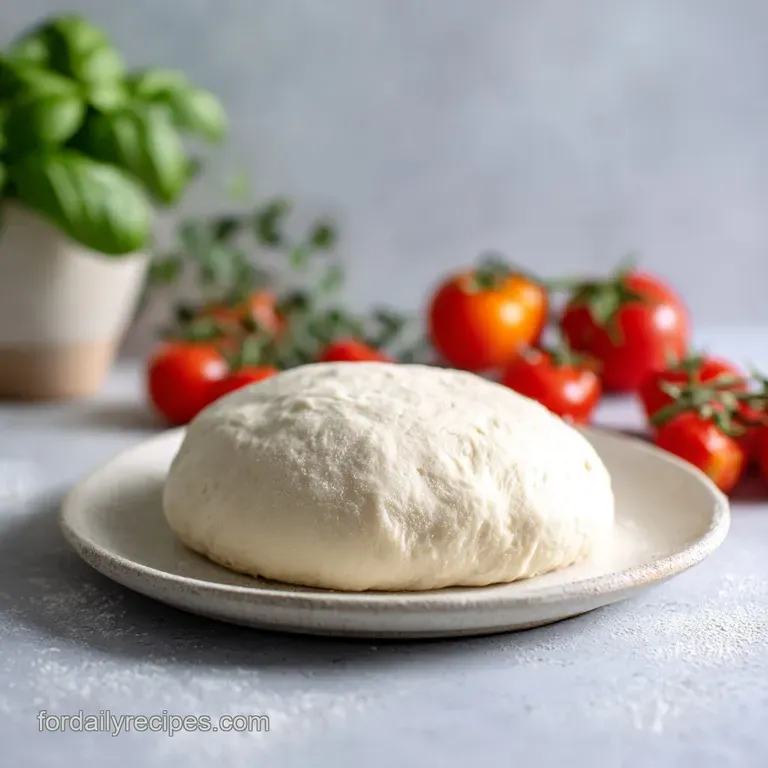
- Divide into two equal portions and shape into balls.
- Rest for an additional 10 minutes before stretching into your final pizza shape.
While the dough is rising, you have the perfect window to prep your toppings. If you're looking for a different project while the oven heats up, you might enjoy making some homemade baked beans, though they take much longer than this pizza!
Fixing Flat or Sticky Dough
Even the best of us run into issues when the humidity changes or the kitchen is a bit too cold. Don't toss the dough; most problems are easily fixed with a small adjustment.
Why Your Dough Snaps Back
This is a classic sign of "tight" gluten. If you try to stretch the dough and it shrinks back like a rubber band, the proteins are simply too tense. Cover it with a cloth and let it rest for another 15 minutes. This allows the gluten to relax, making it much more cooperative for the final shaping.
Why Your Bottom Is Soggy
A soggy bottom usually means the oven wasn't hot enough or the toppings were too wet. Always preheat your oven for at least 30 minutes at its highest setting (usually 500°F).
Also, if using fresh mozzarella, slice it and let it drain on paper towels for 20 minutes before adding it to the pizza to remove excess moisture.
| Problem | Root Cause | Solution |
|---|---|---|
| Dough is too sticky | High humidity or too much water | Add flour 1 tablespoon at a time |
| Dough won't rise | Water was too hot or yeast is old | Restart with fresh yeast and cooler water |
| Crust is tough | Over kneading or low hydration | Knead only until smooth; don't add too much flour |
Common Mistakes Checklist
- ✓ Always check the expiration date on your yeast packet before starting.
- ✓ Avoid adding salt directly to the yeast mixture as it can inhibit growth.
- ✓ Don't skimp on the kneading time; those 8 to 10 minutes are vital for structure.
- ✓ Preheat your baking surface (stone or tray) for at least 30 to 45 minutes.
- ✓ Use a light touch when punching down the dough to keep some air inside.
Customizing Your Pizza Base Flavors
Once you have mastered the basic homemade pizza dough recipe, the world of variations opens up to you. You can change the flour, add aromatics, or adjust the liquid to create something entirely new.
For a nutritional twist, you can swap out 100g of the bread flour for whole wheat flour. This will result in a nuttier flavor and a denser crumb. Just be sure to add an extra tablespoon of water, as whole wheat flour absorbs more moisture than white flour. If you need a completely different approach for dietary needs, my gluten-free Pizza Dough uses psyllium husk to mimic that classic chew without the wheat.
If you want to build flavor directly into the crust, try adding a teaspoon of garlic powder or dried oregano to the flour mixture. Another favorite of mine is replacing the olive oil with melted butter for a richer, more "biscuit like" edge.
For those who love a bit of heat, kneading a pinch of crushed red pepper flakes into the dough during step 4 adds a subtle, lingering warmth that pairs beautifully with sweet toppings like hot honey or pineapple.
Storing and Freezing Dough Tips
Pizza dough is surprisingly resilient and actually benefits from a bit of time in the cold. If you aren't ready to bake immediately, the refrigerator is your best friend for developing deep, complex flavors.
Store the fermented dough in an airtight container or a zip top bag coated with a little olive oil. It will stay fresh in the fridge for up to 3 days. When you're ready to use it, let it sit on the counter for at least 60 minutes to take the chill off; cold dough is nearly impossible to stretch and won't rise as well in the oven.
To freeze, portion the dough into balls and wrap them tightly in plastic wrap, then place them in a freezer bag. They will last for up to 3 months. To thaw, move the dough to the fridge the night before you want to use it, then follow the room temperature resting rule. For zero waste, if you have small scraps of dough left over, roll them in cinnamon sugar and bake them alongside the pizza for a quick treat that tastes like homemade monkey bread.
Finishing Touches for Visual Impact
The way your pizza looks is the first part of the eating experience. Achieving that professional "cornicione" (the raised edge of the crust) is all about how you handle the dough during the final stretch.
The Cornicione Finish
When stretching your dough, avoid using a rolling pin. Rolling pins pop all those beautiful air bubbles we worked so hard to create. Instead, use your fingertips to press the air from the center of the dough out toward the edges.
This leaves a slightly thicker ring around the perimeter that will puff up and char beautifully in the heat of the oven.
High Contrast Toppings
To make the colors pop, add fresh herbs like basil after the pizza comes out of the oven. The residual heat will release the oils without turning the leaves black and bitter.
A final brush of garlic butter or a sprinkle of flaky sea salt on the crust just before serving adds a velvety sheen and a professional touch that transforms the entire meal from a simple dinner into something extraordinary.
Chef's Tip: Freeze your cheese for 15 minutes before grating. This prevents it from clumping and ensures it melts evenly into a silky, golden blanket rather than a greasy puddle.
Whether you're making a classic Margherita or experimenting with wild toppings, this dough provides the reliable, crispy canvas you need. It's a recipe that grows with you, becoming more intuitive every time you feel the flour meet the water. Happy baking!

Recipe FAQs
What is the secret to making good pizza dough?
The secret is patience during the rise and thorough kneading. Allowing the dough to rise for 60 minutes until doubled and kneading for 8 10 minutes builds the necessary gluten structure for a professional, airy crust.
What is the 55 rule for pizza dough?
No, this is a common misconception. The critical timing for this recipe involves preheating your baking surface for 30 to 45 minutes and allowing the dough to rise for 60 minutes to ensure optimal texture.
What is the best dough for homemade pizza?
A high-quality bread flour dough is best. Using bread flour provides higher protein content than all-purpose flour, which creates the essential elastic structure needed for a perfect crust. If you enjoyed working with this elastic dough, see how we adapt similar structural principles for our fluffy gyro bread.
What are the basic ingredients in pizza dough?
The essential components are bread flour, fine sea salt, granulated sugar, warm water, active dry yeast, and extra virgin olive oil. These six ingredients combine to create the base, provided you keep the salt separate from the yeast initially to ensure proper fermentation.
How to store leftover pizza dough?
Place the dough in an airtight container or zip-top bag coated with olive oil. It remains fresh in the refrigerator for up to 3 days, but you must bring it to room temperature for 60 minutes before stretching.
Is it necessary to use a stand mixer for the dough?
No, you can achieve excellent results by hand. Knead the dough on a lightly floured surface for 8 10 minutes until it is smooth, elastic, and passes the windowpane test.
How to tell if my yeast is active?
Watch for a foamy layer and a distinct nutty aroma after 5 10 minutes. If the mixture does not bubble after combining the warm water, sugar, and yeast, the yeast may be expired and should be replaced before proceeding.
Homemade Pizza Dough Recipe

Ingredients:
Instructions:
Nutrition Facts:
| Calories | 248 kcal |
|---|---|
| Protein | 7.9 g |
| Fat | 2.7 g |
| Carbs | 48.5 g |
| Fiber | 1.7 g |
| Sugar | 0.7 g |
| Sodium | 486 mg |
