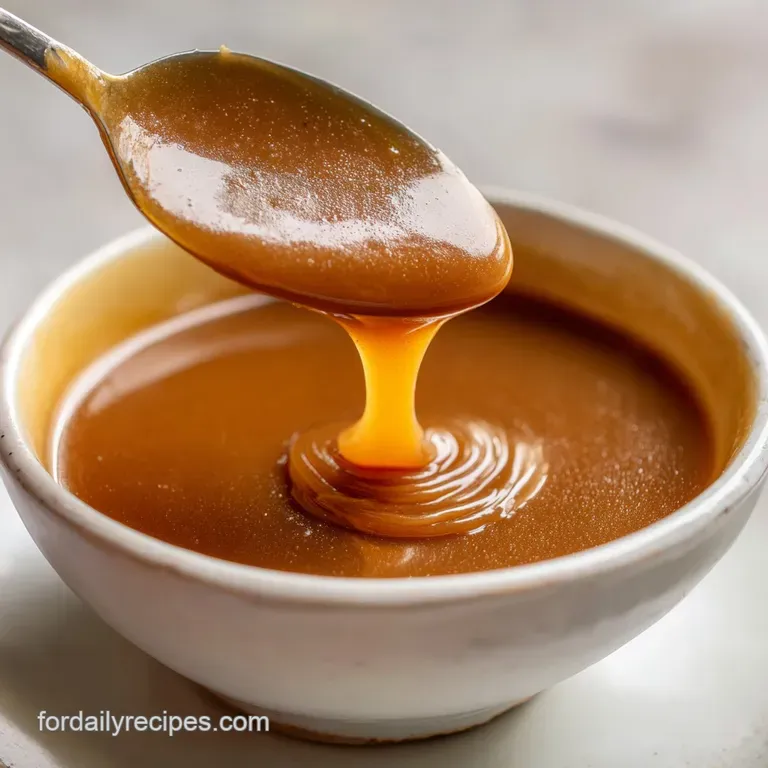
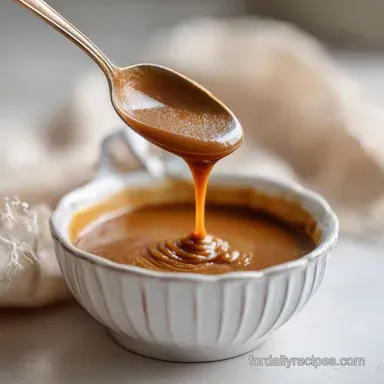
Homemade Brown Gravy Recipe: Velvety Smooth
- Time: Active 10 minutes, Passive 5 minutes, Total 15 minutes
- Flavor/Texture Hook: Savory, nutty, and velvety smooth
- Perfect for: Holiday roasts, weeknight mashed potatoes, or poutine
- Vital Specs for Achieving Perfect Sauce Consistency
- Selecting Ingredients for Deep Umami Layers
- Best Kitchen Tools for a Smooth Finish
- Cooking Method for a Lustrous Brown Sauce
- Fixing Lumps and Common Sauce Mistakes
- Simple Ways to Adapt This Versatile Sauce
- Storage Tips for Your Leftover Homemade Gravy
- Ideal Pairings for This Homemade Sauce
- Recipe FAQs
- 📝 Recipe Card
The aroma of butter hitting a hot skillet is a scent that instantly pulls me back to my grandmother’s kitchen on Sunday afternoons. I remember watching her standing by the stove, her wooden spoon moving in rhythmic circles, transforming simple fat and flour into something that looked like liquid mahogany.
There was no magic wand, just the steady sizzle and the patience to let the flour toast until it smelled like roasted hazelnuts. That kitchen was the heart of our home, and her brown gravy recipe was the soul of every meal we shared.
Whenever I make this now, I feel like I'm channeling generations of cooks who knew that the secret to a great meal isn't in a packet; it's in the layering of simple, honest ingredients.
We've all been there, staring at a pan of lumps or a sauce that looks more like gray paste, but I've learned that the "how" is just as important as the "what." This isn't just a topping; it's a heritage skill that turns a simple plate of biscuits or a humble pile of potatoes into a feast.
It’s about that velvety glide across the tongue and the deep, savory hum that stays with you long after the dishes are cleared.
The beauty of this brown gravy recipe lies in its reliability. Whether you have pan drippings from a festive roast or you're starting from scratch with a stick of butter, the technique remains the same.
It’s the backbone of so many comfort classics, and once you understand how the flour and fat interact, you'll never reach for a store-bought jar again. Trust me, your family will notice the difference the moment that first glossy spoonful hits their plate.
Vital Specs for Achieving Perfect Sauce Consistency
The Roux Dimentals of Starch: Toasting flour in fat breaks down starch granules and triggers the Maillard reaction, creating complex nutty flavors. This process also coats the starch in fat, preventing them from clumping when the liquid hits the pan.
Chef Tip: For a deeper color without burning, whisk in 1/4 teaspoon of instant espresso powder or a drop of kitchen bouquet; it adds a dark hue and a subtle earthiness that mimics hours of simmering.
| Method | Time | Texture | Best For |
|---|---|---|---|
| Stovetop (Classic) | 15 minutes | Silky and rich | Traditional roasts, potatoes |
| Pan Dripping Base | 12 minutes | Intense and savory | Beef, turkey, or pork dinners |
| make-ahead Cold | 5 minutes | Thick and stable | Meal prep or catering |
When you are aiming for that specific glossiness, remember that the temperature of your liquid matters just as much as your roux. I’ve found that using room temperature broth prevents the "thermal shock" that often leads to those pesky flour pockets. This is a technique I use frequently when preparing the base for my Biscuits and Gravy recipe, ensuring every bite is consistently smooth.
Another trick I picked up after years of trial and error is the "cold butter finish." Right before serving, whisk in a single tablespoon of cold, unsalted butter. It doesn't just add richness; it creates a professional sheen that makes the sauce look like it came out of a high end bistro.
It’s these small, time honored habits that separate a good cook from a great one.
Selecting Ingredients for Deep Umami Layers
| Ingredient | Science Role | Pro Secret |
|---|---|---|
| Unsalted Butter | Fat medium | Use high fat European style for a creamier mouthfeel |
| All Purpose Flour | Thickening agent | Toast until the color of a paper bag for maximum flavor |
| Beef Broth | Liquid base | Choose low sodium to control the final seasoning levels |
| Worcestershire | Umami booster | Adds fermented depth that balances the richness of the fat |
The foundation of any heritage sauce is the quality of the elements you bring to the flame. For this recipe, we use 4 tablespoons unsalted butter or rendered pan drippings.
Why this? Fat carries the flavor and creates the smooth suspension for the flour. If you have drippings from a roast, use them; the concentrated meat juices are liquid gold.
Next, you'll need 1/4 cup all purpose flour. Why this? The protein content is ideal for creating a stable, medium thick roux. For the body, we use 2 cups low sodium beef broth.
Why this? It provides the savory volume while allowing you to adjust the saltiness yourself.
| Original Ingredient | Substitute | Why It Works |
|---|---|---|
| Unsalted Butter | Beef Tallow | Provides an even more intense, meaty flavor profile. |
| All Purpose Flour | Cornstarch (half amount) | Makes the recipe gluten-free. Note: Texture will be more gelatinous/clear. |
| Beef Broth | Mushroom Broth | Keeps the savory profile while making the dish vegetarian. |
| Worcestershire | Soy Sauce | Provides the same salty, fermented umami kick if you're out. |
To round out the profile, don't skip the 1 teaspoon Worcestershire sauce, 1/2 teaspoon onion powder, and 1/4 teaspoon freshly cracked black pepper.
Why this? These aromatics cut through the fat and add necessary complexity. Finally, have 1/4 teaspoon salt on hand, but only add it at the very end after tasting.
Best Kitchen Tools for a Smooth Finish
You don't need a pantry full of gadgets, but a few specific tools make this brown gravy recipe much easier to manage. A heavy bottomed skillet or a cast iron pan is my go to. The thick metal distributes heat evenly, which is vital when you're trying to brown flour without scorching it.
If your pan has hot spots, you'll end up with bitter, burnt flecks instead of a uniform mahogany color.
A high-quality balloon whisk is your best friend here. Avoid those flimsy plastic ones; you want something sturdy enough to scrape the corners of the pan where flour likes to hide. I also keep a fine mesh strainer nearby.
Even the best cooks have "off" days where a few lumps manage to survive, and pouring the finished sauce through a strainer is the ultimate safety net for a velvety result.
Finally,, use a liquid measuring cup with a good pour spout. When it's time to add the broth, you want a slow, steady stream. Dumping two cups of cold liquid into a hot roux all at once is a recipe for disaster. Control is the name of the game when you're building these flavor layers.
Cooking Method for a Lustrous Brown Sauce

- Melt 4 tablespoons unsalted butter in a heavy skillet over medium heat. Note: Watch for the foam to subside before adding flour.
- Sprinkle 1/4 cup all purpose flour over the melted fat.
- Whisk the mixture constantly for 3-5 minutes until it smells nutty and turns a light brown.
- Slowly pour in 1 cup of the beef broth while whisking vigorously. Note: This creates a thick paste that we will thin out gradually.
- Add the remaining 1 cup of beef broth once the first addition is fully incorporated.
- Stir in 1 teaspoon Worcestershire sauce, 1/2 teaspoon onion powder, and 1/4 teaspoon black pepper.
- Increase heat slightly and simmer until the sauce coats the back of a spoon.
- Taste the mixture and add 1/4 teaspoon salt if needed.
- Remove from heat and whisk in an optional teaspoon of cold butter for a glossy finish.
- Pour immediately into a warmed gravy boat to prevent a skin from forming.
The transformation from a dry paste to a silky sauce is a sensory experience. You'll hear the sizzle soften as the broth integrates, and the color will deepen from a pale sand to a rich, lustrous brown.
Don't rush the simmering stage; this is where the raw flour taste disappears, replaced by a sophisticated, savory depth.
Fixing Lumps and Common Sauce Mistakes
Handling Flour Lumps
The most common heartbreak in gravy making is the appearance of small, white flour "beads." This usually happens when the liquid is added too fast or the roux wasn't whisked thoroughly at the start. It’s frustrating, but it’s not the end of the world.
| Problem | Root Cause | Solution |
|---|---|---|
| Flour Lumps | Liquid added too fast | Use an immersion blender or pour through a fine mesh strainer. |
| Too Thin | Not enough reduction | Simmer longer or whisk in a "beurre manié" (equal parts butter/flour). |
| Greasy Surface | Too much fat/broken emulsion | Skim the top with a spoon or whisk in a splash of cold broth. |
Fixing Thin Consistency
If your sauce looks more like soup than a proper gravy, you likely haven't allowed it to simmer long enough for the starches to fully expand. Starch gelatinization happens near the boiling point, so ensure you see a few slow bubbles breaking the surface. If it's still too thin, don't just dump in more flour!
That will create lumps. Instead, mix a teaspoon of cornstarch with a tablespoon of cold water and whisk that in slowly.
Taming Excessive Salt
Sometimes, especially if you use full sodium broth or pan drippings from a heavily seasoned roast, the salt level can become overwhelming. The best fix is to add a splash of heavy cream or a pinch of brown sugar.
The fat in the cream coats the palate and masks the salt, while the sugar provides a counter balance to the savory intensity.
Common Mistakes Checklist
- ✓ Never use high heat; a medium low flame prevents the butter from burning.
- ✓ Always whisk in the corners of the pan to prevent flour buildup.
- ✓ Use room temperature broth to ensure a smoother emulsification.
- ✓ Wait until the very end to add salt; the flavor concentrates as it reduces.
- ✓ Strain the gravy if you see even a single lump; your guests will thank you.
Simple Ways to Adapt This Versatile Sauce
Brown Gravy Recipe for Poutine
For that classic Quebec style snack, you want a sauce that is slightly thinner but punchier. I like to swap half the beef broth for chicken broth to lighten the flavor and add a touch of balsamic vinegar for tang.
This allows the sauce to seep into the fries without making them immediately soggy, while the vinegar cuts through the richness of the cheese curds.
The Mushroom Umami Twist
If you want a vegetarian option that doesn't feel like a compromise, sauté 1 cup of finely minced cremini mushrooms in the butter before adding your flour. The mushrooms release their moisture and brown beautifully, providing a meaty texture and deep umami.
Use a high-quality vegetable or mushroom stock instead of beef broth.
If you are looking for something even more specific, you can add a tablespoon of heavy cream at the end to create a "Country Brown" style, which is phenomenal over fried steak. The versatility of this base is why it has remained a staple in my kitchen for decades.
Storage Tips for Your Leftover Homemade Gravy
Properly storing your brown gravy recipe is essential because nobody likes a "skin" or a rubbery texture the next day. Once it has cooled to room temperature, transfer it to an airtight container. It will keep in the refrigerator for up to 4 days.
When it cools, it will likely turn into a jelly like consistency due to the proteins in the broth; don't worry, it will liquefy again as soon as it hits the heat.
For long term storage, this sauce freezes surprisingly well. I recommend using silicone ice cube trays to freeze individual portions. Once frozen, pop the cubes into a freezer bag. They’ll stay fresh for up to 3 months.
This is a great zero waste tip: if you have leftover pan drippings but aren't ready to make a full meal, make a small batch of concentrated roux and freeze it for later use.
To reheat, place the gravy in a small saucepan over low heat. Add a tablespoon of water or broth to help it loosen up. Whisk constantly as it warms to maintain the emulsion. Avoid the microwave if possible, as it tends to heat unevenly and can cause the fat to separate from the flour, leaving you with a greasy mess.
Ideal Pairings for This Homemade Sauce
A great sauce needs a worthy partner. Of course, the classic choice is a mountain of buttery mashed potatoes, but there are so many other heritage dishes that benefit from this silky finish. If you've spent the afternoon roasting a Chuck Roast in recipe, this gravy is the mandatory final touch that brings the whole plate together.
I also love serving this over thick slices of toasted sourdough for an "open faced" sandwich style. It's the ultimate comfort food for a rainy Monday night. If you're feeling adventurous, try it over a savory bread pudding or as a dip for crusty biscuits.
The deep, savory notes complement the sweetness of the wheat and the richness of the butter perfectly.
Whether you're following a family tradition or starting a new one, this brown gravy recipe is a skill that will serve you well for a lifetime. It’s about more than just the food; it’s about the care you put into every stir of the whisk.
So, grab your skillet, turn on some music, and enjoy the process of creating something truly soulful from scratch. Your kitchen is about to smell like home.

Recipe FAQs
What is the 3 2 1 rule for gravy?
No, the 3-2-1 rule is not a standard measure for brown gravy. This rule is most commonly associated with slow cooked ribs (3 hours smoking, 2 hours wrapping, 1 hour saucing), not sauce thickening.
What is brown gravy made of?
Brown gravy is fundamentally a roux (fat and flour) combined with a dark broth. Classic ingredients include unsalted butter or pan drippings, all-purpose flour, beef or chicken broth, and flavor enhancers like Worcestershire sauce or instant espresso powder for color.
What is the secret to a rich brown gravy?
The secret is fully toasting the flour to achieve a deep, nutty flavor before adding liquid. Toasting the flour until it smells like roasted hazelnuts triggers the Maillard reaction, building complex umami.
If you enjoyed mastering the temperature control here, apply that same precision to ensure stability when building the emulsion.
How to make your own gravy easy?
Melt butter, whisk in flour to form a paste (roux), cook until brown, then slowly whisk in room temperature broth. Continue whisking over medium heat until the sauce thickens enough to coat the back of a spoon, which usually takes about 5-8 minutes of simmering.
Can I substitute cornstarch for flour in brown gravy?
Yes, you can substitute cornstarch, but use half the amount of flour required. Cornstarch creates a shinier, more translucent gravy and is typically added as a slurry (mixed with cold water) after the main cooking process is complete.
Why is my brown gravy lumpy instead of smooth?
Your gravy is lumpy because the cold liquid shocked the hot roux, causing the starch to seize up into pockets. To fix this, use an immersion blender to smooth the mixture or strain the entire batch through a fine mesh sieve before serving.
How do I ensure my homemade gravy has a professional, glossy sheen?
Whisk in one tablespoon of cold, unsalted butter off the heat right before serving. This final step, known as monter au beurre, incorporates small, stable fat droplets that give the sauce a beautiful, velvety luster and richness.
Brown Gravy Recipe From Scratch
Ingredients:
Instructions:
Nutrition Facts:
| Calories | 69 kcal |
|---|---|
| Protein | 0.9 g |
| Fat | 5.7 g |
| Carbs | 3.1 g |
| Fiber | 0.1 g |
| Sugar | 0.3 g |
| Sodium | 112 mg |
