Baked Ranch Chicken: Juicy and Tangy
- Time: Active 15 minutes, Passive 20 minutes, Total 35 minutes
- Flavor/Texture Hook: Shatteringly crispy Panko crust with a tangy, velvety interior
- Perfect for: Stress free weeknight dinners or a crowd-pleasing family meal
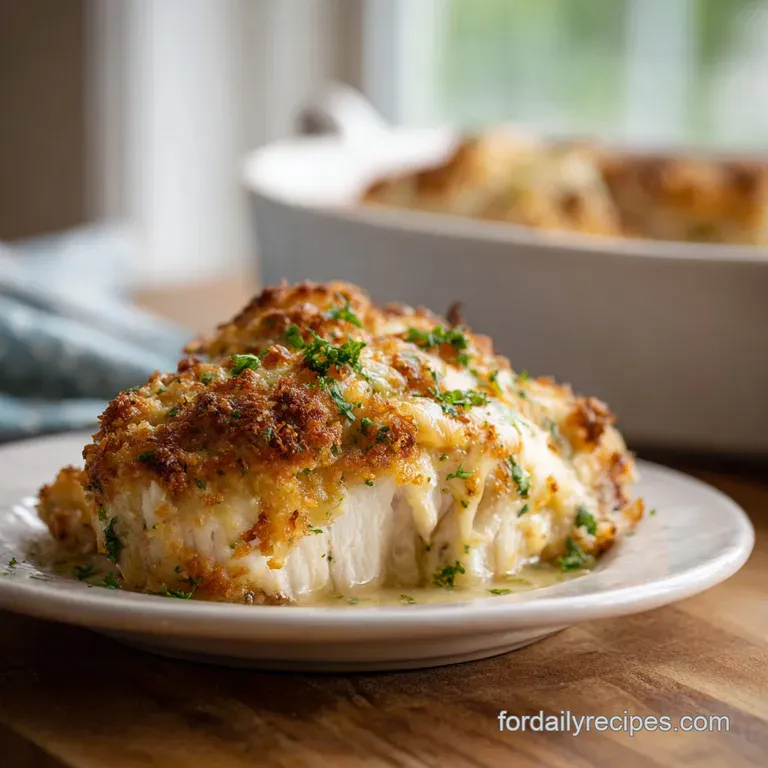
- Golden Shatter Crust Oven Baked Ranch Chicken
- Science of the Shattering Crust
- Quick Specs and Timing
- Gathering Your Flavor Elements
- Essential Kitchen Tools Needed
- Step-by-Step Cooking Methods
- Troubleshooting Your Coating Issues
- Adjusting for More Guests
- Debunking Kitchen Rumors
- Storage and Reheating Tips
- Perfect Serving Side Options
- High in Sodium
- Recipe FAQs
- 📝 Recipe Card
Golden Shatter Crust Oven Baked Ranch Chicken
The smell of toasting garlic and warm butter hitting the oven air is something I never get tired of. I remember the first time I tried making a breaded chicken dish; it was a total disaster because the breading slid off like a wet blanket, leaving the meat sad and naked.
I was so frustrated that I almost gave up on oven frying altogether, but then I discovered the secret of using mayonnaise as a binder. It changed everything.
Now, whenever I pull a tray of this Ranch Chicken out of the oven, the sound of the knife hitting that golden crust is a literal "shatter." You don't get a soft thud; you get a crisp, jagged crackle that promises a serious crunch.
It's the kind of meal that makes the whole house smell like a high end steakhouse, even though you probably prepped it while wearing your favorite old sweatpants.
We’ve all had those nights where we stare into the fridge hoping a gourmet meal will magically assemble itself. This recipe is the closest thing to that magic. It uses a few smart shortcuts, like a pre mixed seasoning packet, but layers them with fresh techniques to make the final result taste like you spent hours at the stove.
Trust me, once you see how the mayo and the ranch spices work together, you'll never go back to plain egg washes again.
Science of the Shattering Crust
The Fat Barrier: Mayonnaise acts as a protective emulsion that prevents the meat's natural juices from escaping into the breading, which would otherwise make it soggy.
The Panko Advantage: These Japanese style breadcrumbs have a larger surface area and an airy structure, allowing heat to circulate around each crumb for a more intense crunch.
| Thickness | Internal Temp | Rest Time | Visual Cue |
|---|---|---|---|
| 0.5 inch | 165°F (74°C) | 5 minutes | Juices run clear when pierced |
| 0.75 inch | 165°F (74°C) | 7 minutes | No pink remains in the center |
| 1.0 inch | 165°F (74°C) | 8 minutes | Crust is deep golden brown |
Getting the temperature right is the difference between a succulent bite and a rubbery one. Since we are using 1.5 lbs boneless skinless chicken breasts pounded to 1/2 inch thickness, they cook remarkably fast. If you are looking for more ways to use poultry, you might enjoy these Shredded Chicken Recipes for your weekly meal prep.
1. The Mayo Fat Barrier
Unlike a traditional egg wash, mayo is mostly fat. When it hits the heat of a 400°F (200°C) oven, it doesn't just dry out; it sizzles. This fat transfer creates a velvety interface between the protein and the crust, ensuring the meat stays lubricated while the breadcrumbs reach maximum crispiness.
2. Acidic Tenderization
The Hidden Valley Ranch dry seasoning mix contains buttermilk solids and citric acid. These components work as a mild brine. As the chicken bakes, these acids gently break down the tough protein fibers, which is why the meat feels so tender you could almost cut it with a fork.
3. Elevated Heat Distribution
By using melted unsalted butter mixed into the crumbs, we are essentially frying the breading from the inside out while it sits in the oven. This creates a uniform browning that mimics a deep fryer without the heavy oil cleanup or the extra calories.
Quick Specs and Timing
| Component | Science Role | Pro Secret |
|---|---|---|
| Mayonnaise | Emulsified Binder | Use full fat for the best moisture retention and crust adhesion |
| Panko Crumbs | Structural Crunch | Toast them in a dry pan for 2 minutes before coating for extra color |
| Ranch Seasoning | Chemical Tenderizer | Rub a little extra directly onto the meat before the mayo layer |
Chef's Tip: Freeze your butter for 10 minutes before melting it. This helps it emulsify better with the breadcrumbs, creating "clusters" of crunch that won't fall off during the bake.
Gathering Your Flavor Elements
For this recipe, we are keeping things focused on high impact ingredients. You will need 1.5 lbs boneless skinless chicken breasts, which we will pound down to an even thickness. This ensures every piece finishes cooking at the exact same moment, preventing that annoying "one piece is raw, one is dry" scenario.
For the seasoning, grab 1 packet (28g) Hidden Valley Ranch dry seasoning mix and 1 tsp Worcestershire sauce. These two are the heavy hitters for umami. We also use 0.5 cup high-quality mayonnaise, 0.5 tsp Kosher salt, and 0.25 tsp freshly cracked black pepper for the base layer.
The crust is a blend of 1.5 cups Panko breadcrumbs, 0.5 cup finely grated Parmesan cheese, and 1 tsp smoked paprika. This combination provides a smoky, salty kick that balances the tang of the ranch. Finally, we finish with 2 tbsp melted unsalted butter to get that bakery style golden finish.
| Original Ingredient | Substitute | Why It Works |
|---|---|---|
| Mayonnaise (0.5 cup) | Greek Yogurt (0.5 cup) | Adds more tang and protein. Note: Crust may be slightly softer |
| Panko (1.5 cups) | Crushed Saltines (1.5 cups) | Provides a saltier, denser crunch that kids often love |
| Parmesan (0.5 cup) | Pecorino Romano (0.5 cup) | Offers a sharper, saltier bite. Note: Reduce Kosher salt slightly |
If you find yourself with extra ranch seasoning, it makes an incredible base for a dip. I often use a similar spice profile when making my Buffalo Chicken Dip recipe for game day. It has that same zesty punch that everyone craves.
Essential Kitchen Tools Needed
You don't need a professional kitchen to make this, but a few specific tools make the job much easier. A heavy meat mallet is non negotiable for pounding the chicken to that 1/2 inch thickness. If you don't have one, a heavy rolling pin or even the bottom of a small cast iron skillet works in a pinch.
A wire cooling rack set inside a large rimmed baking sheet is my favorite trick. By lifting the chicken up, the hot air can circulate underneath, preventing a "soggy bottom." If you bake directly on the pan, the side touching the metal often gets mushy from the trapped steam.
Finally,, a digital meat thermometer is your best friend. Chicken is safe at 165°F (74°C). Pulling it out at exactly that mark ensures it stays juicy. Even a few minutes over can turn a silky breast into something resembling cardboard, so don't guess measure!
step-by-step Cooking Methods

1. The Preparation Phase
Preheat your oven to 400°F (200°C). Lay the 1.5 lbs chicken breasts between two sheets of plastic wrap. Note: This prevents chicken juice from splattering across your counters.
2. Leveling the Meat
Pound the chicken to a uniform 1/2 inch thickness using a mallet. Keep going until the thickness is consistent from end-to-end.
3. Seasoning the Base
Pat the chicken completely dry with paper towels. Season both sides with 0.5 tsp Kosher salt and 0.25 tsp black pepper. Note: Surface moisture is the enemy of a crispy crust.
4. Creating the Binder
In a small bowl, whisk together 0.5 cup mayonnaise, 1 tsp Worcestershire sauce, and 1 tbsp of the ranch seasoning. Mix until the texture is smooth and pale.
5. Mixing the Crust
In a shallow dish, combine 1.5 cups Panko, 0.5 cup Parmesan, 1 tsp smoked paprika, and the rest of the ranch seasoning. Drizzle in 2 tbsp melted butter and toss with a fork until the crumbs look like wet sand.
6. The Multi Level Dredge
Coat each piece of chicken in a thin, even layer of the mayo mixture. Ensure there are no bare spots or thick globs.
7. Pressing the Crumbs
Press the chicken firmly into the Panko mixture. Flip and press again to ensure the coating is packed tight.
8. The Precision Bake
Place the chicken on the wire rack over the baking sheet. Bake for 18-20 minutes until the crust is deep golden and the internal temp hits 165°F.
9. The Final Rest
Remove from the oven and let the chicken rest for 5 minutes. Note: This allows the juices to redistribute so they don't leak out when you slice it.
Troubleshooting Your Coating Issues
Why Your Coating Is Falling Off
If your crust is sliding off the chicken like an oversized coat, it’s usually because the meat was too wet before you started. Surface moisture creates steam during the bake, which pushes the breading away from the protein. Always pat the chicken dry until the paper towel comes away completely clean.
Why Your Ranch Chicken Is Soggy
A soggy bottom is usually caused by baking the chicken directly on a flat sheet pan. As the chicken cooks, it releases a small amount of moisture. If that moisture has nowhere to go, it sits under the chicken and boils the breading. Use a wire rack to give that moisture an escape route.
| Problem | Root Cause | Solution |
|---|---|---|
| Pale Crust | Oven temp too low | Ensure oven is fully preheated to 400°F (200°C) before baking |
| Dry Meat | Overcooked | Use a meat thermometer and pull the chicken at 165°F (74°C) |
| Bland Flavor | Not enough salt | Season the raw meat before applying the mayo binder |
Common Mistakes Checklist ✓ Pat chicken completely dry before seasoning (prevents steaming) ✓ Use a wire rack to allow 360 degree air circulation ✓ Don't skip the Worcestershire sauce; it provides essential depth ✓ Press the Panko firmly into the mayo to ensure a tight bond
✓ Let the meat rest for 5 minutes to retain every drop of juice
Adjusting for More Guests
If you need to double this recipe for a party, don't just double everything blindly. For the chicken, you can easily go up to 3 lbs, but use two separate baking sheets to avoid overcrowding. If the pieces are too close together, they will steam each other instead of getting crispy.
When scaling up the spices, I usually only increase the salt and paprika by 1.5x rather than a full 2x. You can always add more at the table, but you can't take it away once it's baked into the crust. For the liquids like mayo and Worcestershire, a straight double usually works fine.
If you are cooking for just one or two people, you can halve the recipe easily. Use one small egg beaten with half the mayo amount to keep the binder thick enough to stick. Reduce the baking time by about 2-3 minutes since the oven will be less crowded and the heat will be more intense around the smaller batch.
Debunking Kitchen Rumors
"low-fat mayonnaise is a healthy swap for this recipe." This is a myth if you want a crispy result. low-fat mayo has a much higher water content and lower fat content. This means it will steam your breading from the inside, resulting in a soft, mushy mess instead of a shatter crisp crust.
Stick to the full fat version for the chemistry to work.
"Searing the chicken before baking seals in the juices." Science has proven this isn't true. Searing creates flavor through the Maillard reaction, but it doesn't create a moisture proof seal.
In this recipe, the mayo and Panko do the heavy lifting for moisture retention, so skipping the pan sear actually keeps the chicken more tender.
Storage and Reheating Tips
You can store leftover Ranch Chicken in an airtight container in the fridge for up to 3 days. However, the crust will naturally lose its "shatter" as it absorbs moisture from the meat. To revive it, avoid the microwave at all costs! A microwave will turn the breading into a chewy, rubbery disaster.
Instead, reheat the pieces in an air fryer at 350°F (180°C) for 4-5 minutes, or in a toaster oven. This dries out the surface and brings back that signature crunch. For freezing, wrap individual cooked breasts tightly in plastic wrap and then foil.
They will stay good for up to 2 months. Thaw in the fridge overnight before reheating.
Don't throw away any leftover Panko crumbs that didn't touch the raw meat! You can toast them in a skillet with a little garlic butter and sprinkle them over roasted broccoli or pasta the next day. It’s a great way to use up every bit of that flavorful ranch parmesan mix.
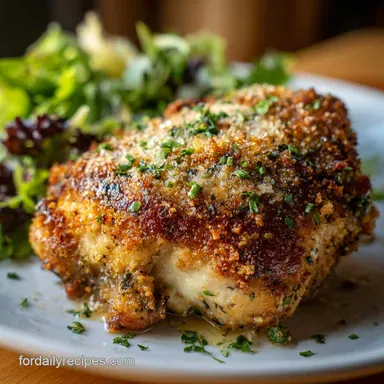
Perfect Serving Side Options
This chicken is quite rich, so I love pairing it with something bright and acidic. A crisp garden salad with a lemon vinaigrette cuts through the creamy mayo binder beautifully. If you want something heartier, roasted baby potatoes tossed in a little extra ranch seasoning create a cohesive "meat and potatoes" vibe.
For a true comfort meal, serve this alongside a big bowl of buttered noodles or a creamy stovetop mac and cheese. The crunch of the chicken provides a fantastic texture contrast to soft pasta.
If you're feeling fancy, a side of grilled asparagus with a squeeze of fresh lemon juice adds a pop of color and freshness to the plate.
- The Steakhouse Pairing: Serve with garlic mashed potatoes and creamed spinach.
- The Garden Fresh Option: Pair with a cucumber and tomato salad with red wine vinegar.
- The Quick Weeknight: Steam a bag of green beans and serve with a side of wild rice.

High in Sodium
985 mg mg of sodium per serving (43% of daily value)
The American Heart Association recommends limiting sodium intake to about 2,300mg per day for optimal health.
Tips to Reduce Sodium in This Recipe
-
Reduce Added Salt-25%
Eliminate or significantly reduce the 0.5 tsp of Kosher salt. Taste the dish after cooking and add a very small amount of salt only if needed.
-
Lower Sodium Cheese-15%
Replace the Parmesan cheese with a lower sodium cheese option like Swiss or mozzarella. Even better, reduce the amount by half. Parmesan cheese is a significant source of sodium.
-
DIY Ranch Seasoning-20%
Ranch seasoning packets are often high in sodium. Create your own Ranch seasoning blend using dried herbs (dill, parsley, chives), garlic powder, onion powder, and a touch of black pepper. Skip the packet to control sodium.
-
Reduce Worcestershire Sauce-10%
Worcestershire sauce contributes to the overall sodium content. Reduce the amount to 1/2 tsp or replace it with a sodium free alternative such as a blend of vinegar and spices.
-
Unsalted Butter Only-5%
Ensure you are using unsalted butter as specified. Even a small amount of salted butter can contribute unnecessary sodium.
-
Flavor with Herbs & Spices
Enhance the flavor of the chicken with a variety of fresh or dried herbs and spices like garlic powder, onion powder, paprika, oregano, or thyme. These add flavor without adding sodium.
Recipe FAQs
How do you cook chicken with ranch?
Coat the chicken in mayonnaise, then press firmly into a Panko/ranch seasoning mixture. Bake at 400°F (200°C) on a wire rack for 18-20 minutes until the internal temperature reaches 165°F (74°C). The mayo acts as a fat barrier to ensure a shatteringly crisp crust.
What makes ranch chicken so good?
The combination of tanginess, savory flavor, and extreme crunch makes it irresistible. The buttermilk solids in the ranch seasoning tenderize the meat while the fat from the mayonnaise creates a superior adhesive for the Panko breadcrumbs.
Does ranch seasoning taste good on chicken?
Yes, ranch seasoning provides excellent flavor depth and mild acidity. The herbs and buttermilk in the mix create a balanced profile that complements the richness of the chicken and the texture of the crust.
What is the most popular dish at Chicken Ranch?
The Oven Baked Ranch Chicken utilizing a mayonnaise binder is generally the signature item. It is highly praised for its texture contrast. If you prefer a saucier preparation, you might enjoy looking up our Chicken Gravy Recipe, which offers a completely different comfort profile.
Can I substitute mayonnaise with egg wash for the binder?
No, using egg wash significantly increases the risk of a soggy crust. Mayonnaise is an oil-based emulsion that fries the breading slightly in the oven, locking in moisture; egg wash is primarily water and protein, which steams the coating instead.
How long should I bake chicken breasts pounded to 1/2 inch thickness?
Bake for approximately 18 to 20 minutes at 400°F (200°C). Always verify doneness with a thermometer, pulling the chicken when it hits 165°F (74°C). Mastering internal temperature control is key to succulent poultry, a skill you can practice with our How to Cook recipe guide.
What is the best way to reheat leftover ranch chicken to keep it crispy?
Use an air fryer or toaster oven set around 350°F (180°C) for 4-5 minutes. Never use a microwave, as the trapped moisture will turn the crispy coating soft and chewy quickly.
Juicy Ranch Chicken Recipe
Ingredients:
Instructions:
Nutrition Facts:
| Calories | 606 calories |
|---|---|
| Protein | 46.6 g |
| Fat | 35.8 g |
| Carbs | 21.4 g |
| Fiber | 0.8 g |
| Sugar | 2.1 g |
| Sodium | 985 mg |
