Hummus Recipe: Velvety & Creamy
- Time: Active 10 minutes, Passive 10 minutes, Total 20 minutes
- Flavor/Texture Hook: Velvety, nutty, and exceptionally creamy
- Perfect for: budget-friendly meal prep or wholesome necessity snacking
- The Best Budget Friendly Hummus Recipe Ever
- Scientific Secrets for a Velvety Puree
- Comparing Fresh and Canned Chickpea Bases
- Essential Pantry Staples for Creamy Hummus
- Necessary Tools for Achieving Professional Smoothness
- Step by Step Mixing Guide
- Solving Common Texture and Flavor Mistakes
- Scaling for Large Groups or Tiny Batches
- Myths About Traditional Hummus
- Storing Leftovers and Using Every Scrap
- Beautiful Garnishes for Professional Table Presentation
- Hummus Recipe FAQs
- 📝 Recipe Card
The Best Budget Friendly Hummus Recipe Ever
Listen, I used to think that achieving that ultra smooth, velvety texture in a hummus recipe required peeling every single chickpea by hand. I actually spent forty minutes one Saturday afternoon standing over the sink, pinching individual beans out of their skins.
It was exhausting, and honestly, the result was barely better than the gritty paste I usually made. I almost gave up on the homemade version entirely until I learned the baking soda trick.
Now, whenever I pop open a can of chickpeas, the first thing I hear is that satisfying hiss of the vacuum seal, followed by the nutty aroma of the legumes. It’s a plant forward staple in my kitchen because it fills that "I need a snack right now" void without breaking the bank.
You don't need expensive imported beans; you just need to treat the cheap ones with a little bit of science backed respect.
This recipe is about getting those high end results on a grocery store budget. We are talking about a dip so smooth it swirls like soft serve ice cream. Once you see the sheen on the finished product and feel that first bite melt on your tongue, you will never look at a plastic tub of store-bought dip the same way again.
It is wholesome, simple, and honestly quite therapeutic to make.
Scientific Secrets for a Velvety Puree
1. The Baking Soda Breakdown
Baking soda is a miracle worker for canned legumes because it creates an alkaline environment. This alkalinity weakens the pectin bonds in the chickpea skins, causing them to disintegrate during a quick simmer. Instead of tough husks, you end up with a soft mash that blends into nothingness.
2. High Shear Tahini Emulsion
Whipping the tahini and lemon juice first creates a thick, pale base that acts as the structural foundation for the dip. This process is similar to making a mayonnaise; you are creating a stable fat in-water emulsion before the heavy solids even enter the bowl.
3. The Ice Water Aeration Trick
Adding ice cold water at the very end is the secret to that light, whipped texture. The cold temperature causes the fats in the tahini to seize slightly while the high speed blades incorporate tiny air bubbles. This results in a pale, fluffy consistency rather than a dense, heavy paste.
Comparing Fresh and Canned Chickpea Bases
| Method | Time Investment | Texture Result | Cost Impact |
|---|---|---|---|
| Dried Beans (Soaked) | 12 hours + 1 hour cook | Earthy and slightly grainier | Lowest cost per gram |
| Canned (Straight Out) | 2 minutes | Noticeably gritty husks | Moderate cost |
| Canned + Soda Simmer | 12 minutes | Ultra smooth and velvety | Moderate cost |
Choosing the right base depends on your schedule, but the simmered canned method is the sweet spot for most home cooks. It provides the texture of a 5 star restaurant without the overnight planning of dried beans. If you find yourself with extra beans, you can even use them in a White Bean Soup Recipe for a cozy, budget friendly meal.
Essential Pantry Staples for Creamy Hummus
| Ingredient | Science Role | Pro Secret |
|---|---|---|
| 1 can (425g) Chickpeas | Primary protein and starch | Simmer them until they are mushy |
| 1/2 cup Tahini | Fat source for emulsification | Use a "runny" brand for easier blending |
| 1/4 cup Lemon Juice | Acid to balance bitter tahini | Freshly squeezed prevents a metallic aftertaste |
| 3 tbsp Ice Cold Water | Aeration and fluffiness | Must be "teeth chattering" cold to work |
When selecting your chickpeas, any standard 15 oz (425g) can will do. We use 1/2 tsp of baking soda to soften them and 1/2 tsp fine sea salt to sharpen the flavors. For the aromatics, 1 clove of garlic is plenty any more and it starts to bite back.
We finish it with 1 tbsp extra virgin olive oil, a pinch of smoked paprika, and 1 tsp fresh parsley.
- 1 can (15 oz) chickpeas: Canned is fine. Why this? Pre cooked beans save hours while baking soda fixes the texture.
- 1/2 cup premium tahini: Look for jars where the oil hasn't separated into a brick. Why this? High fat content is essential for a velvety mouthfeel.
- 1/4 cup fresh lemon juice: Avoid the bottled stuff. Why this? The citric acid cuts through the heavy sesame fats.
- 1/2 tsp baking soda: Use standard pantry soda. Why this? It dissolves the skins so you don't have to peel.
Necessary Tools for Achieving Professional Smoothness
To get that restaurant style finish, a high powered food processor is your best friend. A standard blender can work, but you will likely need to stop and scrape the sides every thirty seconds because the mixture is so thick. If you are using a blender, make sure it has a tamper to push the ingredients into the blades.
You will also need a small saucepan to simmer the chickpeas. This step is non negotiable if you want the "wow" factor. A fine mesh strainer is helpful for rinsing the beans after their soda bath, ensuring no soapy residue remains.
Finally, a sturdy silicone spatula is a must for swirling that signature "swoosh" into the serving bowl.
step-by-step Mixing Guide

- Drain and rinse. Empty the 15 oz can of chickpeas into a colander and wash thoroughly. Note: This removes the metallic canning liquid taste.
- Simmer with soda. Place chickpeas in a pot, cover with water, and add 1/2 tsp baking soda.
- Boil 10 minutes. Cook 10 minutes until the skins are falling off and beans are mushy.
- Rinse again. Drain the hot beans and rinse with cold water until they are cool to the touch.
- Whip the tahini. Process 1/2 cup tahini and 1/4 cup lemon juice for 1 minute until thick and pale.
- Add aromatics. Pulse in 1 clove minced garlic and 1/2 tsp sea salt until fully incorporated.
- Process the beans. Add the softened chickpeas and process for 3 full minutes. Note: Patience here ensures a velvety texture.
- Drizzle ice water. Slowly add 3 tbsp ice cold water while the motor is running.
- Observe the change. Continue blending until the mixture turns light and fluffy.
- Garnish and serve. Plate with 1 tbsp olive oil, smoked paprika, and 1 tsp parsley.
Chef's Tip: If you have a few minutes to spare, let the minced garlic sit in the lemon juice for 5 minutes before blending. This "cooks" the garlic, removing that harsh raw sting that can sometimes ruin a delicate dip.
Solving Common Texture and Flavor Mistakes
1. My Hummus is Too Thick
This usually happens if the tahini is particularly dry or if the chickpeas were very starchy. As the mixture sits in the fridge, it will continue to thicken up. Don't be afraid to add another splash of ice water.
2. It Tastes Bitter
Bitterness almost always comes from the tahini. Some brands are more toasted than others, which can lead to an acrid aftertaste. Balancing this requires more acid (lemon) or a tiny pinch of sugar to round out the flavors.
| Problem | Root Cause | Solution |
|---|---|---|
| Grainy Texture | Chickpea skins remained intact | Simmer longer with baking soda next time |
| Flat Flavor | Lack of acidity or salt | Add 1 tsp lemon juice and a pinch of salt |
| Too Runny | Too much water added too fast | Add a tablespoon of tahini to thicken |
If you find that the tahini flavor is just too much for you, or if you've run out of it entirely, there are ways to pivot. You might actually prefer a Hummus Without Tahini recipe which relies on olive oil for its richness. It is a great budget alternative when sesame paste is too pricey.
Common Mistakes Checklist
- ✓ Rinsing the chickpeas after the baking soda simmer (prevents a soapy aftertaste)
- ✓ Using "ice cold" water, not just cold tap water (crucial for aeration)
- ✓ Processing for at least 3 minutes (don't stop just because it looks "done")
- ✓ Letting the chickpeas get truly mushy (they should squash with zero resistance)
Scaling for Large Groups or Tiny Batches
When you are scaling down for a single person, use half a can of chickpeas and beat a small amount of tahini by hand if your processor is too large to catch the blades. Reduce the simmer time for the beans to about 7 minutes since there is less volume to heat through.
For big parties, you can easily triple this recipe. However, do not triple the garlic linearly! For a triple batch, use only 2 cloves of garlic; otherwise, the flavor becomes overpowering.
Also, work in batches if your food processor is smaller than 11 cups to ensure the motor doesn't overheat while trying to whip that much heavy paste.
Myths About Traditional Hummus
Many people believe you must use dried beans for an authentic hummus recipe. While dried beans have a lovely flavor, the baking soda method with canned beans actually produces a smoother texture that is indistinguishable from traditional versions.
The "authenticity" lies in the balance of tahini and lemon, not just the bean's origin.
Another common myth is that olive oil belongs inside the hummus. In many traditional regions, olive oil is only used as a garnish on top. Adding it to the blender can actually make the hummus feel greasy and heavy rather than light and fluffy. We want the tahini to do the heavy lifting for the creaminess.
Storing Leftovers and Using Every Scrap
Storage: Keep your hummus in an airtight container in the fridge for up to 5 days. It actually tastes better on day two once the flavors have had time to marry. You can freeze it for up to 3 months, though the texture might become slightly more porous.
To fix this, just give it a quick whip with a spoon and a drop of water after thawing.
Zero Waste: Don't toss the liquid from the chickpea can! This is called aquafaba. You can whip it into a vegan meringue or use it as a binder in baking. If you have leftover parsley stems, toss them into a freezer bag for your next vegetable stock.
Even the lemon rinds can be used to clean your wooden cutting boards or zest into a batch of muffins before you juice the fruit.
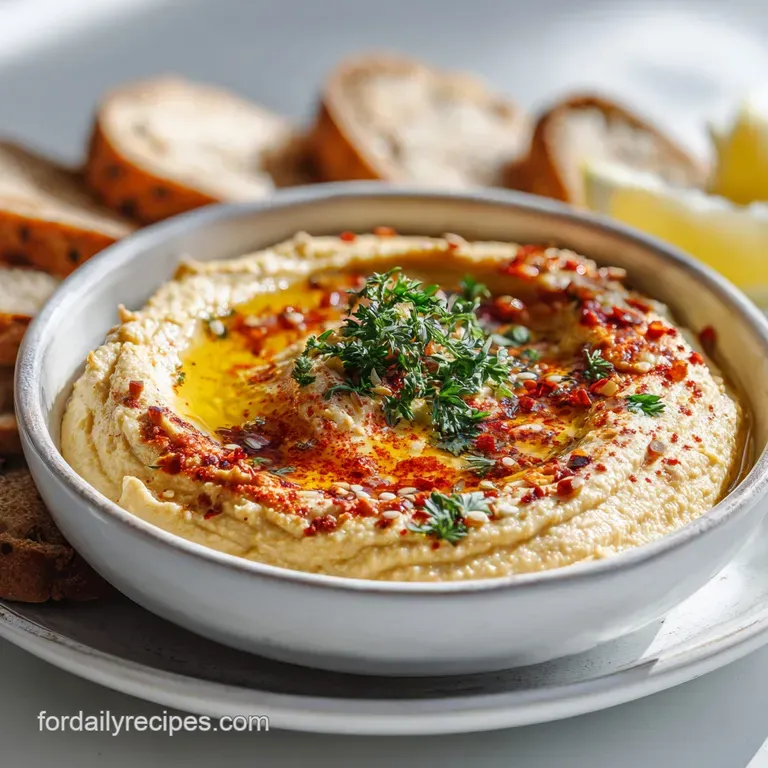
Beautiful Garnishes for Professional Table Presentation
To get that "swirl," use the back of a spoon to create a deep well in the center of the hummus. Rotate the bowl as you push the spoon outward. This creates ridges that act as little canals for the olive oil to pool into. It looks gorgeous and ensures every bite gets a bit of that golden oil.
For a pop of color, don't just sprinkle the paprika; tap the spoon against your finger to get an even, misty dusting. Add a few whole chickpeas that you've reserved from the can, a sprinkle of toasted pine nuts if you are feeling fancy, or even some Pickled Radish Recipe slices on the side for a bright, crunchy contrast. The visual appeal is what takes this from a "fridge snack" to a "party centerpiece."

Hummus Recipe FAQs
What are the ingredients in hummus?
Chickpeas, tahini, lemon juice, and garlic are the core ingredients. Water, salt, and optional spices like cumin or paprika are also common. Some recipes might include olive oil for blending or garnishing.
Why can't you eat hummus after 7 days?
It's generally safe for up to 5 days when stored properly in an airtight container in the refrigerator. After that, the risk of bacterial growth increases, affecting both safety and flavor.
What is the secret to good hummus?
Using canned chickpeas simmered with baking soda is a key secret. This softens them significantly, breaking down skins for an incredibly smooth texture without tedious peeling, similar to how we control texture in oven-roasted Vegetables Crispy Baked.
Do you really need tahini for hummus?
Yes, tahini is essential for authentic hummus flavor and texture. It provides that characteristic nutty richness and creamy, emulsified base. While alternatives exist, they significantly alter the classic profile.
How do I make my hummus extra smooth?
Process the mixture for an extended period, at least 3 minutes, in a high powered food processor. Ensure your chickpeas are very soft from the baking soda simmer and add ice-cold water slowly while blending to incorporate air.
My hummus tastes bitter, what did I do wrong?
The bitterness usually comes from the tahini, especially if it's heavily toasted. Counteract it with more fresh lemon juice or a tiny pinch of sugar to balance the flavors.
Can I make hummus without a food processor?
Yes, but it's challenging and results in a coarser texture. A powerful blender with a tamper can work, but you'll need to stop and scrape frequently due to the thickness.
Homemade Hummus Recipe

Ingredients:
Instructions:
Nutrition Facts:
| Calories | 211 kcal |
|---|---|
| Protein | 7.2 g |
| Fat | 14.2 g |
| Carbs | 16.5 g |
| Fiber | 5.0 g |
| Sugar | 0.8 g |
| Sodium | 242 mg |
