Hoisin Sauce: Sweet, Salty, and Totally Spot on Homemade Recipe
- What Exactly is Hoisin Sauce? Defining the Chinese BBQ Flavor Profile
- The Science of Umami: Why Homemade Hoisin Sauce Tastes Better
- Essential Components: Ingredients and Smart Substitutions
- Mastering the Method: Step-by-Step Hoisin Creation
- Troubleshooting Your Sauce: Tips, Tricks, and Avoiding Common Pitfalls
- Beyond the Glaze: Creative Ways to Utilize Hoisin Sauce
- Longevity and Freshness: Proper Storage and Freezing Guide
- Dietary Notes: Understanding the Nutrition Profile
- Recipe FAQs
- 📝 Recipe Card
What Exactly is Hoisin Sauce? Defining the Chinese BBQ Flavor Profile
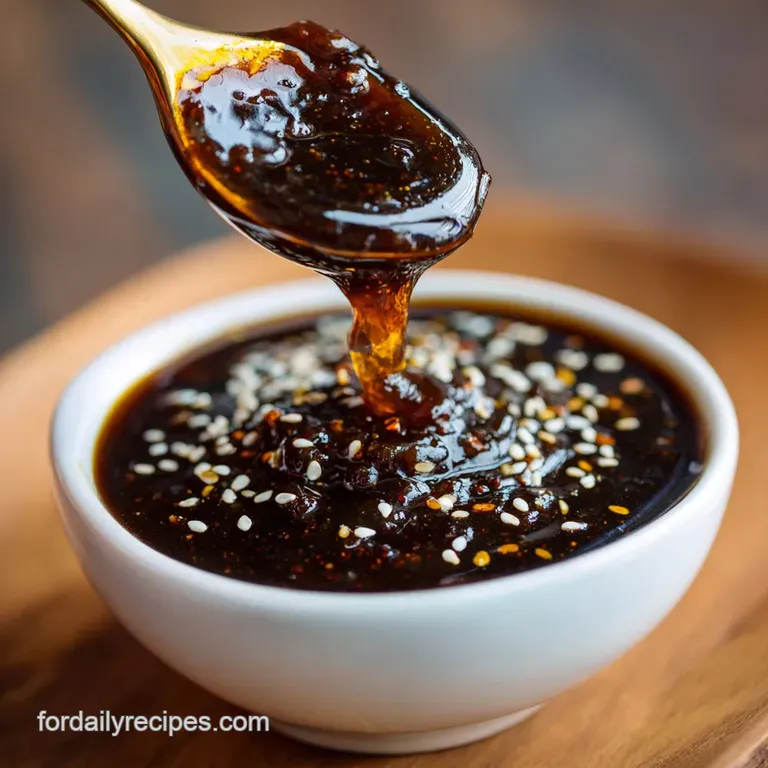
You know that deep, complex aroma that hits you when you walk into a really good Cantonese restaurant? That’s Hoisin. It’s sticky, deeply savory, and boasts this incredible mahogany shine that just screams flavor and richness. This sauce is absolutely everything.
For years, I just grabbed the squat jar from the international aisle, which is fine, I guess, but honestly, most store-bought versions are just sugar bombs lacking real depth. Making hoisin sauce at home takes barely 20 minutes, uses pantry staples you already have, and you get total control over that crucial salty sweet balance.
It’s fast, easy, and way cheaper than buying the premium bottled stuff.
Ditching the preservatives and weird stabilizers for the real deal is truly transformative for your home cooking. Trust me on this one, once you taste this homemade version of hoisin sauce , you will never look back. Let's crack on and master the Chinese BBQ flavor profile.
The Science of Umami: Why Homemade Hoisin Sauce Tastes Better
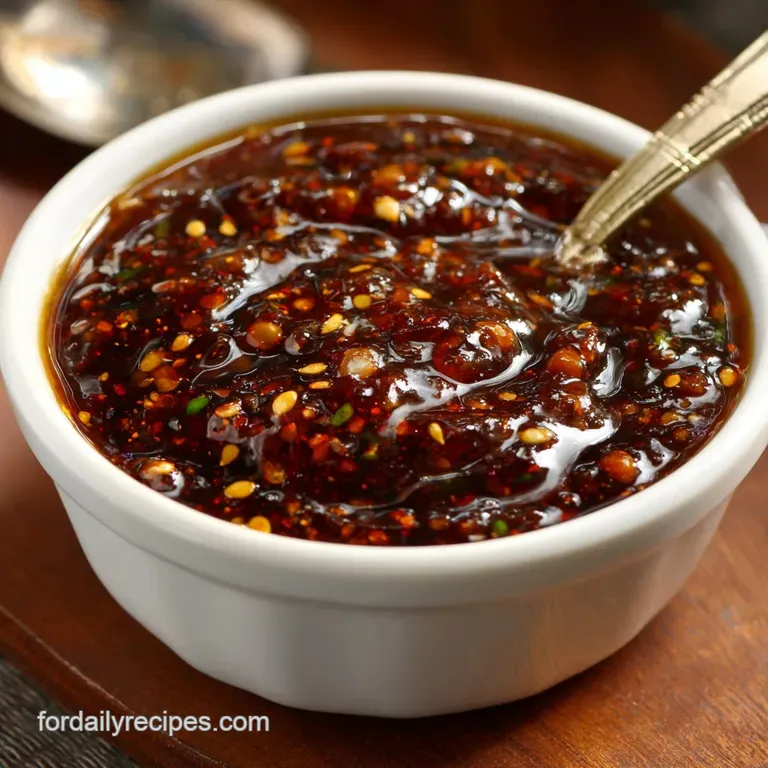
The magic of great homemade hoisin sauce isn't just one flavor; it’s how five different elements harmonize on your tongue. We are aiming for a sticky, deeply complex flavor that manages to be simultaneously sweet, salty, savory, and slightly acidic.
The Etymology and History of Hǎixiānjiàng
Fun fact: Hoisin is technically Hǎixiānjiàng , which literally means "seafood sauce," but it almost never contains seafood. Confusing, right? The name is thought to be historic, perhaps used originally with seafood, or maybe it just means a highly flavorful condiment that goes well with delicate things.
Either way, the flavor profile is rooted in Cantonese cuisine, built on fermented soybeans, aromatics, and rich sweeteners.
Deconstructing the Core Flavour Palette (Sweet, Salty, Tangy)
Every great sauce needs contrast. The dark brown sugar provides deep, molasses rich sweetness, which needs the sharp, clean counterpoint of rice vinegar. That tanginess keeps the sauce from tasting flat or overly sweet.
We layer the saltiness using soy sauce, but we ensure it’s balanced by the smooth, fatty texture of the peanut butter.
Why Homemade Always Wins Over store-bought
Why bother making hoisin sauce when you can buy it? Because factory made sauces often rely too heavily on corn syrup and artificial thickeners, sacrificing the subtlety of the five spice and real garlic flavor.
When you make it yourself, you get maximum aromatic punch and the perfect thickness no weird gelatinous texture here!
Building the Layered Umami Foundation
Our recipe skips the struggle of finding specialized, high-quality fermented soybean paste, and instead focuses on building deep umami layers with accessible ingredients. We combine low-sodium soy sauce and black bean paste (or dark miso).
This combination delivers that earthy, fermented depth that provides the savory backbone for the entire sauce.
Achieving Perfect Sweetness and Acidity
The key is balance. If your sauce is too sweet, it tastes like candy. If it’s too acidic, it’s sharp. The dark brown sugar gives us the initial sweetness, but the hoisin sauce needs the vibrant lift of rice vinegar to cut through the richness.
Always taste and adjust before you thicken if it tastes dull, a few extra drops of vinegar can wake everything up.
Controlling Thickness for Ideal Consistency
We rely on a simple cornstarch slurry for the perfect consistency. You don't want liquid soup, but you also don't want sludge. The slurry, when rapidly whisked into the hot base and cooked for just two minutes, sets up beautifully.
Crucially, the sauce will always thicken significantly more once it cools down. Don't overdo the cornstarch while it's hot!
Essential Components: Ingredients and Smart Substitutions
This is where we take common pantry staples and turn them into gold. Getting the right mix of fat, acid, spice, and salt is what makes this hoisin sauce recipe so brilliant.
Mandatory Pantry Staples for Authentic Flavour
The five spice powder is non-negotiable for that authentic aroma; don't skip it. Also, use smooth peanut butter here. If you use chunky or natural peanut butter, it will separate and give you a grainy texture, and nobody wants grainy sauce.
Swaps for gluten-free or Low-Sodium Diets
If you're making a hoisin sauce gluten-free version, Tamari is your best friend. For those watching their sodium intake, coconut aminos are an excellent swap for the soy sauce, though you may need to add a tiny pinch of extra salt later, as coconut aminos are much milder.
| If You Don't Have... | Use This Instead... | Why It Works |
|---|---|---|
| Black Bean Paste/Miso | 1 tablespoon of Worcestershire sauce | Provides color and fermented, dark umami flavor. |
| Peanut Butter | Tahini or smooth sunflower seed butter | Maintains the necessary fat content and creamy body (essential for emulsification). |
| Brown Sugar | Maple syrup or Honey | Offers rich liquid sweetness. Tip: Reduce the initial water slightly. |
| Rice Vinegar | Apple cider vinegar (or white wine vinegar) | Provides the necessary acidity and brightness. |
Adjusting Sugar Levels Without Sacrificing Body
If you want a lower sugar hoisin sauce , you can certainly reduce the brown sugar by up to 25%. However, sugar adds volume and body, not just sweetness. If you reduce the sugar, you might want to increase the cornstarch slurry by half a teaspoon to maintain that satisfying, sticky glaze quality.
Mastering the Method: step-by-step Hoisin Creation
This is a three step dance: combine, simmer, thicken. It’s super straightforward!
Stage 1: Initial Combination
- Mince Aromatics: Finely mince your fresh garlic. Remember, you want flavor infusion, not big chunks.
- Combine Main Ingredients: In your saucepan, combine the soy sauce, peanut butter, black bean paste (or miso), brown sugar, rice vinegar, sesame oil, minced garlic, five spice powder, and the ¼ cup (60 ml) of water/stock.
- Whisk to Incorporate: Using a wire whisk, vigorously mix all the ingredients until the peanut butter is completely dissolved. If you see any oily streaks or paste clumps, keep whisking!
Stage 2: Simmering and Flavor Development
- Heat Gently: Place the saucepan over medium heat. Bring the mixture just to a gentle simmer, stirring constantly so the sugar doesn't scorch.
- Cook Down: Reduce the heat to low. Maintain a slow, bubbling simmer for 6 to 8 minutes . Stir occasionally. This low and slow simmering is how the spices and garlic truly infuse, giving the sauce that deep, complex flavor we are after.
Stage 3: Thickening and Finishing
- Prepare Slurry: Whisk the cornstarch (1 tbsp) and cold water (2 tbsp) in a separate small bowl until completely smooth. You must use cold water! Warm water activates the starch too quickly and leads to lumps.
- Thicken the Sauce: Remove the saucepan from the heat momentarily. Pour the cornstarch slurry into the simmering sauce while constantly and rapidly whisking.
- Final Cook: Return the sauce to low heat. Continue to whisk for 1 to 2 minutes until the sauce has visibly thickened, becoming glossy and sticky. Once it’s reached a nice boil, the starches have set.
Chef’s Note: Do not keep the sauce on a heavy boil after the slurry is added. Rapid, long boiling can actually break down the starch molecules, making your perfectly thick sauce run thin again.
- Cool and Store: Remove from heat immediately. Let it cool completely to room temperature before covering and refrigerating. It will be much thicker once chilled.
Troubleshooting Your Sauce: Tips, Tricks, and Avoiding Common Pitfalls
We all make mistakes, I once burned a batch by walking away while the brown sugar was simmering oops! Here is how you can avoid the most common problems with homemade hoisin sauce .
Prepping and Combining Your Dry and Wet Elements
Make sure you whisk the peanut butter completely before turning on the heat. If you try to dissolve the peanut butter in hot liquid, it often separates into an oily mess. Cold mixing first ensures a smooth, stable emulsion from the start.
The Crucial Simmering and Reduction Phase
Don't rush the initial 8 minute simmer. This isn't just about reducing the liquid; it's about activating the Chinese five spice powder and mellowing the raw bite of the fresh garlic. If you cut this step short, your final sauce will taste less integrated and a little too sharp.
Testing for the Nappe (Coating) Stage
When you are thickening the sauce, pull your whisk out and check the coating. The sauce should cling lightly to the back of a spoon (that’s the classic nappe stage).
If it beads up or slides off quickly, you need to return it to the heat for another 30 seconds of gentle simmering after adding the slurry.
How to Fix Hoisin That Is Too Salty or Thin
If the sauce is too salty, you need to balance it with sweetness or fat. Stir in a teaspoon of brown sugar or honey, or add another teaspoon of peanut butter. If it is too thin, create another small cornstarch slurry (1/2 tsp cornstarch + 1 tsp cold water) and repeat the thickening step.
Achieving a Silky, Lump Free Texture
Lumps usually come from improperly mixed cornstarch. Always, always use cold water for your slurry and whisk it until it looks like milk. If you do end up with lumps, don’t panic! Just strain the finished sauce through a fine mesh sieve before cooling.
Maximizing Flavour Infusion During Cooking
Adding the toasted sesame oil at the beginning gives you great depth, but for maximum fragrance, stir in an extra half teaspoon of sesame oil right after you pull the sauce off the heat. That fresh hit of toasted oil really lifts the whole flavor profile.
Beyond the Glaze: Creative Ways to Utilize Hoisin Sauce
This isn't just a dipping sauce; it's a foundation! This is perhaps the most versatile sauce you can keep in your fridge.
Enhancing Dipping Sauces and Dressings
Hoisin is incredible as a straight dipping sauce for potstickers, but it also makes a great base for creamy dressings. Mix it with a touch of mayonnaise or yogurt for a tangy, sweet savory aioli. It's got the same kind of addictive complexity as my favorite ChickfilA Sauce Recipe: The Ultimate Copycat (Creamy, Sweet Smoky) .
Utilizing Hoisin as a Stir Fry Base
The perfect amount of stickiness makes this the ideal component for a quick weeknight stir fry. Just mix two or three tablespoons with a tablespoon of water or stock before tossing it through your wok for the last minute of cooking.
The Ultimate Marinade Accelerator
Use Hoisin sauce as a quick marinade glaze for anything going on the grill. It caramelizes beautifully because of the sugar content. It gives that deep, sticky exterior that takes any protein to the next level kind of like the crust you get on a great Crack Burger: The Ultimate Smash Recipe with Addictive Ranch Sauce .
Longevity and Freshness: Proper Storage and Freezing Guide
One of the best things about making a big batch of this hoisin sauce is how long it lasts. You will definitely want to double the recipe, trust me.
The Shelf Life of Freshly Made Sauce
Because this recipe contains acid (vinegar), salt (soy sauce), and sugar, which all act as natural preservatives, your homemade Hoisin sauce has a great shelf life. Kept properly, it should last up to 3 weeks in the refrigerator.
Best Practices for Refrigeration and Sealing
Always store the sauce in an airtight glass jar. This prevents any off-flavors from the fridge from seeping in, and it keeps oxygen out. Give it a good whisk or shake before using it, as the natural ingredients might separate slightly over time.
Freezing Hoisin for Long Term Convenience
But does it freeze well? You bet it does! Hoisin sauce freezes beautifully for up to 3 months. Portion it out into smaller containers or even ice cube trays (great for adding a quick tablespoon to a soup or marinade). Thaw it overnight in the fridge and give it a thorough whisk before using.
You may need to gently reheat it on the stovetop if you notice any separation upon thawing.
Dietary Notes: Understanding the Nutrition Profile
While we control the quality of the fat and sugar, remember that hoisin sauce is naturally rich and concentrated. It should be used as a flavorful condiment or glaze, not a liquid base.
Our homemade version uses lower sodium soy sauce and avoids high fructose corn syrup, making it a generally healthier choice than most commercial brands.

Recipe FAQs
How long will homemade Hoisin sauce last in the refrigerator?
Homemade Hoisin sauce, when stored correctly, will generally last for 2 to 3 weeks in the refrigerator. Ensure you use a thoroughly sterilized, airtight container to maintain freshness and prevent contamination. Always perform a quick check for any unusual odors or mold before using the sauce after the first week.
My sauce is too thick or too thin. How can I adjust the consistency?
If your sauce is too thin, return it to a low simmer for a few extra minutes until the moisture evaporates and the sauce naturally thickens. Conversely, if the sauce is too thick, gradually whisk in a teaspoon of hot water, broth, or extra soy sauce until you achieve the desired pourable texture.
Can I make this Hoisin sauce recipe entirely gluten-free and/or vegan?
Traditional Hoisin recipes, relying on fermented soybean paste, are already naturally vegetarian and often vegan. To ensure it is strictly gluten-free, you must substitute standard soy sauce with tamari or certified gluten-free coconut aminos.
Always check the label of the soybean paste, as some commercial brands may contain trace amounts of wheat.
What is the best way to reduce the overall saltiness of the finished sauce?
The salinity primarily comes from the soy sauce and fermented bean paste. If the sauce tastes too salty, balance it immediately by stirring in a little acidic element, such as rice vinegar, or a touch more sweetener (sugar or honey).
A small amount of water or low-sodium stock can also dilute the flavor without compromising thickness significantly.
I don't have Chinese 5-Spice powder. Is there a viable substitution?
While 5-Spice is crucial for the deep, aromatic character of Hoisin, you can approximate the flavor by focusing on star anise, ground fennel, and cloves. Ensure you use these substitutions sparingly, as their individual flavors can easily overwhelm the batch if not measured carefully.
Can I freeze homemade Hoisin sauce for long term storage?
Yes, Hoisin sauce freezes very well due to its low water content and high sugar/salt profile. Pour the cooled sauce into small, airtight freezer safe containers or even ice cube trays, and it will keep for up to three months.
Thaw overnight in the refrigerator and stir vigorously before serving, as some slight separation might occur.
Besides Peking Duck, what are the best culinary applications for homemade Hoisin?
Homemade Hoisin is extremely versatile and excels beyond its classic pairing with duck. It makes an incredible glaze for slow cooked ribs or pork belly, functions as a robust marinade for stir fried beef or tofu, and can be used as a flavor backbone in savory salad dressings or noodle sauces.
Try adding a tablespoon to your next batch of homemade chili.
Homemade Hoisin Sauce Recipe
Ingredients:
Instructions:
Nutrition Facts:
| Calories | 50 calories |
|---|---|
| Fat | 2 g |
| Fiber | 1 g |
