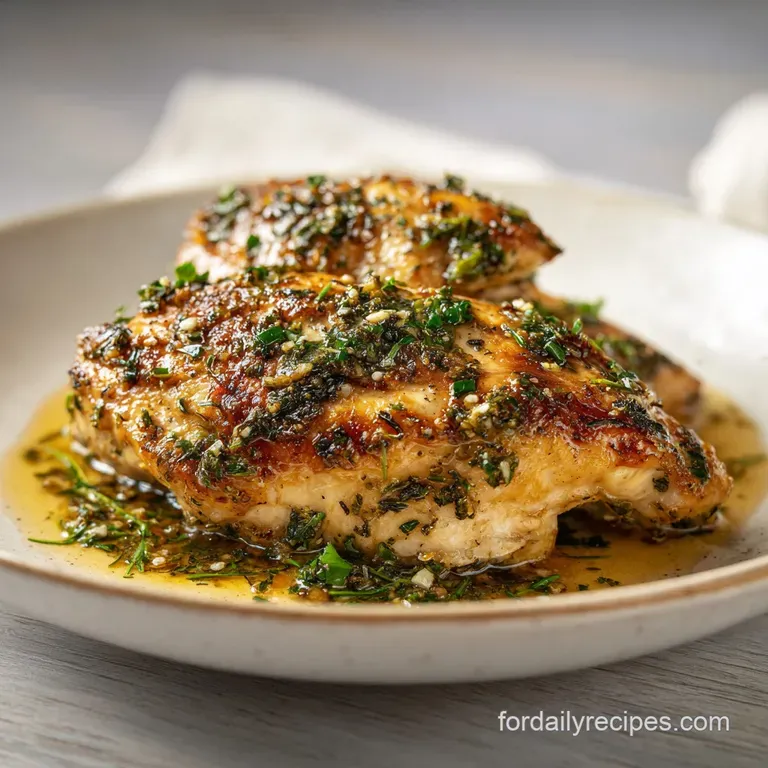
Easy Chicken Recipe with Garlic and Herbs: Pan-Seared
- Time: Active 10 minutes, Passive 12 minutes, Total 22 minutes
- Flavor/Texture Hook: Golden, crispy exterior with a velvety garlic butter finish
- Perfect for: Busy weeknights where you want a high protein meal that tastes expensive
- Techniques for Juicy Garlic Herb Chicken
- Essential Numbers for Fast Cooking
- Sourcing Quality Chicken and Herbs
- Minimal Tools for Maximum Flavor
- Step-by-Step Stovetop Sear Guide
- Avoiding Common Chicken Sealing Mistakes
- Flavor Tweaks and Ingredient Swaps
- Storage and Leftover Revivals
- Plating Like a Bistro Pro
- The Truth About Searing Meat
- Recipe FAQs
- 📝 Recipe Card
Techniques for Juicy Garlic Herb Chicken
Working with lean protein like chicken breast is all about managing thermal momentum. Since there's very little fat within the muscle itself, we have to introduce it externally and protect the moisture from escaping.
I used to think high heat was the enemy of juiciness, but it’s actually your best friend if you know when to walk away. By creating a hard sear, we initiate the Maillard reaction, which is a chemical dance between amino acids and reducing sugars.
The Science of the Golden Crust
Thermal Conductivity: over High heat searing creates a moisture resistant barrier through protein coagulation, while the butter basting uses fat to carry heat into the center more gently than the pan surface. This prevents the outer layers from becoming "stringy" before the middle is safe to eat.
We also use a quick pan reduction at the end. When you add the chicken stock to the hot pan, it lifts all those browned bits (the fond) off the bottom. That's pure concentrated flavor. If you've enjoyed my Garlic Herb Chicken recipe, you know that this liquid gold is what separates a "dry chicken" from a restaurant quality meal.
Quick Decision Table: Stovetop vs. Oven
| Method | Time | Texture | Best For |
|---|---|---|---|
| Stovetop (This Recipe) | 12 minutes | Crispy, deeply browned crust | Maximum flavor, fast results |
| oven-roasted | 20-25 minutes | Even, soft, tender | Large batches, hands off cooking |
| Combination | 15 minutes | Thick crust, juicy middle | Extra thick chicken breasts |
The stovetop method is my go to because I love that direct contact heat. It gives you more control over the butter basting process, which is where the real magic happens. If you're feeding a crowd, the oven might be easier, but for 1.5 lbs of chicken, the pan is king.
Essential Numbers for Fast Cooking
When you're fighting a deadline or just want to get dinner on the table, knowing the "why" behind your ingredients saves you from second guessing yourself. I never used to care about the type of oil I used until I set off my smoke alarm three times in one week.
Now, avocado oil is my best friend for over high heat searing because it doesn't break down into bitter compounds at 400°F (200°C).
Component Analysis
| Ingredient | Science Role | Pro Secret |
|---|---|---|
| Avocado Oil | High smoke point lubricant | Use only enough to coat the pan to avoid greasy meat |
| Unsalted Butter | Flavor carrier & emulsifier | Add it only at the end to prevent the milk solids from burning |
| Kosher Salt | Protein denaturant | Salt the meat 10 minutes early to draw out moisture for a better sear |
| Chicken Stock | Solvent for deglazing | Use low sodium so the final sauce doesn't become a salt bomb |
The garlic is another area where people trip up. Don't mince it. If you mince it, those tiny bits will burn in the time it takes to finish the chicken, and burnt garlic tastes like bitter charcoal. Smash the cloves with the side of your knife instead.
It releases the oils but keeps the garlic intact enough to survive the heat.
Sourcing Quality Chicken and Herbs
For this dish, you need 1.5 lbs boneless skinless chicken breasts. If they're uneven in thickness, do yourself a favor and give the thick end a quick whack with a heavy pan. You want them relatively uniform so one side isn't raw while the other is turning into leather.
For the Chicken
- 1.5 lbs boneless skinless chicken breasts: The star of the show. Why this? Lean, fast cooking protein that absorbs herb flavors easily.
- 1 tsp kosher salt: For seasoning and moisture retention. Why this? Coarse grains are easier to sprinkle evenly than table salt.
- 0.5 tsp freshly cracked black pepper: For a bit of back of-the throat heat.
For the Garlic Herb Infusion
- 2 tbsp avocado oil: Your over high heat vehicle.
- 6 cloves fresh garlic, smashed: Provides a mellow, aromatic base.
- 4 sprigs fresh thyme: Adds an earthy, floral note.
- 2 sprigs fresh rosemary: Brings a piney, bold aroma.
- 3 tbsp unsalted butter: The secret to a velvety finish.
For the Quick Pan Sauce
- 0.5 cup low sodium chicken stock: To deglaze and create the sauce.
- 1 tbsp fresh lemon juice: To cut through the fat and brighten the dish.
- 1 tbsp fresh parsley, chopped: For a fresh, green finish.
| Original Ingredient | Substitute | Why It Works |
|---|---|---|
| Avocado Oil | Grapeseed Oil | Both have high smoke points. Note: Avoid extra virgin olive oil for the initial sear. |
| Fresh Rosemary | Dried Rosemary (0.5 tsp) | Concentrated flavor. Note: Add earlier so it has time to rehydrate in the fat. |
| Chicken Stock | Dry White Wine (Sauvignon Blanc) | Adds acidity and depth. Note: Reduces faster than stock, so watch the pan. |
Minimal Tools for Maximum Flavor
You don't need a kitchen full of gadgets for this. In fact, fewer tools usually mean less cleanup and better focus. I swear by my 12 inch cast iron skillet for this. It holds heat like a champion, which means when you drop that cold chicken in, the temperature of the pan doesn't plummet.
If you don't have cast iron, a heavy bottomed stainless steel pan works too. Just stay away from thin, cheap non stick pans if you want a real crust. They simply can't handle the heat needed for a proper sear. You'll also need a pair of sturdy tongs and a large spoon for the basting.
That basting step spooning the hot herb butter over the chicken is the "chef secret" that makes this feel like a $30 entree.
For Even Cooking and Tender Fiber
Uniformity is the key to timing. If one breast is 2 inches thick and the other is 1 inch, you're going to have a bad time. Use a piece of plastic wrap and a heavy bottle or meat mallet to even them out. It’s a great way to release any workday frustration too.
step-by-step Stovetop Sear Guide
- Prep for Uniformity. Pat the chicken breasts dry with paper towels. Note: Moisture is the enemy of a sear; any water on the surface will turn to steam and prevent browning.
- Season generously. Rub the 1 tsp kosher salt and 0.5 tsp pepper onto both sides of the chicken.
- Heat the pan. Place your skillet over medium high heat. Add the 2 tbsp avocado oil and wait until the oil shimmers and just begins to smoke.
- The over High heat Sear. Carefully lay the chicken in the pan. Cook for 5-6 minutes without moving it until the edges are golden and it releases easily from the pan.
- Flip and color. Turn the chicken over. You should see a deep, mahogany colored crust.
- The Garlic & Herb Bloom. Toss in the 6 smashed cloves of garlic, 4 sprigs of thyme, and 2 sprigs of rosemary. Move them around in the oil for 1 minute until the kitchen smells like heaven.
- Butter Basting. Add the 3 tbsp unsalted butter. As it melts and foams, tilt the pan slightly and use a spoon to pour the bubbling butter over the chicken repeatedly for 2 minutes.
- The Deglazing Finish. Pour in the 0.5 cup chicken stock and 1 tbsp lemon juice. Let it bubble for 2-3 minutes until the liquid reduces by half and looks slightly syrupy.
- Final Touch. Sprinkle with 1 tbsp parsley and spoon that pan sauce over the meat one last time before serving.
Chef's Tip: If you want to take the flavor profile in a slightly different direction, try adding a spoonful of the base from my Garlic Parmesan Sauce recipe into the pan during the final reduction. It adds a nutty, salty depth that is incredible with the herbs.
Avoiding Common Chicken Sealing Mistakes
The biggest mistake I see people make is pan crowding. If you put too much meat in the pan at once, the temperature drops and the chicken steams instead of searing. If you're doubling the recipe, work in batches. It takes an extra 10 minutes, but the difference in flavor is worth it.
Why Your Chicken is Dry
It's usually a matter of carryover cooking. Chicken continues to cook after you take it off the heat. If you pull it off the stove at exactly 165°F (74°C), it will likely climb to 170°F (77°C) while resting, which is where things start to get tough.
| Problem | Root Cause | Solution |
|---|---|---|
| Rubber Texture | Overcooking or over high heat for too long | Pull the chicken at 160°F (71°C) and let it rest; it will reach 165°F (74°C) naturally. |
| Bitter Sauce | Burnt garlic or herbs | Ensure garlic is smashed, not minced, and add butter only in the final stages. |
| Soggy Crust | Didn't pat the chicken dry | Always use paper towels to remove surface moisture before seasoning. |
Common Mistakes Checklist
- ✓ Pat chicken completely dry before searing (prevents steaming)
- ✓ Preheat the pan for 3 full minutes before adding the oil
- ✓ Don't overcrowd the pan - leave at least an inch of space between pieces
- ✓ Let the meat rest for 5 minutes before slicing to keep the juices inside
- ✓ Use fresh herbs instead of dried whenever possible for the basting step
Flavor Tweaks and Ingredient Swaps
I love this recipe because it's a blank canvas. If you're bored with rosemary and thyme, you can easily pivot. This dish is actually quite similar to the foundation of a Sun Dried Tomato recipe I make when I want something more Mediterranean. Just swap the rosemary for some chopped sun dried tomatoes and a splash of heavy cream at the end.
To Make it dairy-free
If you can't do butter, you can use a high-quality vegan butter substitute or just stick with the avocado oil. However, you'll miss that foaming action that helps the herbs stick to the meat. In that case, I'd suggest a quick Poultry Seasoning recipe rub before cooking to ensure the flavor is locked into the crust itself.
Budget Alternatives for Herbs
| Premium | Budget | Flavor Impact | Savings |
|---|---|---|---|
| Fresh Rosemary/Thyme | Dried Italian Seasoning | Less aromatic, more herbal | Save $3-5 |
| Fresh Garlic Cloves | Garlic Powder (in the rub) | Lacks the buttery roasted bits | Save $1-2 |
| Chicken Stock | Water + Bouillon Cube | Slightly saltier | Save $2 |
Storage and Leftover Revivals
If you have leftovers (which is rare in my house), they store beautifully in the fridge for up to 3 days. The key to reheating chicken breast without it turning into a tire is to do it gently. I like to slice it thin and warm it in a pan with a tablespoon of water and a lid on. The steam helps keep it moist.
For a zero waste approach, don't throw away those herb stems or the garlic cloves from the pan! Toss them into a freezer bag. When the bag is full, you can boil everything with some water and vegetable scraps to make a phenomenal homemade stock.
Even the lemon rinds can be tossed into the bag for a bright, citrusy undertone in your next soup.
Plating Like a Bistro Pro
We eat with our eyes first, right? To make this look like it came out of a professional kitchen, slice the chicken on a slight bias (at an angle). This exposes more of the juicy interior and makes the portion look larger and more "designed."
Fan the slices out on a warmed plate and pour that glossy pan sauce directly over the center of the meat. Don't hide the garlic cloves; tuck them around the side as a rustic garnish. A final sprinkle of fresh parsley adds that pop of vibrant green that makes the golden brown chicken really stand out.
Serve this alongside some roasted potatoes or a simple green salad, and you've got a meal that feels like a reward for surviving the day.
Decision Shortcut
- If you want a creamy finish, whisk in 2 tablespoons of heavy cream or crème fraîche into the pan sauce at the very end.
- If you want more crunch, dredge the chicken in a tiny bit of flour before searing to create a thicker, more "shatter crisp" crust.
- If you want a spicy kick, add a teaspoon of red pepper flakes to the oil along with the garlic.
The Truth About Searing Meat
There’s a common myth that searing "seals in the juices." Science tells us this isn't true moisture loss happens regardless of the crust. The real reason we sear is for the flavor development of the Maillard reaction and the texture contrast.
That crispy "shatter" of the skin or crust against the tender interior is what our brains crave.
Another myth is that you should only flip chicken once. While that's great for getting deep grill marks, flipping more often can actually help the chicken cook more evenly and up to 30% faster.
However, for this specific garlic herb method, I prefer the "set it and forget it" approach for the first 5 minutes to ensure we get that deep, restaurant style color before we start the basting process.
This Chicken Breast Recipe is a masterclass in simplicity. It proves you don't need a pantry full of exotic spices or a kitchen full of gadgets to make something that tastes truly professional. Just keep your pan hot, your chicken dry, and your herbs fresh. Trust me, once you master the butter baste, you'll never go back to "plain" chicken again. Let's crack on and get that pan heating up!

Recipe FAQs
How to make easy garlic and herb chicken?
Pat the chicken dry, season it, and sear it over high heat in oil until golden brown. Then, add butter, smashed garlic, and herbs, tilting the pan to baste the chicken with the foaming butter for the final few minutes of cooking.
What herbs go well with garlic chicken?
Thyme and rosemary are the best foundational herbs for this preparation. Thyme offers earthiness while rosemary provides a strong, piney aromatic backbone that holds up well to high heat searing.
What is the best herb combination for chicken overall?
The most versatile combination is thyme, rosemary, and a touch of sage. This trio covers savory, earthy, and slightly sweet notes, balancing well with almost any acid or fat used in the pan sauce.
Do I cook garlic before adding to chicken when pan-searing?
No, you cook the garlic concurrently with the chicken during the basting phase. Add smashed garlic cloves to the hot butter toward the end of cooking so they infuse flavor without burning and turning bitter.
What temperature should the chicken reach internally?
Pull the chicken from the pan when it registers 160°F (71°C) on an instant read thermometer. This accounts for carryover cooking, ensuring the final resting temperature lands perfectly at the USDA recommended 165°F (74°C) without drying out.
Can I use dried herbs instead of fresh for the basting step?
Yes, but you must significantly reduce the quantity due to flavor concentration. Use about one-third the amount of dried herbs as fresh, and consider adding them earlier with the oil to allow them time to rehydrate and bloom.
What is the purpose of adding butter at the end of cooking?
Butter is added late to create flavor, emulsification, and a velvety texture for the pan sauce. Adding it late prevents the milk solids from burning during the initial high heat sear, a technique similar to how we build flavor bases in a creamy alfredo sauce recipe.
Garlic Herb Chicken In 22 Min
Ingredients:
Instructions:
Nutrition Facts:
| Calories | 428 kcal |
|---|---|
| Protein | 53 g |
| Fat | 22 g |
| Carbs | 2 g |
| Fiber | 0.3 g |
| Sugar | 0.6 g |
| Sodium | 640 mg |
