Pumpkin Bars: Tender Heritage Spice Cake

- Time: Active 20 minutes, Passive 30 minutes, Total 50 minutes
- Flavor/Texture Hook: Spiced, moist cake with velvety frosting
- Perfect for: Large gatherings, bake sales, or cozy autumn afternoons
- Heritage Inspired Soft Pumpkin Bars
- Why This Science Works Well
- Technical Specs for This Bake
- Understanding the Ingredient Science
- Gathering Your Essentials and Substitutes
- Equipment for the Best Results
- Golden Steps for the Bake
- Solving Common Baking Problems
- Adjusting Batches for Large Crowds
- Creative Variations for Heritage Flavors
- Myths About Soft Sheet Cakes
- Storage and Zero Waste Tips
- Slicing for Professional Presentation
- Recipe FAQs
- 📝 Recipe Card
Heritage Inspired Soft Pumpkin Bars
You know that specific aroma that fills a kitchen and suddenly makes everything feel right in the world? It is that heady mix of cinnamon and cloves hitting the warm air as you pull a sheet pan from the oven.
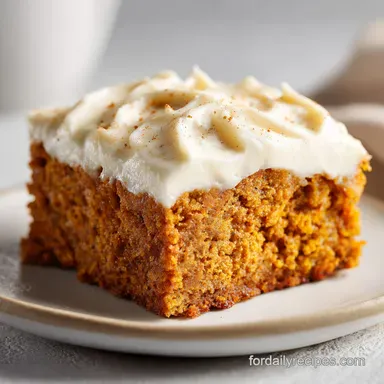
These bars represent the very best of heritage baking, where the goal is a texture so soft it almost melts, topped with a frosting that has that satisfying slight shatter on the first bite.
I remember the first time I made these for a neighborhood gathering, and the pan was wiped clean before the tea had even finished steeping.
This recipe is designed to be a reliable staple in your kitchen, requiring just 50 minutes from start to finish. We are looking for a specific contrast here: the deep, rich warmth of the pumpkin base against the bright, cold tang of the cream cheese frosting.
It is a pairing that has sustained generations of home cooks because it simply works. You won't find any dry, bready textures here; instead, we are aiming for a moist, tender crumb that holds its shape but yields easily to a fork.
While some might try to complicate this classic, we are sticking to the methods that have proven themselves over decades. By focusing on the quality of your pumpkin and the precision of your spice blend, you create something far superior to anything you could find in a store.
It is about the comfort of a well baked treat and the joy of sharing something handmade that actually tastes the way a home baked memory should.
Why This Science Works Well
Oil Based Emulsion: Using vegetable oil instead of butter prevents the cake from becoming tough because oil remains liquid at room temperature, ensuring a velvety mouthfeel even after cooling.
Acid Base Reaction: The natural acidity in the pumpkin puree reacts with the baking soda to create immediate carbon dioxide bubbles, providing a significant lift that keeps the bars from becoming dense.
Egg Protein Structure: Using four large eggs creates a sturdy protein web that supports the heavy moisture of the pumpkin, preventing the center of the bars from sinking during the cooling process.
Starch Gelatinization: As the all purpose flour hydrates with the wet ingredients and heats up, the starches swell and set, creating a tender structure that perfectly holds the suspended spices.
| Servings | Ingredient Adjustments | Pan Size | Cook Time |
|---|---|---|---|
| 12 People | Half the recipe; use 2 eggs | 8x8 inch square | 25 minutes |
| 24 People | Standard recipe as written | 9x13 inch pan | 30 minutes |
| 48 People | Double recipe; use 8 eggs | Two 9x13 pans | 35 minutes |
To ensure you get the absolute best results every single time, we need to look at how these ingredients interact. For instance, the ratio of four eggs to two cups of flour might seem high compared to a standard cake, but it is the secret to that heritage texture. For a more traditional custard style bake, you might look at my Libbys Pumpkin Pie recipe, but for these bars, we want that specific cake like lift.
Technical Specs for This Bake
When we talk about heritage baking, precision still matters. Following these numeric checkpoints ensures your batch looks exactly like the one in my kitchen. We are aiming for a total yield of 24 bars, which makes this the ideal choice for sharing at church socials or family reunions where you need to feed a crowd without spending all day at the stove.
| Feature | Specification |
|---|---|
| Oven Temperature | 350°F (175°C) |
| Bake Time | 30 minutes |
| Total Prep Time | 20 minutes |
| Yield | 24 squares |
| Pan Requirement | 9x13 inch rimmed |
The cooling phase is perhaps the most underrated part of the process. If you rush and frost these while they are even slightly warm, the butter in the cream cheese frosting will lose its structure and slide right off. Trust the process and let them reach room temperature on a wire rack.
Understanding the Ingredient Science
Every element in this recipe serves a functional purpose beyond just flavor. We aren't just adding pumpkin for the taste; it provides the bulk of the moisture and the structural acidity needed for the leavening agents to do their job properly.
| Ingredient | Science Role | Pro Secret |
|---|---|---|
| Pumpkin Puree | Provides moisture and acidity | Use 100% pure pumpkin, not pie filling, for the best spice control. |
| Vegetable Oil | Maintains soft texture | Avoid olive oil; a neutral oil like canola keeps the pumpkin flavor front and center. |
| Baking Soda | Chemical leavener | Sift this with the flour to avoid "soapy" pockets of unreacted powder. |
| Cream Cheese | Adds structural tang | Always use full fat blocks for a frosting that holds its shape. |
Using 1 ⅔ cups (335g) of granulated sugar provides more than just sweetness. Sugar is a tenderizer; it interferes with the development of gluten, which is why these bars stay so soft. When you whisk the sugar with the eggs and oil, you are creating the foundation of the entire bar's structure.
Gathering Your Essentials and Substitutes
To make these "deens pumpkin bars" properly, you need to start with high-quality basics. I always recommend using a good kosher salt because it enhances the warm notes of the cinnamon and ginger without making the bars taste "salty." If you find yourself missing an ingredient, don't worry most of these have reliable swaps that won't ruin the heritage feel of the dish.
- 4 large eggs: These provide the lift and structure.
- 1 ⅔ cups (335g) Granulated sugar: Provides sweetness and moisture retention.
- 1 cup (240ml) Vegetable oil: Ensures a tender, velvety crumb.
- 1 can (15 oz) Pumpkin puree: The heart of the recipe Why this? Puree adds moisture without the extra sugar of pie filling.
- 2 cups (250g) All purpose flour: The structural base of the bar.
- 2 tsp Baking powder & 1 tsp Baking soda: Our leavening powerhouses.
- 2 tsp Cinnamon, ½ tsp Ginger, ½ tsp Cloves: The classic spice trio Why this? Fresh spices ensure the flavor doesn't taste flat or dusty.
- 1 tsp Kosher salt: Sharpens all the other flavors.
- 8 oz Cream cheese & ½ cup Butter: The base for our velvet frosting.
- 2 cups Powdered sugar: Sifted to ensure a smooth finish.
- 1 tsp Pure vanilla extract: Adds depth to the frosting.
| Original Ingredient | Substitute | Why It Works |
|---|---|---|
| Vegetable Oil | Melted Coconut Oil | Similar fat content. Note: Adds a very slight tropical scent. |
| All Purpose Flour | Cup for-Cup GF Flour | High starch content mimics gluten well in moist sheet cakes. |
| Pumpkin Puree | Roasted Butternut Squash | Similar texture and sugar content when pureed smooth. |
If you are out of cloves, you can increase the cinnamon slightly, but that earthy bite of the cloves is what truly makes this a "paula deens pumpkin bars" style classic. It is that little bit of spice that cuts through the richness of the frosting.
Equipment for the Best Results
You don't need a high tech kitchen to master these bars, but a few specific tools will make your life much easier. I always suggest using a 9x13 inch metal baking pan rather than glass if you have the choice. Metal conducts heat more evenly and gives you those nice, clean edges that look so professional when sliced.
- Electric Hand Mixer: Essential for getting the frosting to that "cloud like" consistency. A whisk just won't incorporate enough air.
- Large Mixing Bowl: You need plenty of room to fold the dry ingredients without knocking out all the air you've whisked into the eggs.
- Parchment Paper: Don't skip this. Leaving an overhang on the sides allows you to lift the entire block of bars out for perfectly clean cuts.
- Sifter or Fine Mesh Strainer: Sifting the flour and spices ensures there are no lumps of baking soda, which can taste bitter.
- Offset Spatula: This is the secret to getting that perfectly level, professional layer of frosting across the top.
Using a kitchen scale to measure your flour (250g) is a habit I picked up years ago that changed my baking game. It is so easy to accidentally pack too much flour into a measuring cup, which is the number one reason pumpkin bars end up dry or heavy instead of tender.
Golden Steps for the Bake

- Prep the station. Preheat your oven to 350°F (175°C). Line a 9x13 inch baking pan with parchment paper, leaving an overhang on the sides. Note: This allows for easy removal later.
- Emulsify the wet base. In a large mixing bowl, whisk together the 4 eggs, 1 ⅔ cups sugar, 1 cup vegetable oil, and 15 oz pumpkin puree until the mixture is glossy and smooth.
- Incorporate the dry aromatics. Sift the 2 cups flour, 2 tsp baking powder, 1 tsp baking soda, 2 tsp cinnamon, ½ tsp ginger, ½ tsp cloves, and 1 tsp salt directly over the wet mixture.
- Fold gently. Use a spatula to fold the ingredients together until no streaks of flour remain. Do not over mix, or the bars will become tough.
- Level and bake. Pour the batter into the prepared pan and level the top. Bake for 25–30 minutes until the edges pull away from the pan and a toothpick comes out clean.
- Cool completely. Transfer the pan to a wire rack. It must be room temperature before you even think about frosting.
- Whip the butter and cheese. Use an electric mixer to beat the 8 oz cream cheese and ½ cup butter until pale and fluffy (about 3 minutes).
- Finish the frosting. Gradually add the 2 cups powdered sugar and 1 tsp vanilla, beating on high until it looks like a soft cloud.
- Frost and slice. Spread the frosting in an even layer over the cooled bars and slice into 24 squares.
Solving Common Baking Problems
Even the most seasoned home cooks run into issues now and then. The most common complaint with pumpkin bars is usually related to the texture either they are too wet and "gummy" in the middle, or they are surprisingly dry.
Usually, this comes down to either the measurement of the flour or the freshness of the leavening agents.
Why Your Bars Are Spongy
If your bars feel more like a sponge than a tender cake, you likely over mixed the batter. When you stir flour into wet ingredients, gluten begins to develop. In a bread recipe, we want that! In a pumpkin bar, we want to minimize it. Only fold until you see the last streak of flour disappear.
What if the Frosting Is Runny
Runny frosting usually happens if the butter or cream cheese was too warm or if you added the sugar too quickly. To fix this, you can chill the frosting for 15 minutes in the fridge and then beat it again. If it's still too thin, add another ¼ cup of powdered sugar to help stabilize it.
| Problem | Root Cause | Solution |
|---|---|---|
| Sinking in the center | Underbaked or opened oven too early | Bake until the toothpick is completely clean; don't peek before 20 mins. |
| Dry, crumbly texture | Too much flour or overbaked | Weigh your flour (250g) and check doneness at 25 minutes. |
| Grainy frosting | Powdered sugar wasn't sifted | Always sift your sugar to remove the tiny hard clumps before mixing. |
Common Mistakes Checklist
- ✓ Ensure your eggs are at room temperature for better emulsification.
- ✓ Use full fat brick cream cheese, not the spreadable kind from a tub.
- ✓ Pat the bottom of the pan on the counter once before baking to release large air bubbles.
- ✓ Let the bars cool for at least 1 hour before frosting to prevent melting.
- ✓ Use a hot knife (dipped in warm water and wiped dry) for the cleanest slices.
Adjusting Batches for Large Crowds
Scaling this recipe is quite simple because it is baked in a standard sheet pan. If you need to make a massive amount for a big heritage celebration, I recommend making separate batches rather than trying to triple the recipe in one massive bowl. This ensures the leavening agents are distributed evenly.
- To double (48 bars): Bake in two separate 9x13 pans. Do not try to bake one double thick batch in a deep pan, as the outside will burn before the middle sets.
- To halve (12 bars): Use an 8x8 inch square pan. Use 2 eggs and exactly half of all other ingredients. The bake time will usually stay around 25 minutes, but start checking at 20.
- For the frosting: When doubling, you only need to increase the salt and spices to 1.5x to avoid overpowering the palate, but keep the sugar and fat ratios at 2x.
When you are scaling up, remember that the mixing time might increase slightly, but the goal remains the same: a glossy, smooth batter that hasn't been overworked.
Creative Variations for Heritage Flavors
While the classic "deens pumpkin bars" are a masterpiece on their own, there are ways to put your own spin on them without losing that cozy, traditional feel. If you love these warm spices, you'll find similar heritage flavors in my Honey Bun Cake.
- The Nutty Crunch: Fold in 1 cup of chopped toasted pecans or walnuts to the batter before baking for a savory contrast.
- Brown Butter Upgrade: Instead of softened butter in the frosting, use cooled brown butter for a deep, toffee like flavor profile.
- Maple Twist: Replace the vanilla extract in the frosting with 1 tablespoon of pure maple syrup.
| Method | Time | Texture | Best For |
|---|---|---|---|
| Classic Sheet | 30 mins | Soft and uniform | Large crowds |
| Muffin Tin | 18 mins | Slightly crisper edges | Individual portions |
| Layer Cake | 35 mins | Denser, sturdy | Special occasions |
Adding a tablespoon of dark molasses to the wet ingredients can also deepen the color and add a subtle ginger snap undertone that feels very "old world" and sophisticated.
Myths About Soft Sheet Cakes
One common misconception is that you must use butter in the cake batter for it to taste "homemade." In reality, oil based cakes often have a superior texture in the world of pumpkin bakes because pumpkin is quite heavy. Oil coats the flour proteins more efficiently, ensuring that every bite is moist.
Another myth is that you can't freeze cream cheese frosting. While some delicate frostings break, this specific cream cheese and butter ratio freezes remarkably well. The key is to thaw it slowly in the refrigerator so the emulsion stays stable.
Finally, many people think "pumpkin pie spice" is exactly the same as using individual spices. While it's a fine shortcut, using individual cinnamon, ginger, and cloves allows you to adjust the "heat" of the ginger or the "depth" of the cloves to your specific heritage preference.
Storage and Zero Waste Tips
These bars actually taste better on the second day. As they sit, the moisture from the pumpkin and the oils from the spices "bloom," creating a more cohesive and deep flavor.
- Fridge: Store in an airtight container for up to 5 days. Because of the cream cheese frosting, they must stay refrigerated.
- Freezer: You can freeze the unfrosted bars for up to 3 months. If frosted, flash freeze them on a tray for an hour until the frosting is hard, then wrap in plastic and foil.
- Zero Waste: If you have a little bit of pumpkin puree left in the can, don't throw it out! It's fantastic stirred into morning oatmeal, mixed into dog treats, or used as a binder in a batch of homemade granola bars. You can even freeze leftover puree in an ice cube tray for future use.
Slicing for Professional Presentation
If you want those perfectly sharp, clean edges that look like they came from a high end bakery, the secret is all in the temperature. Chill the frosted bars for at least 30 minutes before slicing. This firms up the frosting so it doesn't drag as the knife passes through.
I like to use a long, thin chef's knife. Between every single cut, wipe the blade completely clean with a damp cloth. It takes a little extra time, but the result is a platter of 24 perfectly uniform squares where the orange cake and white frosting are distinct and beautiful.
For a final heritage touch, you can lightly dust the top with a tiny pinch of extra cinnamon or place a single toasted pecan half in the center of each square. It signals to your guests exactly what flavors they are about to enjoy.
These little bars aren't just a dessert; they are a piece of kitchen history that brings people together, one spiced, velvety bite at a time.

Recipe FAQs
Can I use pumpkin pie filling instead of plain pumpkin puree?
No, avoid using pre-mixed pumpkin pie filling. It contains added sugar and spices that will throw off the chemistry of the bars, making them overly sweet and mushy.
How to ensure the cream cheese frosting doesn't melt when applied?
Cool the bars completely to room temperature before frosting. If you apply the frosting while the bars are still warm, the butter and cream cheese will lose their structure, resulting in a runny finish instead of a cloud like texture.
Is it true I can use a stand mixer for the entire batter?
No, this is a common misconception. Using an electric mixer for the dry ingredients often leads to over mixing, which develops too much gluten and creates a tough, bread like texture rather than a tender bar.
How to get clean, professional looking slices?
Dip your knife in warm water and wipe it dry between every cut. The heat from the blade slices through the frosting cleanly without dragging it, a technique that also helps when portioning our high protein salad for meal prep.
Should I grease the pan if I am using parchment paper?
No, it is unnecessary if the parchment paper is positioned correctly. By leaving an overhang on the sides of your 9x13 pan, you create handles that make lifting the cooled bars out for slicing simple and clean.
How to tell if the pumpkin bars are perfectly baked?
Check that the edges are pulling away from the sides of the pan and a toothpick comes out clean. Relying on these visual and physical cues ensures the center is set without drying out the edges, similar to how you gauge doneness in other baked goods.
Is it possible to freeze these bars once frosted?
Yes, provided you flash freeze them first. Place the frosted bars on a tray in the freezer for one hour until the frosting is firm, then wrap them tightly in plastic and foil to prevent freezer burn for up to three months.
Classic Pumpkin Bars
Ingredients:
Instructions:
Nutrition Facts:
| Calories | 295 kcal |
|---|---|
| Protein | 2.8 g |
| Fat | 17.1 g |
| Carbs | 33.8 g |
| Fiber | 0.8 g |
| Sugar | 24.5 g |
| Sodium | 221 mg |
