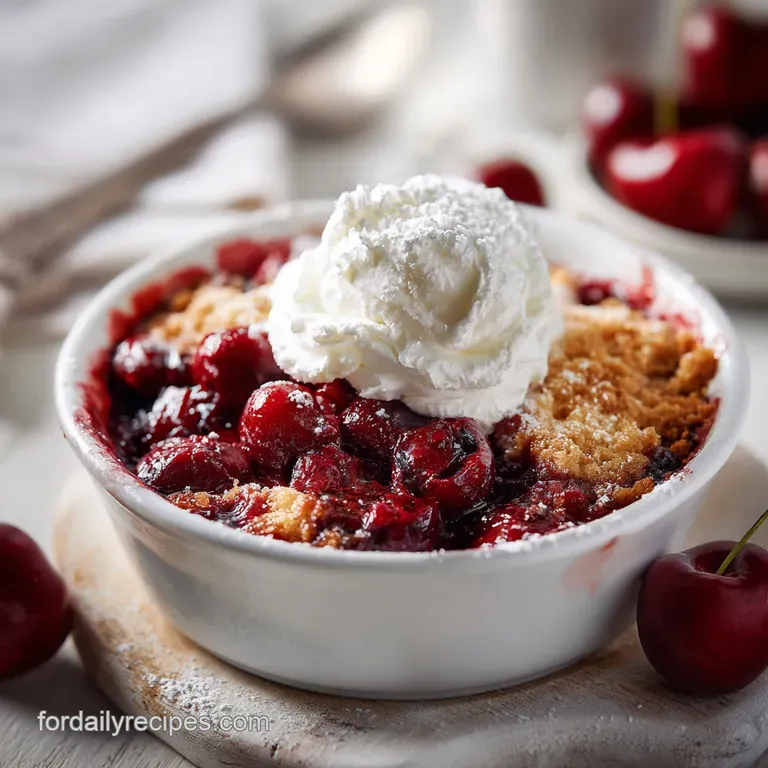
3 Ingredient Cherry Dump Cake with Whipped Cream

- Perfect 3 Ingredient Cherry Dump Cake Recipe
- How the Butter Makes the Crust
- Vital Specs for Success
- Essential Component Breakdown
- Best Tools for Easy Baking
- Step-by-Step Instructions
- Fixes for Common Problems
- Clever Flavor Swaps
- Storage and Freshness Tips
- Delicious Pairing Suggestions
- Kitchen Myths Debunked
- Recipe FAQs
- 📝 Recipe Card
Perfect 3 Ingredient Cherry Dump Cake Recipe
Have you ever wondered how a dessert that requires zero stirring and only five minutes of prep can actually taste like a professional cobbler? It sounds like a kitchen myth, but the logic is surprisingly solid once you see it in action.
Discover how to make a simple yet delicious 3 ingredient cherry dump cake topped with fluffy whipped cream. It is the ultimate shortcut for those nights when the clock is ticking and your energy is low, but the craving for something warm and bubbly is high.
We are not talking about a traditional cake with a fine crumb here. This is something entirely different, a hybrid between a buttery biscuit topping and a fruit preserve. The magic happens when the butter melts down through the dry powder, creating a texture that is part soft cookie and part golden crust.
It is the kind of dish that makes people think you spent an hour over a hot stove when you really just spent five minutes opening cans and slicing butter.
You can expect a contrast of temperatures and textures that is truly addictive. The bottom layer is a thick, tart, and jammy cherry filling that stays molten hot under a blanket of sweet, buttery cake mix.
When you add that cold, velvety dollop of homemade whipped cream on top, it starts to melt into the crevices, creating a creamy sauce that balances the sweetness of the fruit. This is honest, no fuss baking at its most efficient, and it never fails to impress a crowd.
How the Butter Makes the Crust
Most people assume you have to mix ingredients to get a cake, but in this case, the lack of mixing is exactly what creates the unique texture. As the dish heats up in the 175°C oven, the juices from the 42 oz of cherry pie filling begin to bubble and release steam.
This moisture rises into the dry yellow cake mix from below, while the 3/4 cup of thinly sliced butter melts into it from above.
The fat in the butter hydrates the starch in the cake mix without developing gluten, which is why it stays tender rather than becoming bread like. Because we don't stir it, the sections where the butter and fruit juice meet the powder create a "shatter" effect on the surface.
You get these little pockets of crisp, golden brown goodness that protect the soft, steamed cake underneath. It is a simple matter of controlled hydration and fat distribution.
| Cooking Method | Time | Texture Result | Best For |
|---|---|---|---|
| Standard Oven | 45 minutes | Crispy, golden, "shatter" top | Achieving the classic crust |
| Stovetop (Dutch Oven) | 35-40 minutes | Softer, dumpling style top | Camping or no oven days |
| Slow Cooker | 3-4 hours | Uniformly soft and pudding like | Hands off party prep |
If you are a fan of textures that lean more toward the flaky side, you might also enjoy making a 3 Ingredient Biscuit. Just like this cake, it relies on the simplicity of high-quality fats to do the heavy lifting for the structure. The interplay between the fat and the flour is what dictates whether your dessert is a success or a soggy mess, so sticking to the chilled butter method is non negotiable here.
Vital Specs for Success
When you are racing against a deadline or just want to get out of the kitchen quickly, having exact checkpoints is a lifesaver. This recipe is designed for a 9x13-inch baking dish, which provides the necessary surface area for the butter to saturate the cake mix properly.
If the dish is too small, the layer of dry mix will be too thick, and you will end up with pockets of raw flour that never get hydrated.
The timing is also incredibly specific to ensure the fruit filling reaches a safe and appetizing temperature of around 95°C. At this point, the starches in the pie filling have fully thickened, so the sauce doesn't run all over the plate.
You want to see the edges frantically bubbling and the top reaching a deep mahogany gold before you even think about pulling it out of the oven.
| Component | Science Role | Pro Secret |
|---|---|---|
| Cherry Pie Filling | Provides base moisture and acidity | Spread it right to the corners to prevent the cake mix from burning on the glass. |
| Yellow Cake Mix | Acts as the structural starch and sweetener | Sift or whisk the dry mix in the bag first to remove lumps before "dumping." |
| Unsalted Butter | Creates the "shatter" crust and adds richness | Use a vegetable peeler to get paper thin slices for 100% surface coverage. |
The butter acts as the sealant for the entire operation. If you leave large gaps between the butter slices, the cake mix will remain dry and powdery, which is the most common complaint with this style of baking.
Think of it as tiling a floor you want every inch of that dry mix to have a "tile" of butter sitting on top of it. This ensures that as it melts, it spreads horizontally and soaks every single grain of the mix.
Essential Component Breakdown
Even though we only use a handful of items, the quality of each one matters immensely. Since there is nowhere for bad flavors to hide, I always suggest using a reputable brand of cherry pie filling. You want 42 oz total, which is usually two standard cans.
Make sure the labels say "pie filling" and not just "canned cherries," as the filling includes the necessary thickeners and sweeteners to create that jammy base.
For the topping, a standard 15.25 oz box of yellow cake mix provides a neutral, vanilla forward flavor that complements the tartness of the cherries. White cake mix works too, but yellow mix usually contains more fat (in the form of egg yolks in the powder), which helps with the browning process.
The 3/4 cup of unsalted butter should be cold straight from the fridge so you can slice it thinly without it turning into a greasy mess in your hands.
- 42 oz cherry pie filling: The foundation of the dish. Why this? Provides the steam needed to cook the cake mix from the bottom up.
- 15.25 oz yellow cake mix: The structural topping. Why this? Pre measured leavening and sugar ensure a consistent rise every time.
- 3/4 cup unsalted butter: The fat source. Why this? Salted butter can make the topping too savory; unsalted offers pure creamy flavor.
- 1 cup heavy whipping cream: For the garnish. Why this? High fat content (36%+) is required for stable, stiff peaks.
- 2 tablespoons powdered sugar: For the cream. Why this? Dissolves instantly without the grittiness of granulated sugar.
- 1 teaspoon vanilla extract: For the finish. Why this? Rounds out the flavors and cuts through the richness of the cream.
| Original Ingredient | Substitute | Why It Works |
|---|---|---|
| Yellow Cake Mix | Chocolate Cake Mix | Adds a "Black Forest" vibe. Note: Result is much richer and heavier. |
| Unsalted Butter | Vegan Butter Sticks | Similar melting point. Note: Ensure it is a stick form, not a soft tub spread. |
| Heavy Cream | Coconut Cream (Chilled) | Whips into a thick foam. Note: Adds a distinct tropical flavor to the dish. |
If you find yourself wanting to experiment with the flavors, adding a splash of Blueberry Syrup to the whipped cream can bring a bright, fruity acidity that cuts through the heavy butter of the cake. It is a quick way to make a three ingredient dish feel like a gourmet creation without adding more than thirty seconds to your prep time.
Best Tools for Easy Baking
Efficiency is all about having the right gear so you aren't searching through drawers while the oven is preheating. For this recipe, the most important tool is actually a chilled metal bowl for your whipped cream.
A cold bowl helps the fat molecules in the cream stay solid while you incorporate air, which means you get stiff peaks in about half the time.
You also need a reliable 9x13-inch baking dish. I prefer glass or ceramic because they retain heat well and allow you to see if the fruit is bubbling at the very bottom. A simple hand mixer is plenty for the cream, and a sharp knife or a mandoline (if you are feeling brave) will make quick work of that butter.
This is a minimal tool recipe, so don't overcomplicate it with fancy gadgets.
- 9x13-inch Baking Dish: Provides the perfect surface area for even cooking.
- Chilled Metal Bowl: Essential for stable whipped cream.
- Hand Mixer: Much faster than a whisk for the cream.
- Offset Spatula: Great for leveling the cake mix without packing it down.
- Sharp Chef’s Knife: To get those vital thin slices of cold butter.
step-by-step Instructions
- Prep the Base. Preheat your oven to 350°F (175°C). Pour both cans of cherry pie filling into an ungreased 9x13-inch baking dish. Note: Using an ungreased dish is fine because the fruit filling won't stick once it starts bubbling.
- Level the Fruit. Use a spatula to spread the cherries into an even, level layer, ensuring the corners are filled. Do this until the bottom is completely covered.
- Apply the Powder. Sprinkle the dry yellow cake mix evenly over the cherries. Ensure you do not stir the mixture.Note: Stirring will result in a heavy, doughy mess instead of a flaky crust.
- Smooth the Surface. Use the back of a spoon to gently level the powder so no large fruit craters are visible. This creates a flat stage for the butter.
- Slice the Fat. Arrange the thin slices of chilled butter in a grid pattern across the top of the cake mix. Aim for maximum coverage to saturate the powder.
- Bake the Cake. Place in the center of the oven and bake for 45 minutes until the topping is a deep mahogany gold.
- Check the Bubbles. Look for the fruit filling bubbling vigorously around the edges of the dish. Note: This signifies the fruit is hot enough to have hydrated the bottom of the cake mix.
- Whip the Cream. While the cake bakes, combine heavy whipping cream, powdered sugar, and vanilla extract in a chilled metal bowl. Beat until stiff peaks form.
- The Cooling Phase. Let the cake sit for at least 10 minutes after removing it from the oven. This allows the sauce to thicken as it cools.
- Serve and Enjoy. Scoop a generous portion into a bowl and serve a dollop of the whipped cream over the warm cake. Enjoy the contrast of hot fruit and cold cream.
Fixes for Common Problems
Even the simplest recipes can have a few hiccups if you aren't careful. The most common issue with any dump cake is the dreaded "flour patch" those spots where you bite into a mouthful of dry, powdery cake mix that never met any butter or juice.
This usually happens because the butter slices were too thick or too far apart, or the oven had a cold spot.
Another concern is the "soggy middle." If you pull the cake out too early, the steam from the cherries hasn't had enough time to cook the center of the cake mix layer. You are looking for a specific color change; a pale yellow topping means it is underdone.
It needs to be a rich, golden brown to ensure the texture has shifted from "powder" to "crust."
To Fix Dry Flour Spots
If you pull the cake out and see white patches, don't panic. You can gently press those spots down into the bubbling fruit juices with a spoon and pop the dish back into the oven for another five minutes. The liquid will quickly hydrate the dry mix.
In the future, try grating your butter with a cheese grater while it's frozen; this creates a "snow" of butter that covers every millimeter of the mix.
To Prevent a Soggy Bottom
A soggy bottom usually happens if the pie filling is too watery or if you used a dish that was too small, making the fruit layer too deep. Ensure you are using exactly 42 oz of filling in a 9x13-inch pan.
If you want to be extra safe, you can sprinkle a tablespoon of quick cooking oats or breadcrumbs over the fruit before adding the cake mix to help absorb excess moisture.
| Problem | Root Cause | Solution |
|---|---|---|
| Powdery patches on top | Butter was not distributed evenly. | Use more, thinner slices of butter to cover the entire surface. |
| Topping is too soft/doughy | Cake was stirred or underbaked. | Never stir the layers; bake until the top is dark golden and firm. |
| Filling is too runny | Cake was served immediately while hot. | Let the dish rest for 10-15 minutes to allow starches to set. |
Chef Tip: Freeze your butter for 10 minutes before slicing. It makes it much easier to get those paper thin, uniform pieces that are essential for full coverage.
Common Mistakes Checklist:
- ✓ Never stir the cake mix into the fruit; the layers must remain separate.
- ✓ Ensure the oven is fully preheated to 175°C before the dish goes in.
- ✓ Use chilled butter, not melted; melted butter runs too quickly and leaves dry spots.
- ✓ Don't skip the resting time; a 10 minute rest is the difference between a puddle and a plate.
- ✓ Check that your cake mix isn't expired, as the leavening agents lose power over time.
Clever Flavor Swaps
One of the best things about this 3 ingredient cherry dump cake recipe with whipped cream is how adaptable it is. Once you have the basic ratio down (fruit + mix + fat), you can play with the components.
If you are a fan of darker, more complex flavors, swapping the yellow cake mix for a devil's food or chocolate mix creates a decadent Black Forest version that feels much more expensive than it actually is.
For those who find the standard recipe a bit too sweet, you can add a "tart citrus kick" by zestng a whole lime or lemon directly over the cherry filling before adding the cake mix. The acidity brightens the heavy syrup in the pie filling.
You can also experiment with the fat; while butter is king, some people swear by using a lemon lime soda poured over the top instead of butter, though the texture will be more like a soft sponge and less like a crisp cobbler.
For a Nutty Crunch
If you want to add some texture, sprinkle half a cup of sliced almonds or chopped pecans over the butter layer before baking. The fat from the butter will essentially "fry" the nuts as the cake bakes, giving you a toasted, crunchy element that pairs beautifully with the soft cherries.
For a dairy-free Adaptation
You can easily make this dairy-free by using a vegan cake mix (many standard boxes are "accidentally" vegan) and substituting the butter with a plant based stick butter or chilled coconut oil. For the whipped cream, use a chilled can of full fat coconut milk.
Scoop out the solid cream from the top of the can and whip it with powdered sugar just like you would with heavy cream.
Decision Shortcut
- If you want a crispier top: Use 1/4 cup more butter and slice it even thinner.
- If you want a richer flavor: Add 1/2 teaspoon of almond extract to the cherry filling.
- If you want a lighter dessert: Serve with Greek yogurt instead of whipped cream to add a tangy contrast.
Storage and Freshness Tips
Leftover dump cake is a rare occurrence in my house, but if you do have some, it stores surprisingly well. The topping will lose its "shatter" crunch as it sits in the fridge and absorbs moisture from the fruit, but the flavor actually deepens.
It becomes more like a bread pudding the next day, which is delicious in its own right.
- Fridge: Store in an airtight container for up to 4 days.
- Freezer: You can freeze the baked cake for up to 3 months. Wrap it tightly in plastic wrap and then foil to prevent freezer burn.
- Reheating: For the best results, reheat in a 350°F (175°C) oven for 10-15 minutes to try and reclaim some of that top layer crispness. Avoid the microwave if possible, as it will make the topping rubbery.
- Zero Waste: If you have leftover whipped cream, don't toss it! Dollop it onto a parchment lined tray and freeze the mounds. Once frozen, pop them into a bag. They are perfect for dropping into a hot cup of coffee or cocoa.
Delicious Pairing Suggestions
While the whipped cream is the classic partner for this dish, you don't have to stop there. The warmth of the cherries calls for something that can stand up to its intensity. If you are serving this for a weekend brunch (yes, cake for breakfast is allowed), a side of salty bacon or breakfast sausage provides a fantastic savory counterpoint to the sugary cherries.
If you are looking for another classic dessert to round out a party spread, my Snickerdoodle Cookies offer a nice cinnamon sugar contrast to the fruit heavy dump cake. Both recipes are crowd pleasers that don't require you to be a professional pastry chef to execute perfectly.
The Classic Contrast
There is a reason why vanilla is the go to pairing. Whether it is the vanilla extract in your whipped cream or a scoop of high-quality vanilla bean ice cream, the floral notes of the vanilla soften the sharp tartness of the cherries.
If you want to get fancy, try a drizzle of dark chocolate sauce over the whipped cream right before serving.
The Brunch Pivot
To turn this into a brunch friendly dish, serve it alongside a bowl of fresh berries and a sharp, aged cheddar cheese. It might sound strange, but the "fruit and cheese" pairing is a timeless combination that works perfectly with the buttery, biscuit like topping of the cake.
The saltiness of the cheese cuts through the sugar and makes the whole experience feel much more sophisticated.
Kitchen Myths Debunked
One common myth is that you must melt the butter before pouring it over the cake mix to ensure it covers everything. In reality, melting the butter causes it to soak into the powder too quickly in some spots while leaving others dry.
Slicing cold butter allows it to melt slowly as the oven heats up, giving the steam from the fruit time to rise and meet the fat halfway, resulting in a much more even "bake."
Another misconception is that dump cakes are "unhealthy" because they use boxed mix. While they are certainly a treat, you have total control over the quality of the ingredients you add.
By choosing a high-quality butter and making your own whipped cream from scratch with real vanilla, you are avoiding the preservatives and artificial flavors found in canned whipped toppings or margarine.
Finally, many people think you can't overbake a dump cake because the fruit keeps it moist. This is false. If you leave it in too long, the sugars in the fruit filling will begin to scorch and turn bitter, especially around the edges of the dish.
Stick to the 45 minute mark and trust your eyes once it is mahogany gold and bubbling, it is time to get it out of the heat.

Recipe FAQs
Do I need to grease the baking dish?
No, you do not need to grease the pan. The fruit filling provides enough moisture that the cake will not stick to an ungreased 9x13-inch baking dish.
Why is my cake mix still powdery on top?
You likely did not provide enough butter coverage. Ensure you place thin slices of chilled butter in a grid across the entire surface so all the dry mix becomes saturated during the 45-minute bake time.
How to ensure the topping reaches that deep mahogany gold color?
Bake the cake for the full 45 minutes at 350°F (175°C). If you enjoyed mastering the visual cues of golden pastry here, you will notice the cake is ready when the edges are bubbling and the butter soaked mix turns a rich, deep brown.
Is it true I should stir the cake mix into the cherry filling?
No, this is a common misconception. Stirring prevents the cake mix from properly dissolving into the juices and ruins the texture; you must leave the dry layer undisturbed on top of the cherries.
How to store leftovers properly?
Place leftovers in an airtight container in the refrigerator for up to 4 days. While the crisp topping will soften as it absorbs moisture, the flavor actually deepens, resulting in a delicious, pudding like consistency.
Can I freeze this cake after baking?
Yes, you can freeze it for up to 3 months. Wrap the cake tightly in plastic wrap followed by a layer of foil to prevent freezer burn before placing it in the freezer.
How to make the perfect whipped cream topping?
Use a chilled metal bowl to whip the heavy cream, powdered sugar, and vanilla extract. Beat the mixture with a hand mixer until stiff peaks form to ensure the cream is stable enough to serve over the warm cake.
3 Ingredient Cherry Dump Cake

Ingredients:
Instructions:
Nutrition Facts:
| Calories | 411 calories |
|---|---|
| Protein | 2g |
| Fat | 22g |
| Carbs | 53g |
| Fiber | 1g |
| Sugar | 38g |
| Sodium | 295mg |
