Limoncello: the Traditional Amalfi Gold Homemade Recipe
- The Alchemy of Limoncello: Capturing the Amalfi Sun
- Ingredients You Need for Limoncello
- Crafting Limoncello: A Four-Step Maceration Process
- Expert Techniques and Avoiding Limoncello Pitfalls
- Preserving Your Batch: Long-Term Limoncello Storage
- Beyond the Shot Glass: Creative Ways to Serve Limoncello
- Recipe FAQs
- 📝 Recipe Card
The Alchemy of Limoncello: Capturing the Amalfi Sun
I’m convinced that the first batch of real, homemade Limoncello is proof of kitchen magic. When you peel those heavy, fragrant lemons, your whole kitchen smells like pure sunshine. That sharp, clean zest, suspended in a liquid so vibrant it looks like melted gold?
Nothing beats the sensory experience of shaking that jar and watching the spirit slowly turn brilliant yellow.
Seriously, this recipe is a total game changer for entertaining. It looks incredibly impressive, tastes leagues better than anything you can buy, and the active preparation time is less than 30 minutes.
The waiting part is the hard bit, I know, but think of this as a super cheap luxury item you make months ahead of time.
This isn't just about mixing booze and sugar, though; it’s about a very specific technique. We are going to lock in the intense citrus oils while leaving all the bitter nonsense behind. Trust me, once you nail the peel, you’re basically done. Let’s get this incredible Italian digestivo started.
The Heritage of Limoncello: A Classic Italian Digestivo
Limoncello, traditionally sipped ice-cold after a huge Italian meal, serves a simple but essential purpose: settling your stomach. It acts as a digestivo, a perfect way to cap off rich pasta or heavy roasts.
Many regions claim its origin, from Capri to Sorrento, but everyone agrees the best batches use those incredible, massive, fragrant Italian lemons.
For centuries, this wasn’t just a fancy liqueur; it was a practical application of excess citrus. That intense lemon flavour, coupled with the clean, fiery alcohol, cleanses the palate beautifully.
Don't skip this critical end-of-meal ritual, especially if you’re trying to impress guests with authentic flair.
Why Homemade Always Triumphs Over store-bought Quality
You might think, "Why bother waiting a month when I can grab a bottle off the shelf?" I get it, but hear me out. Commercial Limoncello usually uses inferior, pre-mixed lemon flavouring or less expensive, lower proof alcohol. Homemade Limoncello uses the purest essential oils directly from the fruit.
When you use high proof spirit, you create an aggressive solvent that pulls out far more flavor compounds than any ready-made version. Plus, you control the balance of sweetness and proof. I like mine potent and slightly less sugary than the sticky stuff they sell in tourist shops.
Time Commitment and Preparation Overview
People look at the total time (5 7 weeks!) and panic, but 99% of that is just waiting. The preparation is straightforward: peel, pour, seal, shake, and wait. The only real active work happens during the peeling stage and later when you boil the simple syrup.
Chef's Note: Mark your calendar immediately after bottling! The flavor profile changes dramatically between Week 4 and Week 6 of the infusion. If you can wait the full six weeks, the result is exponentially better.
Ingredients You Need for Limoncello
Main Ingredients Notes
The fewer ingredients there are, the more the quality matters. This recipe calls for just three things, so you need the best version of each. I made a huge mistake on my first batch by using waxy grocery store lemons; it tasted like sadness and furniture polish.
- Lemons: They must be organic or untreated. If they have wax or pesticides, that stuff goes straight into your liqueur. Look for bright, thick skinned lemons they have more zest and oil.
- Neutral Grain Spirit (190 Proof): This is the secret weapon. Yes, it’s intense, but it is necessary for maximum oil extraction. Think of it as a flavor sponge. You dilute it significantly later, bringing the final proof down to a comfortable 60 70 proof range.
- Granulated Sugar & Water: Simple syrup. Use superfine sugar if you have it, as it dissolves quickly, but regular granulated is fine. Use filtered water if your tap water tastes strongly of chlorine.
Easy Substitutions and Swaps
If you can't find the traditional ingredients, don't worry. There are viable options, though they will slightly alter the final proof and flavour complexity.
| Ingredient | Substitution Idea | Notes |
|---|---|---|
| 190 Proof Spirit | 100 Proof Vodka (50% ABV) | Increase infusion time to 8+ weeks and slightly reduce syrup volume for adequate strength. |
| Lemons | high-quality organic oranges (Arancello) | Use slightly fewer oranges (8 10 large ones); the steps are identical. |
| Granulated Sugar | Cane Sugar or Turbinado Sugar | Will add a slight caramel colour and deeper flavour; use slightly less, as these are often sweeter. |
Essential Equipment
You don't need a fancy lab, just common sense and clean tools. Sterilize everything that touches the liquid, especially the bottles for Long Term storage. A large glass jar is non-negotiable for the infusion, as plastic can sometimes impart off-flavours when exposed to high proof alcohol.
Crafting Limoncello: A Four Step Maceration Process
Step 1: Preparing the Peel (Avoiding the Bitter Pith)
This is the most crucial 20 minutes of the entire process, so put on some good music and focus. Wash and dry your lemons meticulously. Using a vegetable peeler, strip the yellow zest off the fruit in long ribbons. You must avoid the white pith at all costs.
If you peel too deep, use a small paring knife to carefully scrape any white material away before dropping the zest into the jar.
Once all the peels are ready, place them immediately into your large glass infusion vessel. Then, pour the high proof spirit right over them. The spirit should cover the peels entirely.
Step 2: The Infusion Period: Monitoring the Golden Steep
Seal the jar tightly, then give it a serious, enthusiastic shake. Store the jar in a cool, dark place a cupboard works perfectly. Within an hour, you should already see the spirit start taking on a faint yellow hue. The high alcohol content is rapidly dissolving the essential oils from the peels.
For the first week, shake the jar every day to ensure maximum contact between the peels and the spirit. After that, once or twice a week is plenty. The goal is for the liquid to turn a deep, vibrant, almost neon yellow color , signifying that the oils have fully leeched into the alcohol.
Let it steep for 4 to 6 weeks.
Step 3: Crafting the Simple Syrup Dilution
After your patience has paid off (hopefully you waited the full six weeks!), it’s time to make the syrup. Combine the water and sugar in a saucepan and bring it just to a boil, stirring constantly until every single grain of sugar has dissolved. The mixture should be perfectly clear.
This is a critical temperature check: Remove the syrup from the heat and let it cool completely to room temperature. If you add hot syrup to the infused spirit, the sudden temperature shock can damage the delicate flavour compounds and potentially cloud the final product prematurely.
You want it cool, calm, and ready to mix.
Step 4: Straining, Combining, and Final Bottling
First, strain the infused spirit through a fine mesh sieve lined with cheesecloth or muslin into a clean bowl. Discard the lemon peels they have given their life for the cause. Next, slowly introduce the cooled simple syrup into the spirit, mixing gently with a spoon.
You will immediately notice the liquid turning cloudy; this is expected and beautiful.
Filter the Limoncello one final time for superior clarity. I always run mine through a paper coffee filter (it takes forever, but the polish is worth it). Funnel the golden liquid into your pre-sterilised bottles and seal them up tight. Place the bottles directly into the freezer now.
This is where the magic matures and prepares for serving.
Expert Techniques and Avoiding Limoncello Pitfalls
Troubleshooting the ‘Cloudy Effect’ (The Louche Phenomenon)
When you add water (via the syrup) to the high proof spirit, the lemon oils that were soluble in 190 proof alcohol suddenly become less soluble. They clump together, reflecting light, and making the liquid opaque. This is called louching and is totally normal and actually desired!
If your Limoncello doesn't turn cloudy when you add the syrup, it means you didn't extract enough lemon oil.
Reducing Bitterness: How to Fix Excessive Pith
If you taste your final batch and it's too bitter, you definitely included too much white pith during the peeling stage. Unfortunately, once the bitterness is extracted, it’s hard to remove. You have two options:
- Dilute: Add a little more simple syrup (1/4 cup at a time) to mask the bitterness.
- Mask: Add one split vanilla bean to one of your bottles and let it cure for another week in the freezer. The vanilla smooths out the rough edges beautifully.
Adjusting Strength: Dialing in the Final Proof
This recipe yields a Limoncello around 30% ABV (60 Proof), which is traditional. If you prefer a lighter, less intense version, you can dilute it further. Simply make another half batch of simple syrup (water and sugar) and slowly add it until you reach your desired taste.
Just remember that too much dilution might compromise its ability to stay liquid in the freezer.
Preserving Your Batch: Long Term Limoncello Storage
Optimal Temperature: Why Limoncello Lives in the Freezer
Limoncello is mandatory freezer food. The cold temperature enhances its viscosity, making it feel silky and luxurious on the tongue, and it dulls the aggressive heat of the alcohol. The high sugar and alcohol content mean it will never freeze solid.
Always serve Limoncello straight from the freezer, pouring it into chilled glasses.
Bottling Best Practices for Maximum Shelf Life
Always use glass bottles with airtight, non-reactive caps. Make sure they are sterilized using boiling water before you pour the Limoncello in. When stored correctly in a sealed bottle in the freezer, your Limoncello will easily last indefinitely .
However, I find the absolute peak flavour is usually within the first 12 18 months. After that, the vibrant yellow colour might start to fade slightly.
Classic Presentation: Ice-Cold Digestivo Etiquette
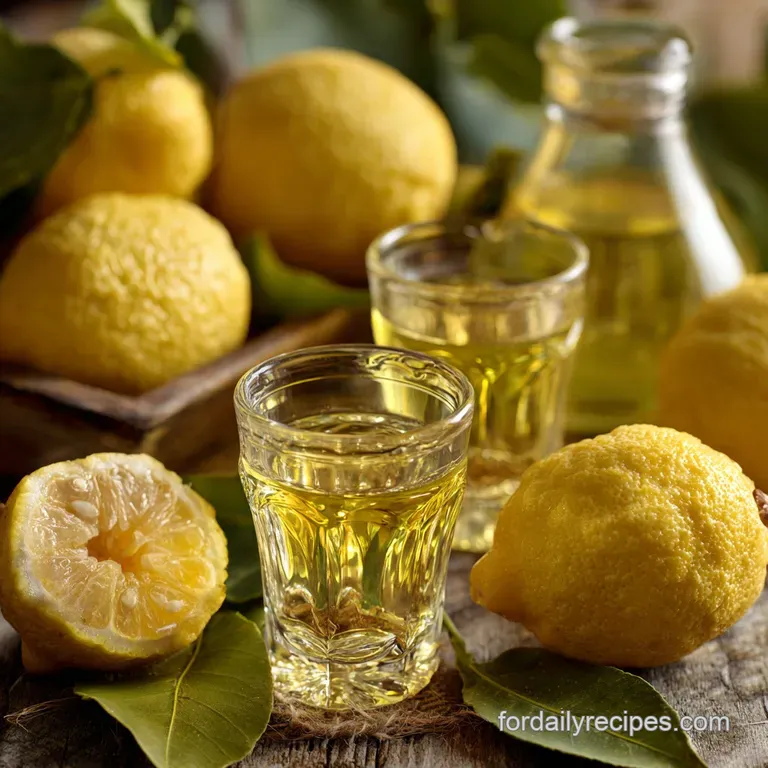
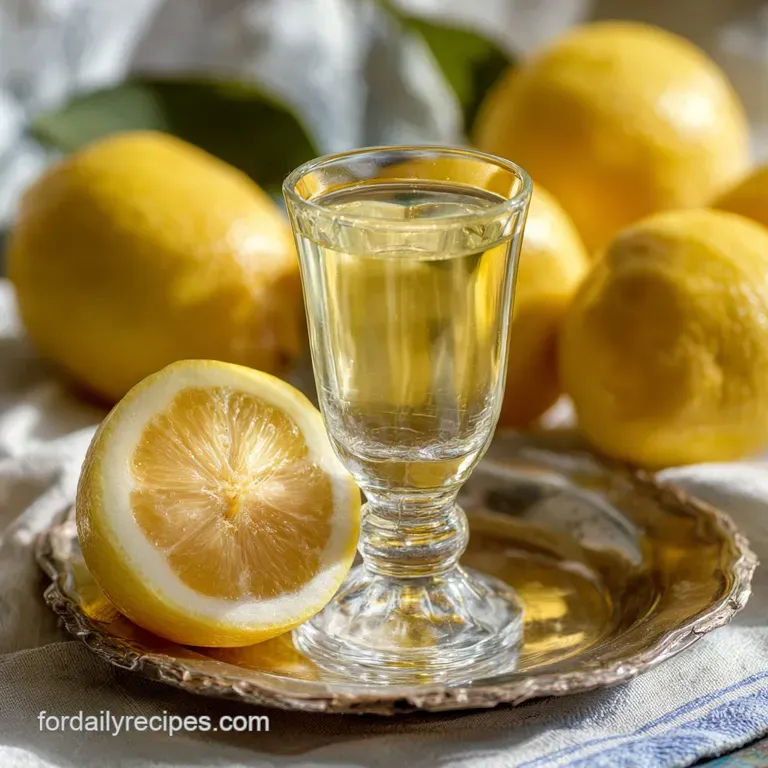
Don't use large glasses! Limoncello is strong and sweet. Serve it in tiny, elegant shot glasses or miniature liqueur glasses. The glasses should also be pulled directly from the freezer; a frosted rim is the ideal visual cue.
Serving it this way signals that you know exactly what you’re doing and honours the tradition of the Amalfi Coast.
Beyond the Shot Glass: Creative Ways to Serve Limoncello
This bright, zesty spirit is incredibly versatile. Don't limit yourself to just a cold shot after dinner! Try swapping it into classic cocktails for an immediate citrus upgrade.
- Limoncello Martini: Use it instead of dry vermouth in a vodka martini recipe for a bright, dessert like twist.
- The Limoncello Spritz: My favourite summer move. Mix 2 parts Prosecco, 1 part Limoncello, and a splash of sparkling water over lots of ice. Garnish with a big sprig of mint. It's brilliant.
- Drizzle Dessert: Warm it slightly and drizzle it over fresh strawberries or pound cake. The combination of sweet alcohol and tart fruit is fantastic.

Recipe FAQs
What type of alcohol is best for Limoncello infusion?
You must use a high proof neutral spirit (100 proof/50% ABV minimum, ideally 190 proof/95% ABV grain alcohol). The high alcohol content is crucial for efficiently extracting the maximum amount of essential oils and flavor from the lemon zest.
Lower proofs may result in a much weaker, less intensely flavored final product.
Why is my Limoncello cloudy or opaque after adding the simple syrup?
This phenomenon is perfectly normal and is known as the ‘louche’ effect. When water from the simple syrup is introduced to the high proof alcohol, the dissolved essential oils emulsify and create the characteristic milky appearance.
This cloudiness is a positive indicator that you successfully extracted the oils from the lemon rind.
How important is it to avoid the white pith when zesting the lemons?
It is absolutely critical to avoid the pith at all costs. The pith contains bitter compounds that will leach into the alcohol during the infusion process, resulting in a harsh and unpalatable Limoncello. Use a microplane or vegetable peeler carefully to capture only the bright yellow zest.
How should I store the finished Limoncello, and how long does it last?
Limoncello should be stored in airtight bottles and kept in the freezer, as it is traditionally served straight from the ice. Due to the high sugar and alcohol content, the liqueur will not freeze solid. It can be safely stored indefinitely, although its peak freshness and flavor are best enjoyed within 1 to 2 years.
I infused the mixture for weeks, but the resulting color is very pale. What happened?
A pale color usually indicates that the zest was not steeped long enough, or that the lemons used were low in essential oil content. Ensure the zest infuses for the full recommended 4 6 weeks to allow the essential oil pigments to fully dissolve into the spirit.
If necessary, you can always strain out the old zest and infuse a second batch of fresh zest into the same alcohol for a few weeks to deepen the color and flavor.
My finished Limoncello tastes too sweet/syrupy. How can I adjust the flavor?
If the final product is too sweet, you can easily dilute it with a little more unflavored, high proof alcohol to cut the sugar concentration. Alternatively, try adding a small amount of filtered water incrementally until the balance between the tartness, alcohol, and sweetness is perfect for your palate.
Always make adjustments gradually.
Traditional Homemade Limoncello Recipe

Ingredients:
Instructions:
Nutrition Facts:
| Calories | 180 kcal |
|---|---|
| Fat | 0 g |
| Fiber | 0 g |
