Fork Tender Chuck Roast in the Oven
- Time: Active 25 mins, Passive 3 hours 30 mins, Total 3 hours 55 mins
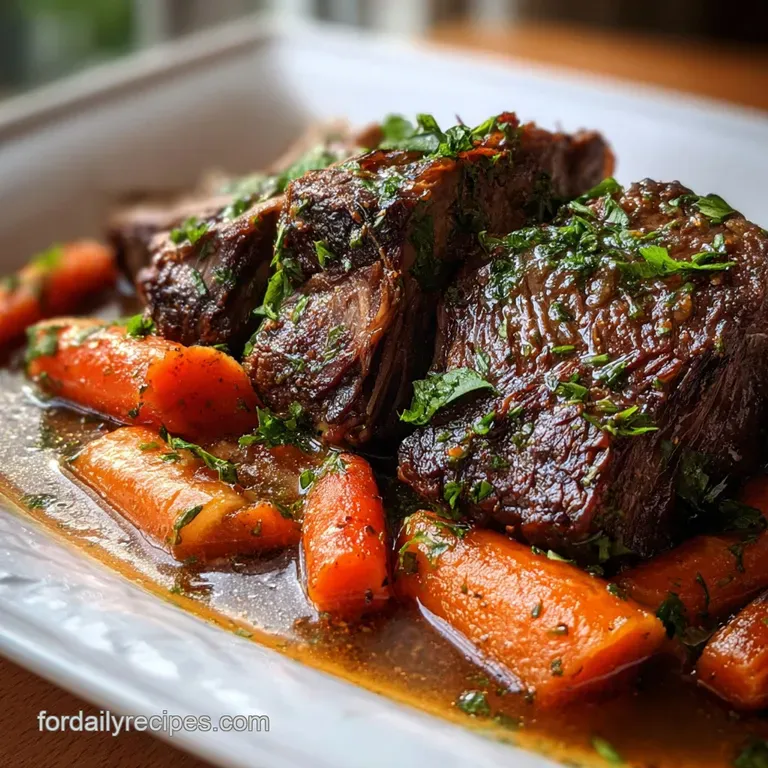
- Flavor/Texture Hook: Velvety, melt in-your mouth beef with a rich, mahogany hued jus.
- Perfect for: Sunday family dinners or cozy cold weather meal prepping.
- Creating the Best Chuck Roast in Oven
- Braising Science Explained
- Essential Recipe Specifications
- Required Ingredients and Substitutions
- Kitchen Tools for Success
- Step by Step Cooking Guide
- Solving Common Pot Roast Issues
- Adjusting the Recipe Size
- Braising Legends and Facts
- Proper Storage and Leftover Use
- Ideal Sides for Serving
- High in Sodium
- Recipe FAQs
- 📝 Recipe Card
Creating the Best Chuck Roast in Oven
The kitchen fills with a heavy, savory aroma the moment that beef hits the hot avocado oil. It’s that deep, primal sizzle that signals something special is happening. My grandmother used to start this on rainy Sunday mornings, letting the heavy cast iron pot sit in the back of the oven while we played outside.
By the time we came in, the house smelled like woodsmoke, rosemary, and home. It’s a heritage dish that doesn’t require fancy gadgets, just a little patience and the right technique.
You’re looking for that specific moment when the connective tissue finally gives up and turns into silk. We’ve all had those pot roasts that end up dry or stringy, but we aren't doing that today.
This method ensures every fiber of the meat is bathed in a concentrated braising liquid of red wine and bone broth. It’s simple, honest cooking that feels like a warm hug from generations past.
We’re going to focus on a hard sear first to build flavor, then a long, quiet nap in the heat. It’s the kind of meal that makes you want to pull out the good plates and maybe some warm biscuits to soak up every last drop of the sauce.
Trust me, once you see that beef shatter under the weight of a fork, you’ll never go back to any other way of making it.
Braising Science Explained
Collagen Conversion: Low temperatures over several hours slowly break down tough connective tissues into gelatin, creating a velvety mouthfeel.
Maillard Reaction: Searing the meat at high heat before braising creates hundreds of new flavor compounds that season the entire pot.
Acidic Tenderization: The tannins in red wine help weaken protein bonds, allowing the cooking liquid to penetrate deeper into the roast.
| Thickness | Internal Temp | Rest Time | Visual Cue |
|---|---|---|---|
| 2-3 inches | 200°F - 205°F | 20 mins | Meat shreds easily with a fork |
| 3-4 inches | 200°F - 205°F | 25 mins | Bone (if present) pulls out clean |
| 1-2 inches | 195°F - 200°F | 15 mins | Connective tissue looks translucent |
The relationship between time and temperature is everything when working with this cut. While a steak is done at 135°F, this specific cut needs to hit at least 200°F internally so the fat and collagen can fully melt.
If you pull it too early, it will be tough and rubbery instead of tender.
Essential Recipe Specifications
For Collagen to Gelatin Transformation
Choosing a 3.5 lb beef chuck roast is non negotiable for this recipe. This specific cut comes from the shoulder, meaning it has worked hard and is packed with the intramuscular fat necessary for a moist result. It's much better than an eye of round which can lean toward the dry side.
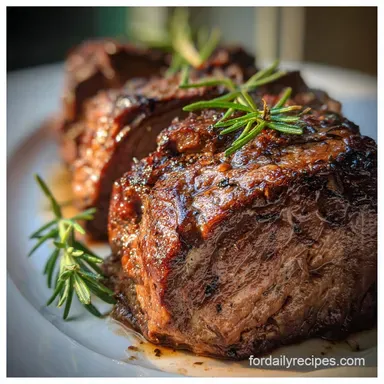
For the Deepest Mahogany Crust
We use avocado oil for the sear because it has a high smoke point, allowing us to get that dark, savory crust without burning the oil. That crust is the foundation of your sauce's color and depth. Without it, the final dish looks pale and lacks that characteristic "roasted" flavor we crave.
For a Naturally Glossy Jus
The combination of tomato paste and the natural gelatin from the bone broth creates a sauce that coats the back of a spoon. Using 2 cups of beef bone broth provides more body than standard stock. If you prefer a lighter side to balance the richness, my oven-roasted Vegetables recipe is a fantastic companion.
Required Ingredients and Substitutions
Component Analysis
| Ingredient | Science Role | Pro Secret |
|---|---|---|
| Chuck Roast | Primary Protein | Room temp meat sears faster and more evenly. |
| Red Wine | Solvent & Acid | Use a dry Cabernet to dissolve flavorful browned bits. |
| Tomato Paste | Umami Booster | Caramelize it in the pan to remove raw metallic notes. |
| Garlic Head | Aromatic Base | Halving the whole head releases oils without burning bits. |
The Protein
- 3.5 lb beef chuck roast: The star of the show. Why this? High fat and collagen content ensure it stays moist during long cooking.
- Substitute: Brisket or beef shanks. Note: These may require 30-60 mins more time.
- 1 tbsp kosher salt: Essential for drawing out moisture for the sear.
- Substitute: 2 tsp fine sea salt.
- 1 tsp coarse black pepper: Adds a subtle heat.
- Substitute: 1 tsp cracked peppercorns.
The Braising Base
- 2 cups beef bone broth: Provides the liquid for the braise. Why this? Higher protein content than regular broth creates a silkier sauce.
- Substitute: Vegetable stock or water with a bouillon cube.
- 1 cup dry red wine: Adds acidity and depth.
- Substitute: 1 cup extra broth plus 1 tbsp balsamic vinegar.
- 2 tbsp tomato paste: Thickens and adds color.
- Substitute: 1/4 cup tomato puree (reduce broth by 2 tbsp).
The Garden
- 1 lb fingerling potatoes: Holds shape well during the long roast.
- Substitute: Yukon Gold cut into 2 inch chunks.
- 4 large carrots: Cut into 2 inch chunks.
- Substitute: Parsnips or rutabaga.
- 2 yellow onions: Quartered for sweetness.
- Substitute: 4 large shallots, peeled and halved.
- Fresh Herbs: Thyme and rosemary sprigs.
- Substitute: 1 tsp each of dried herbs (add earlier).
Kitchen Tools for Success
You'll need a heavy bottomed vessel, ideally a 5 to 7 quart Dutch oven. This distributes heat evenly and has a tight fitting lid to trap steam. If you don't have one, a deep roasting pan covered tightly with two layers of heavy duty foil will work.
A good pair of tongs is also vital for turning the heavy roast without splashing hot oil.
step-by-step Cooking Guide

- Prep the meat. Pat the 3.5 lb roast dry with paper towels and season aggressively with 1 tbsp kosher salt and 1 tsp pepper. Note: Dry meat is the only way to get a proper sear.
- Sear the beef. Heat 2 tbsp avocado oil in a Dutch oven over medium high heat. Brown the meat for 5-7 mins per side until a dark, crusty bark forms.
- Remove and rest. Transfer the beef to a plate. Listen for the sizzle to ensure the pan stays hot but doesn't smoke excessively.
- Sauté aromatics. Add the quartered onions and halved garlic head (cut side down) to the fat. Cook 3 mins until the garlic is fragrant and golden.
- Develop flavor. Stir in 2 tbsp tomato paste. Cook for 2 mins, stirring constantly, until it turns a deep rust color.
- Deglaze the pan. Pour in 1 cup red wine. Scrape the bottom with a wooden spoon to release the "fond" (the brown bits).
- Assemble the pot. Add 2 cups bone broth, thyme, and rosemary. Return the beef and any juices to the pot.
- The long roast. Cover and place in a 350°F oven. Bake for 2 hours. The aroma should be rich and savory.
- Add vegetables. Carefully nestle 1 lb fingerlings and 4 carrots around the beef.
- Final cook. Cover and roast another 1 hour 30 mins until the beef is completely tender.
Solving Common Pot Roast Issues
Why Your Meat is Tough
If the beef is still difficult to shred after the allotted time, it simply hasn't spent enough time in the heat. Every cow is different, and some cuts have more stubborn connective tissue. Put the lid back on and give it another 30 mins. It will eventually give in.
To Avoid Mushy Vegetables
Adding the potatoes and carrots at the very beginning of a 3 hour cook is a recipe for veggie mash. By waiting until the final 90 minutes, the vegetables soften perfectly while maintaining their structure and absorbing the braising liquid.
For a Clearer Sauce
If your sauce looks oily, it's likely from the rendered beef fat. You can skim this off with a wide spoon, or better yet, make the dish a day ahead. Once chilled, the fat solidifies at the top, making it effortless to remove.
| Problem | Root Cause | Solution |
|---|---|---|
| Meat is dry | Oven temp too high | Keep at 350°F or lower; check lid seal. |
| Sauce is thin | Too much liquid | Simmer sauce on stovetop after removing beef. |
| Bland flavor | Under seasoned meat | Season heavily with salt before searing. |
Common Mistakes Checklist
- ✓ Pat the beef completely dry before it hits the oil to prevent steaming.
- ✓ Do not skip the searing step; it’s where 80% of the flavor lives.
- ✓ Avoid checking the pot every 20 minutes you lose heat and moisture.
- ✓ Let the meat rest for at least 20 minutes before shredding to keep it juicy.
- ✓ Ensure the liquid only comes halfway up the meat, not covering it.
Adjusting the Recipe Size
Scaling Down: If you're cooking for two, use a 2 lb roast. Reduce the bone broth to 1 cup and the wine to 1/2 cup. Use a smaller 3 quart Dutch oven to ensure the liquid level is high enough. Reduce total cook time by about 45 mins, but still check for tenderness.
Scaling Up: For a crowd, you can use two 3.5 lb roasts. Use a large roasting pan or two Dutch ovens. Do not double the salt or spices; instead, use 1.5x the amount. Increase the liquid only enough to reach the halfway point of the meat.
Cooking two roasts in one large pan may take an extra 45-60 mins of oven time.
| Servings | Meat Weight | Pan Size | Cook Time |
|---|---|---|---|
| 2-3 people | 1.5 - 2 lbs | 3 Qt Pot | 2 hrs 45 mins |
| 6 people | 3.5 lbs | 5-7 Qt Pot | 3 hrs 30 mins |
| 10-12 people | 7 lbs (two roasts) | Roasting Pan | 4 hrs 15 mins |
Braising Legends and Facts
"Searing meat seals in the juices" is a persistent myth that science has debunked. Searing actually causes some moisture loss due to high heat, but we do it for the flavor. The crust created by the Maillard reaction adds a complexity to the sauce that you cannot get any other way.
Another common thought is that you must use expensive wine. In reality, the subtle notes of a $50 bottle will be lost during a 3 hour braise. Use a decent, drinkable dry red that you enjoy, but save the premium vintage for the table. The heat will burn off the alcohol and leave the concentrated fruit and acid behind.
Proper Storage and Leftover Use
Storage: Store leftovers in an airtight container in the fridge for up to 4 days. Keep the meat submerged in the leftover jus to prevent it from drying out. This dish actually tastes better on day two because the flavors have time to meld and deepen.
Freezing: This roasts beautifully. Shred the meat and freeze it in portions with the sauce for up to 3 months. Thaw in the fridge overnight before reheating.
Zero Waste: Don't throw away that garlic head! Squeeze the softened cloves out of the skin and smear them on toasted bread. Any leftover liquid can be strained and used as a base for a killer French onion soup or frozen into ice cube trays to add a massive flavor boost to future gravies.
Ideal Sides for Serving
While the potatoes and carrots make this a one pot meal, a little extra something never hurts. For a classic pairing, serve it with a Baked Potato in recipe to catch even more of that delicious gravy. The silky interior of the potato is the perfect contrast to the savory beef.
If you want to go the "French Onion" route, serve the beef over toasted sourdough slices topped with melted Gruyere. The richness of the beef and the sweetness of the onions in the braise work perfectly with the nutty cheese. Honestly, even a pile of buttered egg noodles or some creamy polenta would be a dream here.
Whatever you choose, make sure you have something to soak up that sauce it’s liquid gold.

High in Sodium
840 mg mg of sodium per serving (37% of daily value)
American Heart Association recommends limiting sodium intake to about 2,300mg per day.
Tips to Reduce Sodium in Your Beef Roast
-
Broth Swap-30%
Replace the 2 cups of low-sodium beef bone broth with no-sodium added beef broth or homemade broth. This can significantly reduce the overall sodium content.
-
Salt Reduction-25%
Reduce the amount of kosher salt used from 1 tbsp to 3/4 tbsp. Taste and adjust after cooking, if needed. You can always add more, but you can't take it away!
-
Tomato Paste Tweak-15%
Use no-salt added tomato paste or consider reducing the quantity used to 1 tbsp and see if you can achieve the same flavor profile.
-
Wine Consideration-5%
While red wine generally doesn't contain significant sodium, be sure to use a dry red wine. Avoid 'cooking wines' that sometimes contain added salt.
-
Herb Power
Enhance the flavor with more fresh herbs and spices! Increase the thyme and rosemary or try adding other herbs like bay leaf or oregano to boost flavor without adding sodium.
Recipe FAQs
How many hours does it take to cook a chuck roast in the oven?
About 3.5 hours total. This includes about 20 minutes of active prep time, 2 hours of initial roasting, and 90 minutes for the vegetables to finish.
Is it better to cook a chuck roast at 325 or 350 degrees?
Stick with 350°F for most roasts. This temperature offers the best balance, ensuring the Maillard reaction crust sets during the sear, while still allowing the connective tissue to break down within a reasonable time frame.
What is the best method for cooking a chuck roast?
Sear hard, then braise covered in liquid. Searing creates the deep flavor base, and braising low and slow transforms the tough collagen into melt-in-your mouth gelatin. If you prefer hands off cooking, look into our Slow Cooker Crockpot recipe which uses the same principle.
Should a chuck roast be covered in the oven?
Yes, it must be covered during the braise. Covering traps the steam, maintaining a moist environment crucial for breaking down the collagen into gelatin. Removing the cover only for the last 30 minutes can help slightly reduce the sauce.
Why is my chuck roast dry and stringy instead of tender?
False. It wasn't cooked long enough. The meat is stringy because the internal temperature hasn't reached the necessary 200°F where collagen fully converts to gelatin.
If you mastered the sensory doneness cues here, apply them to our [Roast Chicken recipe] to ensure any meat you cook reaches its perfect endpoint.
Do I need to sear the roast before putting it in the oven?
Absolutely, searing is critical for flavor development. You are achieving the Maillard reaction, which creates hundreds of non-beefy flavor compounds that season the entire braising liquid. Skipping this results in a pale, less complex tasting roast.
Can I use a tighter lid for the roast instead of foil?
No, a tight fitting Dutch oven lid is preferred over foil alone. The cast iron provides superior, even heat retention, which is essential for consistent long cooking. Foil works as a backup, but ensure you use two layers and crimp it tightly to prevent steam loss.
Oven Chuck Roast Recipe
Ingredients:
Instructions:
Nutrition Facts:
| Calories | 758 kcal |
|---|---|
| Protein | 56 g |
| Fat | 44 g |
| Carbs | 26 g |
| Fiber | 4.5 g |
| Sugar | 6 g |
| Sodium | 840 mg |
