Layer Dip Recipe with Refried Beans: Velvety Base
- Time: Active 20 mins, Passive 30 mins, Total 50 mins
- Flavor/Texture Hook: Savory, creamy, and zesty with a velvety bean base
- Perfect for: Family gatherings, game day spreads, and beginner cooks
- Creating a Layer Dip Recipe with Refried Beans
- The Science of Texture Stability
- Component Analysis for Structural Integrity
- Core Components for Rich Flavor
- Necessary Gear for Assembly
- Step-by-Step Assembly Guide
- Troubleshooting and Success Tips
- Scaling and Portion Adjustments
- Common Misconceptions Debunked
- Variations for Every Palate
- Storage and Make Ahead Methods
- Best Sides for Dipping
- Recipe FAQs
- 📝 Recipe Card
Creating a Layer Dip Recipe with Refried Beans
The air in my kitchen always changes when I start warming the spices for this dip. It begins with the warm, toasted scent of ground cumin hitting the pan, followed immediately by the sharp, bright zing of fresh lime juice.
There’s something deeply nostalgic about the way these scents mingle, reminding me of dozens of family birthdays where this specific dish was the first thing to vanish from the table. I’ve seen people hover over the bowl, waiting for that first chip to break the surface of the cheese.
You won’t find a watery, bland mess here. We’ve all been to those parties where the dip has separated into a puddle, but we’re going to fix that. By treating the beans with a little extra care and simmering them to a velvety consistency, we create a foundation that holds up against every topping.
It’s a technique I learned after years of trial and error, moving away from the "open a can and spread it" method to something much more soulful.
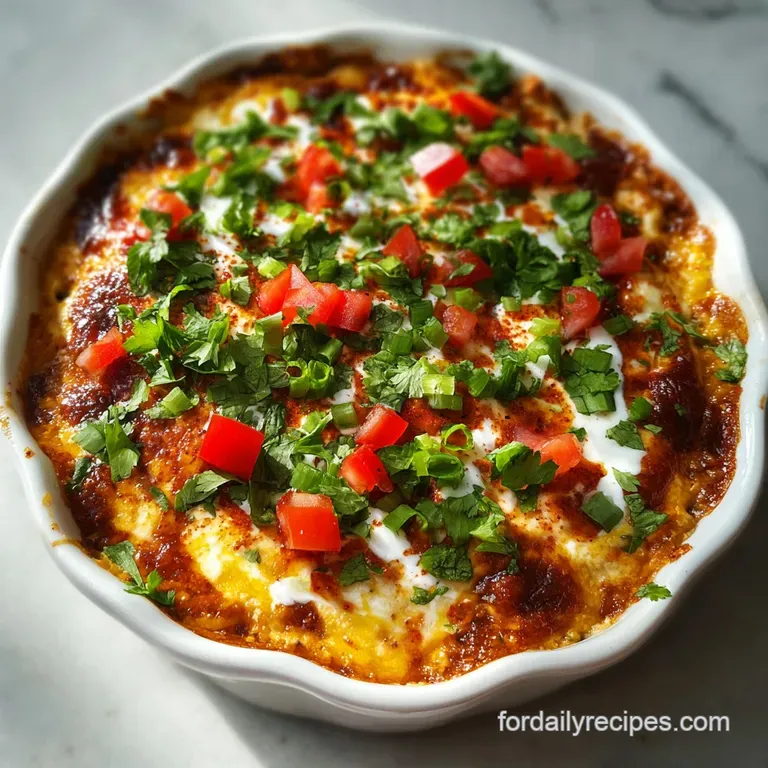
This recipe is about the harmony of textures. You get the soft, yielding beans, the cool tang of the sour cream, and the fresh, crisp bite of diced Roma tomatoes. It isn’t just a snack; it’s a time honored tradition that I’m so excited to share with you.
Whether you’re a seasoned pro or just starting your culinary journey, this method ensures a result that looks as vibrant as it tastes. Trust me on this, once you try the simmered bean method, you’ll never go back to the cold, grainy alternative.
The Science of Texture Stability
The secret to a structural masterpiece lies in how we handle moisture. When we simmer the 30 oz refried beans with 2 tbsp of sour cream and lime juice, we aren’t just adding flavor; we are altering the starch structure.
The heat and fat from the sour cream break down the stiff, grainy clumps found in canned beans, creating a smooth emulsion that spreads without tearing your delicate layers. This ensures a velvety mouthfeel that contrasts beautifully with the crunch of a tortilla chip.
The Fat Barrier Technique: By mixing taco seasoning directly into the 16 oz sour cream, we create a hydrophobic barrier that prevents moisture from the salsa from seeping into the bean layer. This lipid rich wall keeps the dip from becoming a soggy mess during its chill time.
Managing Osmotic Pressure: Salt in the taco seasoning and cheese can draw water out of the tomatoes and salsa. Straining the salsa beforehand and seeding the tomatoes reduces the available water, preventing the "puddle effect" often seen in poorly constructed dips.
| Servings | Refried Beans | Sour Cream | Guacamole | Pan Size |
|---|---|---|---|---|
| 8 People | 15 oz | 8 oz | 1 cup | 8x8 inch |
| 16 People | 30 oz | 16 oz | 2 cups | 9x13 inch |
| 32 People | 60 oz | 32 oz | 4 cups | Two 9x13 inch |
This serving size guide helps you plan for the crowd without running out or ending up with a mountain of leftovers that might lose their crispness. Adjusting the pan size is vital because it determines the thickness of each layer.
If the layers are too thin, they lose their individual identity; too thick, and they become difficult to scoop.
Component Analysis for Structural Integrity
| Ingredient | Science Role | Pro Secret |
|---|---|---|
| 30 oz Refried Beans | Provides structural foundation | Simmer with lime to soften starches and prevent graininess. |
| 16 oz Sour Cream | Acts as a moisture barrier | Use full fat versions to ensure the layer stays firm and creamy. |
| 1 cup Strained Salsa | Adds acidity and brightness | Strain through a fine mesh sieve for 10 mins to remove excess liquid. |
| 2 cups Cheddar Cheese | Offers salt and fat | Grate your own from a block to avoid the dry, powdery anti caking agents. |
Core Components for Rich Flavor
To achieve that heritage style taste, the quality of your elements matters. I always reach for full fat dairy because it provides the necessary weight to support the vegetable toppings. If you're looking for a different texture profile, perhaps for a lighter lunch, you might enjoy a Dense Bean Salad Recipe as a refreshing alternative to this rich dip.
- 30 oz refried beans: Why this? The sturdy base that provides the earthy heart of the entire dish. (Substitute: Mashed black beans with a splash of broth)
- 16 oz full fat sour cream: Why this? Creates a cooling, velvety layer that balances the spicy taco seasoning. (Substitute: Plain Greek yogurt)
- 1 oz taco seasoning: Why this? Concentrated spices that provide the signature Mexican inspired flavor profile. (Substitute: Blend of chili powder, cumin, garlic powder, and onion powder)
- 2 cups prepared chunky guacamole: Why this? Adds a buttery richness and vibrant green color to the middle. (Substitute: Mashed avocados with lime and salt)
- 1 cup thick style salsa: Why this? Provides a zesty, tomato based acidity to cut through the heavy fats. (Substitute: Pico de gallo, well drained)
- 2 cups shredded sharp cheddar cheese: Why this? A sharp, salty finish that brings all the layers together. (Substitute: Pepper Jack cheese for a spicy kick)
- 1 cup Roma tomatoes: Why this? Fresh, firm texture that adds a pop of color and juice. (Substitute: Sliced cherry tomatoes)
- 1/2 cup sliced black olives: Why this? Salty, briny notes that highlight the savory beans. (Substitute: Pickled jalapeños)
- 1 tbsp fresh lime juice: Why this? Essential acid that brightens the earthy beans and prevents avocado browning. (Substitute: Lemon juice)
- 3 green onions: Why this? Provides a mild, sharp bite to finish the presentation. (Substitute: Chives or red onion)
Necessary Gear for Assembly
While this is a relatively simple assembly, a few key tools make the process much smoother. You'll need a medium saucepan to simmer the beans using heat is my favorite trick for a better texture.
A 9x13 inch glass baking dish is the classic choice here, as it allows everyone to see the beautiful, defined layers from the side.
Chef's Note: I highly recommend using a fine mesh sieve to strain your salsa. Let it sit for at least 10 minutes while you prep the other ingredients. You'll be shocked at how much liquid drains out, liquid that would otherwise ruin your dip's consistency.
For the cheese, a box grater is far superior to using pre shredded bags. The fresh cheese has more moisture and a better "shatter" when you bite into it. If you're planning a full spread, having a few small mixing bowls ready for the sour cream and tomatoes will keep your workspace organized and stress free.
step-by-step Assembly Guide
1. Aerating the Bean Base
Place the 30 oz refried beans in a saucepan over medium heat. Stir in the 1 tbsp lime juice, 1 tsp ground cumin, and 2 tbsp sour cream. Cook for 5 minutes until the beans are smooth, steaming, and easily spreadable.
Note: Heating the beans removes the stiff "can shape" and allows flavors to meld.
2. Creating the Seasoned Barrier
In a medium bowl, combine the 16 oz sour cream with the 1 oz taco seasoning. Whisk thoroughly until the mixture is a uniform pale orange and no spice clumps remain.
3. Layering the Foundation
Spread the warm bean mixture into the bottom of a 9x13 inch dish. Use an offset spatula to smooth it into an even layer until it reaches all four corners.
4. Fortifying the Creamy Core
Gently spread the seasoned sour cream over the beans. Work from the center outward until the beans are completely covered by a velvety white layer.
5. Adding the Greenery
Dollop the 2 cups of guacamole over the sour cream. Spread it carefully to avoid mixing the layers until a bright green horizon is formed.
6. Managing the Salsa
Pour the 1 cup of strained salsa over the guacamole. Spread it thinly until the chunky tomatoes are evenly distributed. Note: Straining is the only way to avoid a watery dip.
7. Crowning with Cheese
Sprinkle the 2 cups of shredded sharp cheddar evenly across the top. Ensure the cheese reaches the edges until the colorful layers below are mostly hidden.
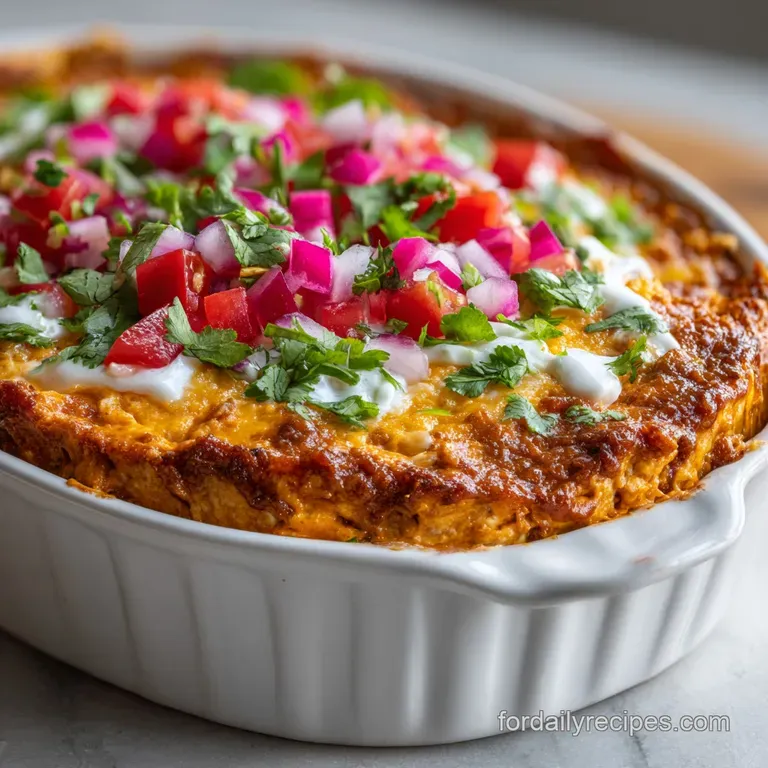
8. Adding Fresh Finishes
Distribute the 1 cup diced tomatoes, 1/2 cup olives, sliced green onions, and 1/4 cup cilantro over the cheese. Press down very lightly with your palms until the toppings are "set" into the cheese.
9. Mastering the Chill
Cover the dish with plastic wrap and refrigerate for at least 30 minutes. Let it sit until the flavors have unified and the layers are firm enough to scoop.
Troubleshooting and Success Tips
Why Your Bean Dip is Watery
If you notice a pool of liquid at the bottom of the dish, it usually comes from the salsa or the tomatoes. Vegetables are mostly water, and salt encourages them to release it. Always strain your salsa and remove the "guts" (seeds and pulp) from your tomatoes before dicing.
| Problem | Root Cause | Solution |
|---|---|---|
| Tough or dry beans | Cold beans are too thick | Simmer with a splash of lime and 2 tbsp sour cream. |
| Mixed/Messy layers | Spreading too forcefully | Use an offset spatula and dollop the ingredients before spreading. |
| Bland flavor | Lack of seasoning in layers | Mix taco seasoning into the sour cream and cumin into the beans. |
Common Mistakes Checklist
- ✓ Never skip straining the salsa; it's the number one cause of "dip soup."
- ✓ Avoid pre shredded cheese, as the starch coating prevents a clean bite and flavor release.
- ✓ Simmer the beans for 5 minutes to ensure a velvety, easy to scoop texture.
- ✓ Pat the diced tomatoes dry with a paper towel before adding them to the top.
- ✓ Let the dip chill for 30 mins to allow the taco seasoning to fully hydrate in the sour cream.
Scaling and Portion Adjustments
Scaling Down (1/2 size): If you're just making a snack for two, use an 8x8 inch pan. Reduce the beans to 15 oz and the sour cream to 8 oz. Since you can't easily use half a packet of seasoning, just measure out 1.5 tablespoons.
Reduce the chill time to 15 minutes as the smaller thermal mass cools faster.
Scaling Up (2x size): For a massive party, use two 9x13 inch pans rather than one giant deep one. This keeps the scoop to chip ratio balanced. When doubling spices, only use 1.5x the salt or taco seasoning initially, then taste. Spices can become overwhelming when doubled perfectly.
If you find yourself with extra ingredients, like leftover cilantro and lime, they work beautifully in a Buffalo Sauce Recipe if you want to create a spicy wing side dish to go along with your dip.
Common Misconceptions Debunked
"You should always serve bean dip at room temperature." Actually, while the beans are better when warmed initially during prep, the dip should be served chilled. The cold temperature keeps the sour cream and guacamole firm, providing that classic structural integrity.
If it sits out too long, the layers begin to slump and lose their distinct textures.
"low-fat sour cream is a good substitute." In this specific recipe, low-fat or fat free sour cream often contains extra thickeners and water. When these hit the salt in the taco seasoning, they tend to weep liquid, leading to a runny mess. Stick with full fat for the heritage quality texture we’re after.
Variations for Every Palate
Achieving the Loaded Meat Version
For a heartier take, you can add a layer of browned ground beef or chorizo between the beans and the sour cream. Just make sure to drain the meat thoroughly on paper towels to remove every drop of grease, otherwise, the fat will soak into the beans and make them heavy.
Creating a Zesty Greek Twist
Swap the refried beans for hummus, use tzatziki instead of seasoned sour cream, and top with feta cheese, cucumbers, and kalamata olives. It’s a completely different flavor profile but uses the same layering physics to create a stunning appetizer.
Storage and make-ahead Methods
This dip is a make-ahead champion. You can assemble the bean, sour cream, and cheese layers up to 24 hours in advance. I recommend adding the fresh tomatoes, cilantro, and green onions just before serving to keep them from wilting or losing their vibrant color.
- Fridge: Store covered for up to 3 days. Note that the guacamole may start to brown slightly after 24 hours, even with the lime juice.
- Freezer: I do not recommend freezing this dish. The sour cream and tomatoes will undergo cellular breakdown, resulting in a grainy, watery mess once thawed.
- Zero Waste: If you have leftovers that are looking a bit "mixed up," stir them all together and use them as a filling for grilled quesadillas or as a topping for a quick taco salad.
Best Sides for Dipping
The classic choice is a thick, restaurant style tortilla chip that can handle the weight of all seven layers without snapping. However, if you want to offer something lighter, sturdy vegetable crudités like bell pepper wedges or thick cucumber slices provide a refreshing "shatter" that cuts through the richness of the refried beans.
If you're hosting a larger gathering, this dip pairs wonderfully with other zesty condiments. You might consider serving a Rémoulade Sauce recipe alongside some fried shrimp for a coastal meets inland appetizer spread. The tang of the remoulade complements the earthy tones of the bean dip perfectly. Right then, let's get that bean base simmering!

Recipe FAQs
What is the 7 layer refried beans dip?
It is a classic cold appetizer built sequentially in a clear dish. The layers typically include seasoned refried beans, sour cream, guacamole, salsa, cheese, tomatoes, and olives. This layered structure ensures every chip scoop gets a balanced texture and flavor profile.
How do you make Mexican layer dip?
Simmer the refried beans with lime juice and sour cream first. Heating the beans removes their can-like texture and creates a smooth, spreadable base layer. Follow by spreading seasoned sour cream, guacamole, strained salsa, cheese, and finishing with fresh toppings.
Do you heat up refried beans for 7 layer dip?
Yes, heating the beans is highly recommended for the best texture. Simmer the beans with a little lime juice and sour cream for about 5 minutes until they are steaming and easily spreadable. This process softens the starches, moving beyond the grainy texture of straight from-the-can beans.
Can you make a 7 layer dip the night before?
Yes, you can assemble the base layers the night before. Assemble the bean, sour cream, and cheese layers up to 24 hours ahead of time and keep it tightly covered in the refrigerator. Add the fresh tomatoes, green onions, and cilantro just before serving to maintain crispness.
What is the key to preventing a watery layer dip?
The key is aggressive moisture management in the salsa layer. Always strain your salsa through a fine mesh sieve for at least 10 minutes before spreading it on top of the sour cream. Removing excess liquid prevents it from seeping down and turning your foundation layer soggy.
Should I use low-fat sour cream to lighten the dip?
No, using full fat sour cream is crucial for structural integrity. low-fat or fat-free versions contain more water and stabilizers, which tend to weep liquid once they interact with the salt and acid in the seasonings.
If you are looking for a lighter recipe that still incorporates layering techniques, check out how we manage texture stability in our make-ahead Cinnamon Roll French Toast Casserole Recipe.
What seasoning works best for the sour cream layer?
Use standard taco seasoning mixed thoroughly into full fat sour cream. Mixing the seasoning directly into the sour cream creates a fatty barrier that prevents moisture migration from the salsa layer.
If you enjoy bold flavor combinations, this technique of layering strong flavor profiles is also essential when building up the sauces for our Buttery Garlic Butter Seafood Boil Sauce.
Layer Dip Refried Bean Recipe

Ingredients:
Instructions:
Nutrition Facts:
| Calories | 224 kcal |
|---|---|
| Protein | 7.8 g |
| Fat | 16.1 g |
| Carbs | 13.8 g |
| Fiber | 4.6 g |
| Sugar | 2.1 g |
| Sodium | 578 mg |
