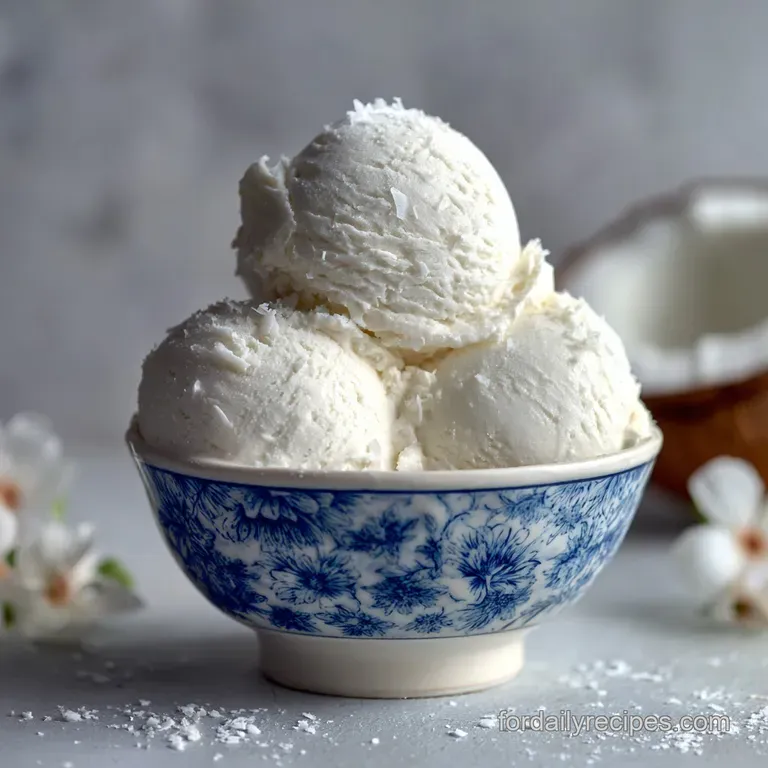
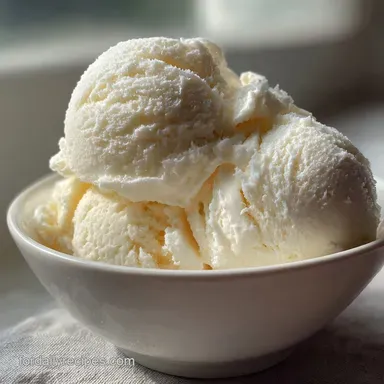
Coconut Ice Cream
- Time: Active 15 minutes, Passive 6 hours 20 mins, Total 6 hours 35 mins
- Flavor/Texture Hook: Silky and toasted with a rich, tropical finish
- Perfect for: Dietary restrictions, plant based diets, and wholesome summer gatherings
- How to Make Silky Homemade Coconut Ice Cream
- Essential Planning for Your Churning Timeline
- Selecting the Best Wholesome Base Components
- Essential Tools for a Flawless Scoop
- Step-by-Step Churning and Freezing Flow
- Avoiding Common Texture and Freezing Mishaps
- Wholesome Variations for Every Dietary Need
- Storing and Reviving Your Frozen Treat
- Wholesome Pairings for the Perfect Serve
- Coconut Ice Cream FAQs
- 📝 Recipe Card
Honestly, if you've ever tried a dairy-free pint from the grocery store and felt like you were biting into a block of flavored ice, I hear you. It’s frustrating when you want a wholesome dessert but end up with something that has the texture of a snow cone.
For a long time, I thought that without heavy cream and eggs, we were just destined for a grainy, icy mess.
But after a few failed attempts and a lot of messy counters, I realized that the secret isn't in adding weird chemicals or gums. It’s all about managing the fats and the sugar in a way that respects the plant based ingredients.
We want something that feels velvety on the tongue and melts slowly, just like the traditional stuff we remember from childhood.
This recipe is my absolute go to because it doesn’t hide behind artificial flavors. We’re using full fat coconut milk and a bit of agave to keep things soft. Right then, let’s get into how we can turn a couple of cans of coconut milk into the best scoop you’ve had in years.
Trust me on this, once you nail the chilling step, you’ll never go back to the store-bought stuff.
How to Make Silky Homemade Coconut Ice Cream
To get that smooth texture we all crave, we have to look at how the ingredients interact during the freezing process. It isn’t just about cold temperatures, it's about controlling how water turns into ice.
The Science of Why it Works
Lipid Saturation: The high concentration of saturated fats in coconut cream creates a stable matrix that traps air, resulting in a velvety texture rather than a hard block.
Freezing Point Depression: Agave nectar and cane sugar lower the temperature at which the mixture freezes, ensuring the final product remains scoopable even after hours in the freezer.
Maximizing Lipid Saturation
When we talk about fat in this recipe, we are focusing on the medium chain triglycerides found in coconut. These fats behave differently than dairy fat. They solidify at a higher temperature, which is why your coconut milk might be solid at the top of the can.
We use this to our advantage to create a structure that mimics the "overrun" or airiness of premium dairy ice cream.
Eliminating the "Icy" Break
Ice crystals are the enemy of a good scoop. By using a combination of organic cane sugar and agave nectar, we are interfering with the water molecules' ability to bond into large, jagged crystals. Small crystals mean a silky mouthfeel.
If you skip the agave, you'll notice the texture becomes significantly more "crunchy" and less like a professional dessert.
Essential Planning for Your Churning Timeline
Making a great frozen treat is more about patience and timing than it is about difficult techniques. You can't rush the cooling process, or you'll end up with a grainy mess that doesn't churn properly.
| Phase | Duration | Goal |
|---|---|---|
| Preparation | 15 minutes | Thoroughly whisk the base to emulsify fats and sugars |
| Maturation | 4 hours | Chill the base to below 4°C to ensure quick freezing |
| Churning | 20 minutes | Incorporate air and break down ice crystals |
The "Maturation" phase is where most people make a mistake. They think as long as it's cool to the touch, it’s ready. In reality, the colder the base is when it hits the machine, the smaller the ice crystals will be. Smaller crystals mean a smoother finish.
Chef Tip: Put your storage container in the freezer at least 2 hours before you start churning. When the soft serve consistency ice cream hits a room temperature bowl, it begins to melt immediately, which leads to "icy" spots once it refreezes.
Selecting the Best Wholesome Base Components
Choosing the right ingredients is the difference between a watery dessert and a rich, wholesome one. Since we aren't using eggs or stabilizers, we rely entirely on the quality of our coconut products.
Ingredient Deep Dive
| Ingredient | Science Role | Pro Secret |
|---|---|---|
| Full Fat Coconut Milk | Primary Fat Source | Use cans with at least 12g of fat per serving for creaminess. |
| Agave Nectar | Texture Softener | This liquid sweetener prevents the mixture from freezing rock hard. |
| Vanilla Bean Paste | Flavor Depth | Paste provides those beautiful black flecks and a more intense aroma. |
| Toasted Coconut | Sensory Contrast | Toasting the flakes until they shatter adds a necessary savory note. |
Getting the right balance of fats is essential. I always check the labels on my coconut milk cans. If the first ingredient is water, put it back. You want coconut extract to be the primary component. This ensures you have enough lipids to create that velvety finish we are looking for.
Ingredients and Wholesome Substitutes
- 2 cans (13.5 oz each) full fat coconut milk: Why this? Provides the essential fat and water ratio for a stable emulsion.
- Substitute: 800ml of homemade cashew milk (high fat version).
- 1/2 cup (120ml) unsweetened coconut cream: Why this? Boosts the lipid content to prevent an icy texture.
- Substitute: Heavy soy cream or additional coconut fat from the top of a chilled can.
- 2/3 cup (135g) organic cane sugar: Why this? Provides sweetness and helps with the structure of the freeze.
- Substitute: Coconut sugar (will turn the ice cream light brown with a caramel flavor).
- 2 tbsp (30ml) light agave nectar: Why this? An invert sugar that keeps the scoop soft and pliable.
- Substitute: Brown rice syrup or maple syrup (maple will add a distinct woody flavor).
- 1.5 tsp (7.5ml) pure vanilla bean paste: Why this? Offers a more concentrated flavor than standard extract.
- Substitute: One whole vanilla bean, scraped, or 2 tsp of pure vanilla extract.
- 1/2 tsp (3g) fine sea salt: Why this? Sharpens the flavor of the fats and balances the sweetness.
- Substitute: Himalayan pink salt for a milder mineral finish.
- 1/2 cup (45g) unsweetened toasted coconut flakes: Why this? Adds a necessary crunch and toasted aroma.
- Substitute: Toasted almond slivers or chopped macadamia nuts.
Selecting a high-quality vanilla is one of those small things that makes a massive difference. While I love the simplicity of this dish, adding a bit of fruit can really brighten it up, much like the flavors you'd find in a Peach Ice Cream Recipe during the height of summer.
Essential Tools for a Flawless Scoop
You don't need a professional kitchen, but having the right tools makes the process much more predictable. We're aiming for consistency, so precision is your friend here.
- Ice Cream Maker: Whether it’s an old-fashioned churner or a modern compressor model, this is vital for aeration.
- Heavy Bottomed Saucepan: Useful if you choose to warm the milk to dissolve the sugar faster.
- Fine Mesh Whisk: Necessary to fully incorporate the coconut cream into the milk.
- Insulated Storage Container: Keeps the temperature stable and prevents freezer burn.
- Digital Thermometer: To ensure your base is chilled to 4°C before churning.
Many people ask if they can make this as a coconut ice cream no churn version. You can, but it won't be nearly as light. Churning incorporates air, which is what gives the dessert its volume.
If you just freeze the liquid, you'll end up with a very hard block that you'll have to shave rather than scoop.
| Feature | Fresh Coconut Base | Shortcut (Powdered/Carton) |
|---|---|---|
| Fat Content | High (17-22%) | Low (usually 2-5%) |
| Texture | Velvety and rich | Often thin and icy |
| Flavor | Deep, authentic nuttiness | Can taste artificial or watery |
step-by-step Churning and Freezing Flow

Now we get to the fun part. The goal here is to keep everything as cold as possible throughout the entire process. Any heat is the enemy of a smooth scoop.
- Whisk the liquids. Combine 2 cans of coconut milk and 1/2 cup coconut cream in a large bowl. Note: Use a whisk to break up any solid fat chunks until the liquid is completely uniform.
- Dissolve the solids. Add 2/3 cup organic cane sugar and 1/2 tsp sea salt. Note: If the sugar isn't dissolving, you can warm 1/2 cup of the milk on the stove, dissolve the sugar, then mix it back into the cold milk.
- Incorporate aromatics. Stir in 2 tbsp agave nectar and 1.5 tsp vanilla bean paste.
- Chill the base. Cover and refrigerate for at least 4 hours. Wait until the base is below 4°C for the best results.
- Toast the flakes. Heat 1/2 cup coconut flakes in a dry pan over medium heat for 5 minutes until they turn golden and smell like toasted nuts.
- Prepare the maker. Set up your ice cream maker according to the manufacturer's instructions.
- Churn the mixture. Pour the cold base into the machine and churn for 20 minutes until it looks like thick soft serve.
- Add the crunch. During the last 2 minutes of churning, slowly add the toasted coconut flakes.
- Transfer and set. Spoon the mixture into a chilled container and smooth the top.
- Hard freeze. Place in the back of the freezer for 4 hours until it is firm enough to scoop.
Chef Tip: When toasting your coconut flakes, don't walk away! They go from perfectly golden to burnt in about 15 seconds. Once they reach a light tan color, pull them off the heat immediately.
Avoiding Common Texture and Freezing Mishaps
Even with the best ingredients, things can sometimes go sideways. Most issues with plant based frozen desserts come down to temperature control or the ratio of solids to liquids.
Why Your Treat Is Rock Hard
If your dessert feels like a brick after a day in the freezer, the culprit is usually a lack of "interfering agents." Agave nectar is our secret weapon here. It stays liquid at much lower temperatures than cane sugar, which keeps the structure of the ice cream more flexible.
If you reduced the sugar or the agave significantly, the water in the coconut milk will simply freeze solid.
Why the Texture Is Grainy
Graininess usually happens when the fat hasn't been properly emulsified or when the sugar hasn't fully dissolved. If you see tiny white specks, those are bits of coconut fat that didn't blend. To fix this next time, give the base a quick 30 second pulse in a high speed blender before chilling.
This forces the fat and water into a tighter bond.
| Problem | Root Cause | Solution |
|---|---|---|
| Icy Texture | Base was too warm | Chill the base and the bowl for longer before churning. |
| Gritty Feel | Sugar undissolved | Whisk sugar into a small amount of warm liquid first. |
| Separated Fat | Poor emulsification | Blend the base on high for 30 seconds before cooling. |
Preventing Grainy Sugar Crystals
Organic cane sugar has larger crystals than standard white sugar. If you find your result is a bit sandy, try grinding your sugar in a clean coffee grinder or blender for a few seconds before adding it to the milk. This creates a "caster sugar" consistency that dissolves almost instantly in the cold coconut milk.
Wholesome Variations for Every Dietary Need
One of the best things about this easy coconut ice cream is how adaptable it is. Since the base is neutral but rich, you can take it in many different directions.
- Infusing Tropical Heat: Add 1/2 tsp of ground ginger and a pinch of cardamom to the base for a spiced version that pairs beautifully with grilled pineapple.
- Creating a Low Carb Version: Swap the cane sugar for an erythritol blend and use a few drops of liquid stevia instead of agave. Keep in mind that keto sweeteners tend to make ice cream freeze harder, so let it sit on the counter for 10 minutes before scooping.
- Chocolate Swirl: Melt 100g of dark chocolate with 1 tbsp of coconut oil and drizzle it into the maker during the last minute of churning for a "stracciatella" effect.
- For a lighter feel
- Replace the coconut cream with an equal amount of almond milk.
- For more body
- Add a tablespoon of tapioca starch to the base (whisked into warm milk first).
- For a fruit focus
- Fold in 1/2 cup of pureed mango or strawberries during the final stage.
Adapting for Scale
Scaling Down (Makes 4 servings): Use 1 can of coconut milk and halve all other ingredients. Reduce the churn time by about 5 minutes as smaller volumes freeze faster. Use a smaller storage container to prevent excess air exposure, which leads to freezer burn.
Scaling Up (Makes 16 servings): Double the ingredients but do not double the salt or vanilla. Use 1.5x the amount of salt and vanilla instead to avoid an overpowering flavor.
Churn in two separate batches; most home machines cannot handle the volume of 4 cans of milk at once without losing aeration.
Debunking Frozen Dessert Myths
"You can use light coconut milk for a healthy version." This is a mistake I once made. Light coconut milk is just full fat milk diluted with more water. More water equals more ice. You'll end up with a coconut flavored ice cube rather than a velvety treat.
"The alcohol in vanilla extract keeps it soft." While alcohol does lower the freezing point, the 1.5 teaspoons we use is nowhere near enough to affect the texture of the entire batch.
You would need several tablespoons of high proof alcohol to notice a difference in scoopability, which would ruin the wholesome flavor of the coconut.
Storing and Reviving Your Frozen Treat
Proper storage is the only way to keep that homemade coconut ice cream tasting fresh. Without the preservatives found in commercial brands, it's more susceptible to the environment of your freezer.
Storage Guidelines: Fridge: The liquid base stays fresh for 3 to 4 days before churning. Freezer: Once churned, the ice cream is best consumed within 2 weeks. After that, the texture begins to degrade as ice crystals grow.
Zero Waste Tips: Don't throw away the "coconut water" left at the bottom of the cans if you only used the thick cream! It's full of electrolytes. Use it in your morning smoothie or as the liquid base for cooking rice to give it a subtle tropical aroma.
If you have leftover toasted flakes, they make a brilliant topping for a morning bowl of oatmeal.
To prevent freezer burn, press a piece of parchment paper or wax paper directly onto the surface of the ice cream before sealing the lid. This prevents air from touching the surface, which is what causes those crunchy, tasteless ice layers to form.
Wholesome Pairings for the Perfect Serve
When you're ready to serve, remember that plant based fats are firmer than dairy fats when cold. Give the container about 5 to 10 minutes on the kitchen counter. This allows the edges to soften slightly, making it much easier to get that classic spherical scoop.
I love serving this alongside fresh, tart berries. If you want to go all out, it actually pairs beautifully with the flavors found in a Fresas Con Crema Recipe. The silkiness of the coconut balances the acidity of the strawberries perfectly.
Another great option is to serve a scoop over a warm fruit crumble. The way the cold coconut milk melts into the warm oats and fruit creates a sauce that is absolutely divine. Just keep it simple this recipe has enough character to stand on its own with just an extra sprinkle of those toasted flakes on top.
Enjoy the process and the creamy reward!

Coconut Ice Cream FAQs
How healthy is coconut ice cream?
Moderately healthy, with considerations. It's a dairy-free alternative, often lower in cholesterol than dairy ice cream. However, it is typically high in saturated fat and calories due to the coconut cream base.
Does Trader Joe's have coconut ice cream?
Yes, often. Trader Joe's frequently carries a coconut milk based ice cream, usually with simple ingredients, though availability can vary by season and location.
Does Ben & Jerry's have a coconut ice cream?
Yes, they have had several variations. Ben & Jerry's has offered coconut based flavors, often in their non-dairy line, featuring combinations like coconut with chocolate or caramel.
What is the name of the Thai coconut ice cream?
It's often called "Mochi" or "Coconut Ice Cream" but is distinct. Authentic Thai coconut ice cream is typically served with toasted coconut shavings, sticky rice, and sometimes mochi, offering a unique texture and flavor profile often found in recipes like Mango Sticky Rice: Master the Ultimate Thai Recipe at Home.
Can I make coconut ice cream without an ice cream maker?
Yes, but it requires more effort. You can achieve a decent result by freezing the base in a shallow pan and breaking up ice crystals with a fork every 30-60 minutes, similar to techniques used for Homemade Oatmeal Cream Pies Recipe Oatmeal Cream P: Better Than store-bought!.
What makes homemade coconut ice cream so creamy?
High fat content and proper chilling. Using full fat coconut milk or cream provides the necessary lipids to create a smooth texture, while ensuring the base is very cold before churning minimizes ice crystal formation.
Is store-bought coconut ice cream usually vegan?
Generally, yes, but check labels. Most brands explicitly market their coconut ice cream as dairy-free and vegan, using coconut milk as a base instead of dairy. However, always verify the ingredients to ensure it aligns with your dietary needs.
Coconut Ice Cream
Ingredients:
Instructions:
Nutrition Facts:
| Calories | 361 kcal |
|---|---|
| Protein | 2.9 g |
| Fat | 30.0 g |
| Carbs | 24.7 g |
| Fiber | 1.4 g |
| Sugar | 20.9 g |
| Sodium | 145 mg |
