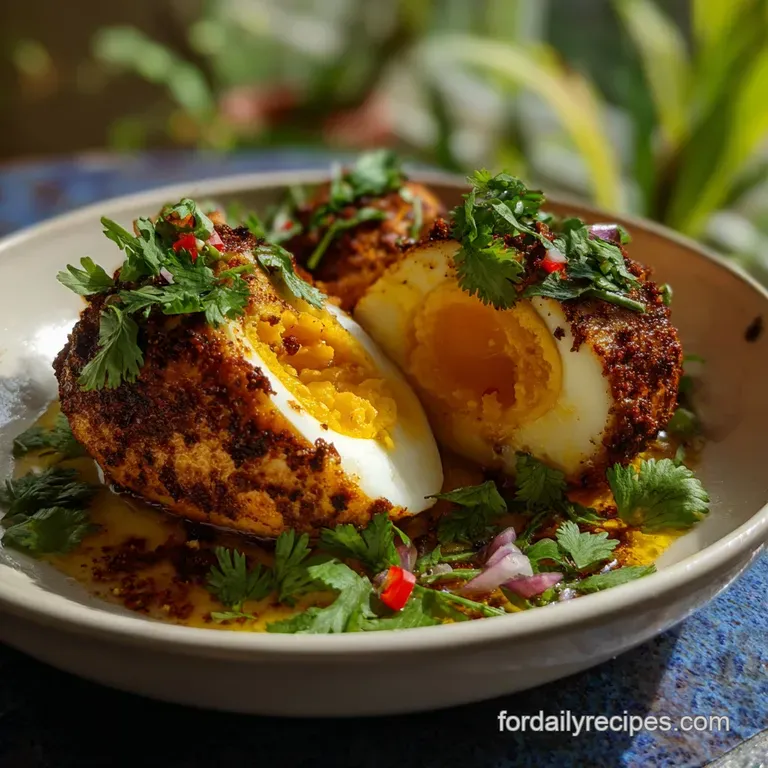
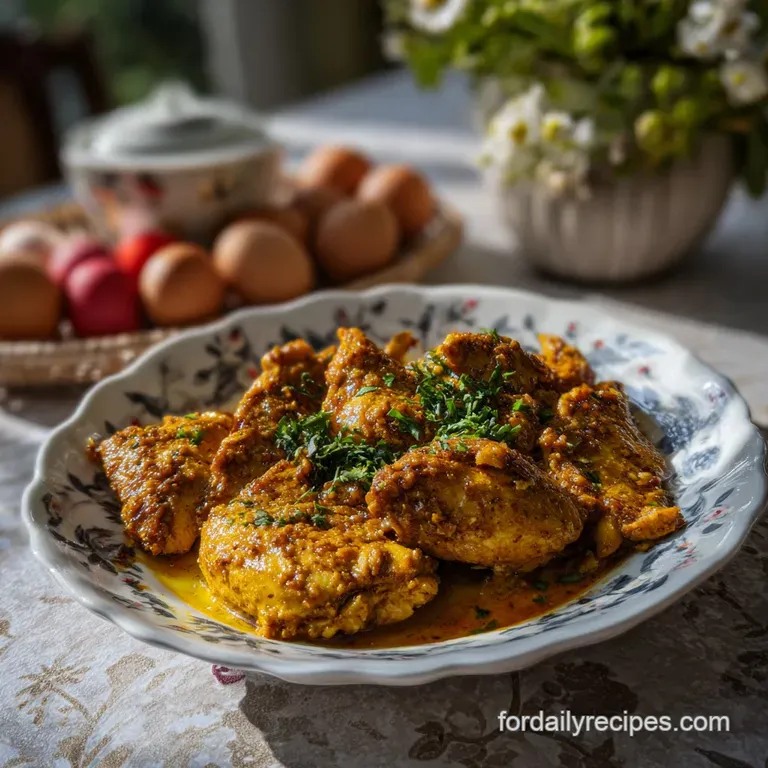
Chicken and Egg: Silky & Tender
- Time: Active 10 minutes, Passive 5 minutes, Total 15 minutes
- Flavor/Texture Hook: Silky ribbons and savory umami
- Perfect for: Weeknight comfort or a high protein lunch
- Discovering Heritage Flavors in This Savory Chicken and Egg
- Vital Statistics for This Time Honored Protein Dish
- Gathering Every Component for This Balanced Savory Meal
- Essential Tools Required for Achieving The Silky Texture
- Mastering the Sizzle With These Detailed Preparation Steps
- Overcoming Challenges for a Flawless Result Every Time
- Adapting the Recipe with Creative Swaps and Variations
- Caring for Leftovers and Smart Kitchen Sustainability Tips
- Complementary Flavors to Serve Alongside Your Finished Dish
- Chicken and Egg FAQs
- 📝 Recipe Card
Discovering Heritage Flavors in This Savory Chicken and Egg
The kitchen comes alive the second that minced garlic hits the warm oil. It's a sharp, punchy aroma that instantly signals comfort is on the way. This Chicken and Egg dish isn't just a meal to me, it's a piece of culinary history passed down through generations.
I remember watching my grandmother move with such grace, swirling eggs into a shimmering pan until they looked like silk ribbons. She didn't use fancy gadgets, just a heavy pan and the knowledge of how heat transforms simple proteins into something extraordinary.
But let’s be honest, we've all been there. You try to whip up a quick scramble with some meat, and you end up with rubbery chunks and dry, overcooked eggs. It’s frustrating when a "simple" dish feels like a chore. That’s why I’m so excited to share the secret of velveting with you.
It sounds technical, but it’s actually a beautiful, gentle way to treat your ingredients. It ensures every bite of this Chicken and Egg recipe feels like a warm embrace on a plate.
We’re going to focus on the textures today. We want the chicken to be incredibly tender and the eggs to stay custardy and soft. No brown, crispy edges here just pure, velvety goodness.
Whether you're making an egg chicken sandwich later or serving this over a steaming bowl of rice, these techniques will change how you approach your stovetop forever. Trust me, once you see how the cornstarch protects the meat, you’ll never go back to plain searing again.
Vital Statistics for This Time Honored Protein Dish
Before we get our hands messy, let's look at why this specific combination of heat and timing creates such a reliable result. This isn't about rushing the process; it's about understanding the internal rhythms of the ingredients.
When we talk about the Chicken and Egg, we are looking for a specific window where the poultry is just cooked through while the eggs remain in that wobbly, luscious state.
Starch Gelatinization: The cornstarch in the marinade creates a physical barrier that prevents moisture from escaping the meat fibers during the over high heat sear.
Carryover Cooking: By removing the pan from the heat while the eggs are still slightly wet, the residual warmth of the chicken finishes the cook without making the eggs rubbery.
Emulsification: The small amount of vegetable oil in the egg mixture helps the proteins slide against each other, creating a much smoother curd than eggs cooked in butter alone.
| Thickness of Chicken | Internal Temp | Rest Time | Visual Cue |
|---|---|---|---|
| 1/4 inch strips | 165°F | 2 minutes | Opaque and white through center |
| 1/2 inch cubes | 165°F | 3 minutes | Firm to the touch, no pink |
| Thin medallions | 165°F | 1 minute | Edges curling slightly |
This table helps you decide how to prep your protein based on how much time you have. If you're in a hurry, those thin 1/4 inch strips are your best friend. They cook in a flash and maximize the surface area for that delicious soy sauce marinade to cling to. For another savory kitchen staple, you might find my Poultry Seasoning recipe useful when you want to experiment with different aromatic profiles in your future poultry dishes.
Gathering Every Component for This Balanced Savory Meal
Getting your "mise en place" ready is the most important part of this recipe. Because the cooking happens so fast literally in about 5 minutes you cannot be chopping garlic while the chicken is already in the pan.
You need everything measured and sitting in little bowls, ready to join the party. It makes the whole experience feel like a calm, focused ritual rather than a frantic scramble.
Component Analysis
| Ingredient | Science Role | Pro Secret |
|---|---|---|
| 1 tsp Cornstarch | Moisture Barrier | Coats the meat to prevent "squeaky" overcooked fibers. |
| 4 Large Eggs | Structural Base | Use room temperature eggs for a more even, faster set in the pan. |
| 1 clove Garlic | Aromatic Depth | Mince it as fine as possible so it melts into the sauce. |
Ingredients & Substitutes
- 250g chicken breast: Sliced into thin, bite sized strips. Why this? Lean protein absorbs the soy marinade quickly without becoming greasy.
- Substitute: Pork tenderloin or firm tofu strips for a different protein base.
- 1 tsp cornstarch: The key to the velveting process.
- Substitute: Arrowroot powder provides a similar silky coating.
- 1 tsp soy sauce: Adds salt and deep umami color.
- Substitute: Tamari for a gluten-free option with a richer flavor.
- 1 tsp vegetable oil (for marinade): Helps the cornstarch adhere.
- Substitute: Canola oil or any neutral tasting fat.
- 4 large eggs: The heart of the dish's texture.
- Substitute: 1 cup of liquid egg whites for a lower fat version (though less creamy).
- ½ tsp toasted sesame oil: Provides that signature nutty aroma.
- Substitute: A drop of peanut oil if you have sesame allergies.
- ¼ tsp fine sea salt: Enhances all the other flavors.
- Substitute: Kosher salt (use double the amount if the grains are large).
- 1 pinch white pepper: Adds a floral, earthy heat without black specks.
- Substitute: Finely ground black pepper for a more pungent bite.
- 2 stalks green onions: Whites for cooking, greens for garnish.
- Substitute: Chives for a more delicate, onion like finish.
- 1 clove garlic: Minced finely for a savory backbone.
- Substitute: 1/4 tsp garlic powder if you're out of the fresh stuff.
- 1 tbsp neutral cooking oil: For the actual frying process.
- Substitute: Avocado oil is great for its high smoke point.
Essential Tools Required for Achieving The Silky Texture
To get that authentic Chicken and Egg feel, the tools you use are just as important as the ingredients. You want a pan that can distribute heat evenly so you don't end up with hot spots that scorch your delicate eggs.
A well seasoned carbon steel wok is the dream here, but a heavy non stick skillet works wonders for most home cooks.
Chef's Note: If you're using a stainless steel pan, make sure it's properly preheated before adding the oil. You can test this by flicking a drop of water on the surface; if it dances around like a bead (the Leidenfrost effect), your pan is ready. This prevents the chicken from sticking and tearing.
Another unconventional trick I love is using a silicone spatula rather than a metal one. The silicone allows you to gently "sweep" the eggs across the bottom of the pan, creating those large, soft folds rather than chopping them into tiny bits. If you're looking for a different kind of textural comfort, you might also enjoy my Simple Chicken Alfredo recipe, which uses a similar focus on gentle heat to keep the sauce from breaking.
Mastering the Sizzle With These Detailed Preparation Steps
Right then, let's crack on with the actual cooking. The smells in your kitchen are about to become incredible. Remember to keep your movements calm the heat does the work, you just guide the ingredients.
- Prep the protein. Toss the 250g chicken breast strips with 1 tsp cornstarch, 1 tsp soy sauce, and 1 tsp vegetable oil in a small bowl. Note: This creates the velvet coating that keeps the meat juicy.
- Whisk the base. In a separate bowl, beat 4 large eggs with ½ tsp toasted sesame oil, ¼ tsp fine sea salt, and a pinch of white pepper. Whisk until no streaks of white remain.
- Prepare the aromatics. Slice the 2 stalks of green onions, keeping the white parts and green parts separate. Mince the 1 clove of garlic finely.
- Heat the pan. Add 1 tbsp neutral cooking oil to your skillet over medium high heat. Wait until the oil shimmers and you see a faint wisp of smoke.
- Sear the chicken. Add the chicken strips and the white parts of the green onions. Spread them out in a single layer. Cook for 2 minutes without moving them to get a light golden sear.
- Add the garlic. Toss the 1 clove of garlic into the pan. Stir for 30 seconds until the aroma is fragrant and pungent.
- Introduce the eggs. Lower the heat to medium and pour the egg mixture directly over the chicken. Listen for a gentle sizzle, not a loud pop.
- The gentle fold. Using your spatula, push the eggs from the edges toward the center. Let the raw egg flow into the empty space.
- Final finish. Once the eggs are 80% set but still look glossy and wet, remove the pan from the heat. The residual heat will finish the job.
- Garnish and serve. Sprinkle the reserved green onion tops over the top and serve immediately while the aroma is at its peak.
Overcoming Challenges for a Flawless Result Every Time
Even the most seasoned cooks have days where things don't go according to plan. The most common heartbreak with an egg chicken recipe is ending up with a watery mess at the bottom of the plate. This usually happens if the chicken wasn't seared fast enough or if the eggs were over whisked.
Chicken is Tough or Dry
If your chicken feels like cardboard, it’s usually because the heat was too low and the meat "stewed" in its own juices rather than searing. Next time, make sure that oil is truly shimmering before the meat touches the pan.
Eggs are Rubbery
This is a classic case of staying on the heat too long. Eggs continue to cook for at least a minute after you take them off the burner. If they look "perfect" in the pan, they will be overdone by the time they reach the table. Aim for "slightly under" when you kill the flame.
| Problem | Root Cause | Solution |
|---|---|---|
| Watery base | Overcooked eggs releasing moisture | Remove from heat while still slightly glossy. |
| Sticking meat | Pan wasn't hot enough | Use the water flick test before adding oil. |
| Bland flavor | Under seasoned eggs | Ensure you add salt to the eggs, not just the chicken. |
Common Mistakes Checklist
- ✓ Don't skip the cornstarch; it’s the secret to the velvet texture.
- ✓ Use a neutral oil with a high smoke point (avoid extra virgin olive oil).
- ✓ Pat the chicken dry with a paper towel before adding the marinade.
- ✓ Avoid over crowding the pan; if doubling the recipe, work in batches.
- ✓ Turn off the heat early residual heat is your best friend.
Adapting the Recipe with Creative Swaps and Variations
Once you've mastered the basic technique, you can start playing with different styles. This dish is a chameleon. You can take it in so many directions depending on what you have in the fridge. For instance, an egg chicken sandwich is a fantastic way to use these flavors.
Just pile the finished scramble onto a toasted brioche bun with a little spicy mayo.
If you have leftover rice, you can easily turn this into an egg chicken fried rice. Just toss the cooked rice into the pan with the chicken before you add the eggs. The grains will toast in the chicken fat and soy sauce, creating a wonderful depth of flavor.
For those chilly evenings, adding these ingredients to a pot of simmering chicken stock creates a beautiful egg chicken soup that feels like a hug in a bowl.
If you’re watching your carbs, the egg chicken salad style is a winner. Let the mixture cool slightly and toss it with some crisp romaine lettuce and a splash of rice vinegar. It’s light, refreshing, and incredibly filling.
| Goal | Adaptation | Texture Change |
|---|---|---|
| Extra Crispy | Increase cornstarch to 2 tsp | Crunchier exterior on chicken |
| Spicy Kick | Add 1 tsp chili crisp to eggs | Bold heat and subtle crunch |
| Creamier Finish | Add 1 tbsp heavy cream to eggs | Richer, more "French" style curd |
Caring for Leftovers and Smart Kitchen Sustainability Tips
This Chicken and Egg dish is best served immediately because the texture of the eggs is so delicate. However, if you do find yourself with leftovers, you can keep them in an airtight container in the fridge for up to 2 days.
When reheating, avoid the microwave if possible, as it will turn the eggs into rubber. Instead, place them in a small skillet over low heat with a teaspoon of water. Cover the pan and let the steam gently warm everything through. It won't be quite as silky as day one, but it’s still a very respectable lunch.
To reduce waste, don't throw away your green onion roots! You can place them in a small jar of water on your windowsill, and they will regrow in about a week. Also, any leftover chicken trimmings can be frozen and saved for making a rich stock later on.
It’s these little habits that turn a good cook into a great one.
Complementary Flavors to Serve Alongside Your Finished Dish
Since this is a savory, umami forward dish, it pairs beautifully with something bright or acidic to cut through the richness. A simple cucumber salad with rice vinegar and a pinch of sugar is the perfect companion. The cool, crisp cucumbers provide a wonderful contrast to the warm, velvety chicken.
If you want a more substantial meal, serve this over a bed of fluffy jasmine rice or even some glass noodles. The noodles are particularly good at soaking up any of the seasoned oils that might escape the eggs. For a spread that really impresses, you could serve this alongside my Baked Chicken Thighs recipe if you're hosting a larger dinner and want to offer different styles of poultry.
No matter how you serve it, remember that the best ingredient in any heritage recipe is the care you put into it. Take a second to smell the garlic, watch the eggs transform, and enjoy the process. Happy cooking!

Chicken and Egg FAQs
What is an "egg chicken"?
It refers to a hen raised primarily for egg production. While these chickens lay eggs for consumption, they are typically different breeds than those raised for meat, focusing on consistent laying rather than rapid growth.
What type of chickens lay eggs?
Female chickens, called hens, lay eggs. Breeds like Leghorns, Plymouth Rocks, and Rhode Island Reds are renowned for their consistent egg-laying abilities.
Are egg chickens good to eat?
Yes, but they are generally tougher and less meaty than specialized meat breeds. While edible, their meat may not have the same tenderness or flavor profile desired for many dishes compared to broiler chickens.
Are egg chickens different from meat chickens?
Yes, they are specifically bred for different purposes. Egg-laying breeds (like Leghorns) are optimized for consistent egg production, while meat breeds (like Cornish Cross) are bred for rapid growth and a higher meat yield, similar to how we approach a Slow Cooker Turkey Breast: Succulent & Savory.
Can I use eggs from older laying hens?
Yes, you can, but the eggs may be different. Older hens often lay larger eggs, and the whites might be thinner and the yolks paler than those from younger hens, though they are perfectly safe and usable in recipes.
What's the difference in taste between eggs from different breeds?
The breed has a minor impact on taste; diet is more influential. While some subtle differences exist, the feed the hens consume has a far greater effect on the yolk color and flavor nuances than the breed itself.
How do I know if my chicken is an "egg chicken"?
Look at their physical characteristics and history. Egg-laying breeds are often leaner, have different comb sizes, and their primary function is egg production, not rapid meat development. If you're preparing a meal, remember that the quality of the final dish depends heavily on the ingredients, much like achieving perfect crispy skin on a Peking Duck Recipe: Shattering Crispy Skin.
Chicken And Egg
Ingredients:
Instructions:
Nutrition Facts:
| Calories | 398 kcal |
|---|---|
| Protein | 41g |
| Fat | 23g |
| Carbs | 4g |
| Fiber | 0.4g |
| Sugar | 0.6g |
| Sodium | 442mg |
