Cherry Pie Filling: the Ultimate Pasty Perfection
- Crafting the Perfect Pasty Foundation: Why Homemade is Always Best
- The Culinary Science Behind This Bright Cherry Filling
- Essential Components and Smart Substitutions for the Best Cherry Pie Filling
- Step-by-Step Guide to Making Flawless Homemade Cherry Pie Filling
- Chef's Troubleshooting: Avoiding Common Filling Flaws
- Preservation Prowess: Storing Your Homemade Batch
- Versatility Beyond the Pie: Creative Uses for Leftover Cherry Pie Filling
- Recipe FAQs
- 📝 Recipe Card
Crafting the Perfect Pasty Foundation: Why Homemade is Always Best
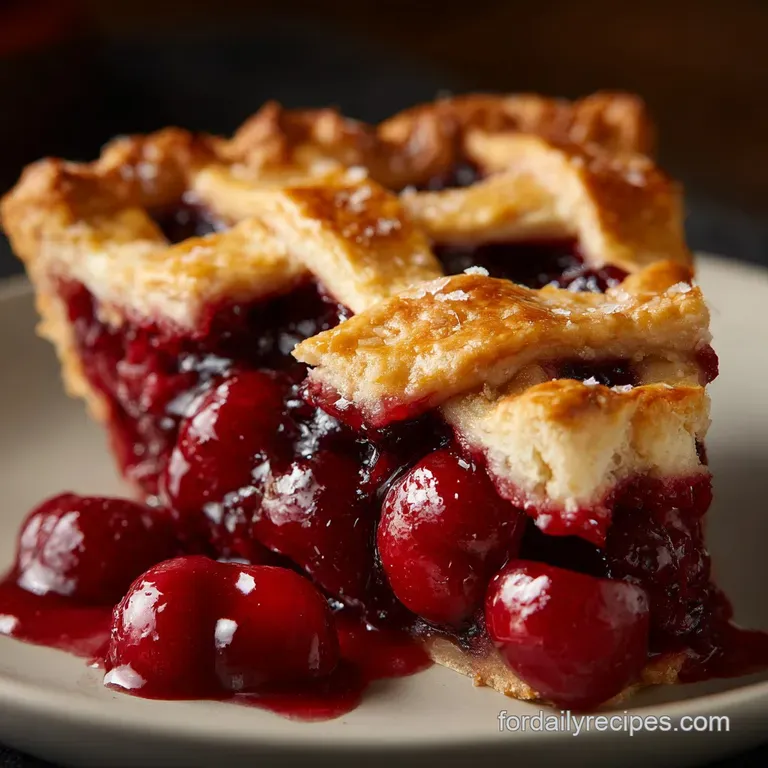
That intense, ruby red color, glistening like melted jewels. The aroma of baked fruit and a hint of almond dancing off the stovetop this homemade Cherry Pie Filling is the absolute best way to make your kitchen smell like pure, unadulterated happiness.
It’s so much more vibrant than anything you’ll find lurking in a can, trust me. The texture is worlds apart, too.
Honestly, ditch the tin opener for good. Making this filling yourself is ridiculously easy, substantially cheaper than the gourmet stuff, and takes about 20 minutes of active cooking time.
It’s a total game changer for spontaneous baking, especially when you realize you need a show stopping dessert centerpiece right now . This recipe is the foundation of baking success.
I’ve messed up plenty of fillings before too runny, too gummy, too sickeningly sweet so I’ve learned the few non-negotiable steps that guarantee perfection.
Today, we are going to nail the method and make the most vibrant, glossy Cherry Pie Filling you’ve ever tasted, ready for your next lattice crust or crumble.
The Culinary Science Behind This Bright Cherry Filling
This isn’t just about boiling fruit and sugar; it’s about controlling the liquid and optimizing the flavor profile. The secret to the very best Cherry Pie Filling is understanding how starch interacts with acid and heat.
If you master that tiny bit of kitchen chemistry, you’ll never look back.
Defining the Desired Texture: Glossy, Not Gummy.
You want the filling to look glossy and jewel like, holding its shape when sliced but still being tender and yielding. That perfect texture is achieved by bringing the mixture to a full boil after the slurry is added.
If you skip this crucial boiling stage, the starch won't fully activate, leaving you with a cloudy, runny mess when you slice the pie. That is a crime against baking.
Comparing Fresh vs. Frozen Cherries for Filling.
I prefer fresh, tart Montmorency cherries if I can get them because the flavor is unparalleled, but frozen works beautifully don't sweat it. If you use frozen cherries, do not thaw them completely. Just measure them out and toss them straight into the pot.
The extra moisture they release as they heat up actually helps prevent scorching on the bottom of the pan, making your homemade Cherry Pie Filling even easier to manage.
Essential Equipment for Stovetop Filling Magic.
A heavy bottomed, non-reactive saucepan is your best friend here. Heavy bottoms distribute heat evenly, which prevents localized scorching of the sugar and fruit a serious problem for fruit fillings.
You’ll also need a decent whisk for mixing the cornstarch slurry, ensuring it's completely lump free before it hits the hot cherries. I learned that lesson the hard way once, resulting in little pockets of raw starch in my very first attempt at homemade Cherry Pie Filling . Yuck.
The Role of Cornstarch vs. Tapioca in Achieving Gloss.
Cornstarch gives that beautiful, high sheen gloss that makes this Cherry Pie Filling look so appealing. It sets up very quickly, which means less time over the heat and better fruit integrity.
Tapioca starch (or flour) is also a great option, especially if you plan to freeze the final pie, as it handles freeze/thaw cycles better without breaking down. I generally stick to cornstarch for fresh baking because I love that super smooth finish.
Optimizing Acidity: Why Lemon Juice is Non-Negotiable.
Cherries need a hit of acid to counteract the sugar. Lemon juice doesn't just cut the sweetness; it also brightens the entire fruit profile, making the flavor pop off the plate. Without it, the filling tastes flat and overly syrupy.
A little squeeze of fresh lemon juice is what separates a decent filling from the best Cherry Pie Filling ever.
The Sneaky Magic of Almond Extract (A Flavor Enhancer).
This is my secret weapon! Cherries and almonds are a match made in heaven, chemically speaking. The hint of almond extract accentuates the natural notes in the cherry pit, adding a depth that people often can’t quite place but absolutely love. Don't skip the almond extract.
It adds complexity without tasting overtly artificial, making this homemade Cherry Pie Filling taste incredibly sophisticated.
Essential Components and Smart Substitutions for the Best Cherry Pie Filling
Getting the ingredients right means understanding the balance between sweetness, acidity, and thickening power. Here is how we build the perfect foundation for a truly excellent Cherry Pie Filling .
Choosing Your Main Star: Sweet vs. Tart Cherry Varieties.
We are aiming for a classic tart cherry flavor profile here, which means sourcing sour cherries (like Morello or Montmorency) is ideal. They hold their shape well and provide that essential tang.
If you can only find sweet cherries (like Bing or Rainier), you must compensate by adding an extra half teaspoon of lemon juice to maintain the necessary balance.
Sweetener Notes: Sugar Levels Based on Cherry Type.
The recipe calls for 1 cup of granulated sugar when using tart cherries. If you are using naturally sweeter varieties, start with 3/4 cup of sugar instead and taste the cooked filling before adding the almond extract and zest.
For a deeper flavor, you can substitute up to half the white sugar with light brown sugar, though this will slightly mute the vibrancy of the Cherry Pie Filling color.
Thickness Agents: When to Swap Cornstarch for Arrowroot.
| Original Ingredient | Viable Substitution | Notes |
|---|---|---|
| Cornstarch | Tapioca Starch or Arrowroot Powder | Use equal amounts of tapioca, or 1/2 the amount of arrowroot (it's very powerful!). |
| Granulated Sugar | Honey or Maple Syrup | Reduce liquid in the recipe by 1/4 cup if using liquid sweeteners. |
| Fresh Lemon Juice | White Vinegar or Lime Juice | Vinegar works in a pinch for acidity, but lime can change the overall flavor slightly. |
| Almond Extract | Vanilla Extract (1/2 tsp) | It won't give the same depth but still provides warmth. |
Freshness Focus: Sourcing the Best Pitting Tool.
If you are using fresh cherries, invest in a good pitter. Trying to pit cherries with a straw, paperclip, or knife is a sticky mess I wouldn't wish on my worst enemy. A simple, handheld pitter makes the process swift and keeps your cherries whole, which makes for a much prettier Cherry Pie Filling .
step-by-step Guide to Making Flawless Homemade Cherry Pie Filling

We are aiming for speed and precision here. The quicker we cook the fruit, the better it retains its structure and color. This easy Cherry Pie Filling recipe is basically stovetop magic.
Prepping the Cherries: Pitting Without the Pains.
First step: get those pits out! Wash your fresh cherries thoroughly. Using your pitter, remove all the pits and discard them. If using frozen, skip the washing and pitting, and move straight to the next step.
In a small bowl, whisk together the 1/2 cup of cold water and the 1/4 cup of cornstarch until completely smooth. This lump free slurry is critical to the texture of our Cherry Pie Filling .
Creating the Syrup Base (The Initial Simmer).
Place the cherries, sugar, salt, and fresh lemon juice into your heavy bottomed saucepan. Put the pan over medium heat. Stir this mixture frequently you want the sugar to dissolve completely and the cherries to start releasing their beautiful juices.
For fresh cherries, this takes about 5 minutes; for frozen, wait until the mixture is steaming and simmering gently.
Chef's Note: Stir constantly while simmering! Sugar can scorch quickly on the bottom of the pan, which will ruin the flavor of your whole batch of Cherry Pie Filling with a burnt undertone.
Tempering the Thickener for a Lump Free Finish.
Once the cherry mixture is actively bubbling and all the sugar is dissolved, give your cornstarch slurry one final, vigorous whisk (it often settles). Now, reduce the heat slightly to maintain a gentle boil, and pour the slurry into the cherry mixture in a slow, steady stream while stirring vigorously.
This prevents clumping.
The Crucial "Bubble and Set" Test.
Keep stirring and let the mixture return to a boil for one to two minutes. You will literally watch the filling transform from cloudy pink liquid to a clear, glossy ruby color. This full boil is mandatory for the cornstarch to fully activate.
When the mixture coats the back of a spoon and you can draw a clean line through it, your homemade Cherry Pie Filling is ready. Remove the pan immediately from the heat and stir in the almond extract and lemon zest.
Chef's Troubleshooting: Avoiding Common Filling Flaws
A beautiful Cherry Pie Filling doesn't require luck; it requires attention to heat and timing. Here are the things that often go sideways and how to fix them.
What to Do If Your Filling Is Too Runny or Too Stiff.
If you cooled your filling completely and it's still runny, it means the cornstarch didn't boil long enough to activate fully. Simply return the cold filling to the saucepan, bring it back to a full boil for two minutes, stirring constantly, and then cool again.
If it is too stiff (gummy), you overcooked it or used too much cornstarch. You can loosen it by stirring in 1 2 tablespoons of hot water or Kirsch (cherry brandy) until the consistency is right.
Preventing Fruit Scorch and Sticky Bottoms.
The key to preventing scorching is the heavy bottomed pan and constant stirring during the initial sugar melting phase. If you smell even a slight burnt sugar aroma, transfer the mixture immediately to a clean pan, leaving the scorched layer behind.
Also, using frozen cherries helps immensely here as they release liquid quickly. Don’t walk away from the stove during this crucial part of making your Cherry Pie Filling .
The Importance of Cooling Completely Before Baking.
I cannot stress this enough: The filling must be completely cold before you put it into a pie crust. If the filling is even slightly warm, it will melt the butter in your pastry crust and turn your beautiful bottom crust into a soggy, wet mess.
Give your Cherry Pie Filling a full two hours in the fridge it's worth the wait for a perfectly flaky pastry.
Preservation Prowess: Storing Your Homemade Batch
You did all that work creating the best Cherry Pie Filling , so let’s make sure it lasts! This recipe is excellent for meal prep, especially if you have a massive haul of fresh cherries.
Refrigerator Life: How Long Will It Last?
Once cooled, your homemade Cherry Pie Filling will keep beautifully in an airtight container in the refrigerator for up to 7 days. Because it is cooked down with sugar, which acts as a preservative, it holds up better than fresh fruit would.
Flash Freezing for Future Baking Projects.
Yes, this easy Cherry Pie Filling freezes like a dream! I often make a triple batch just for the freezer. Allow the filling to cool completely in the refrigerator first. Then, portion the cold filling into freezer safe containers or heavy duty Ziploc bags.
Label and date them you won't believe how handy a bag of frozen filling is when that midnight cobbler craving hits.
Best Containers for Zero Freezer Burn.
I recommend rigid, freezer safe containers or mason jars (leave 1 inch headspace for expansion). If using bags, squeeze out all the excess air and lay the bags flat on a baking sheet to freeze into a thin layer. This shape thaws much faster.
Properly stored, your frozen Cherry Pie Filling will maintain excellent quality for 4 6 months. Thaw overnight in the refrigerator before using in any baked goods.
Versatility Beyond the Pie: Creative Uses for Leftover Cherry Pie Filling
While making a perfect pie is usually the main goal, this bright, delicious Cherry Pie Filling has so many other applications. If you have any leftover (highly unlikely, but possible), here are a few fun ideas.
- Cheesecake Topping: Warm it slightly and spoon it generously over a classic baked or no-bake vanilla cheesecake.
- Cobblers and Crisps: This filling works perfectly straight into a pan, topped with a quick biscuit dough or oat crumble.
- Ice Cream Swirl: Mix chilled filling into vanilla ice cream base before freezing for homemade cherry swirl ice cream.
- Breakfast Treats: Use it as a filling for quick hand pies, Danish pastries, or simply swirl a spoonful into your morning oatmeal or Greek yogurt.
This recipe for Cherry Pie Filling is truly the gift that keeps on giving, whether you bake it now or save it for a cold winter night. Enjoy every ruby red bite!

Recipe FAQs
My filling seems too runny after cooking. What did I do wrong?
The filling is usually too thin if the cornstarch (or other starch) was not fully activated through heat. Ensure you bring the mixture to a full, rolling boil for at least one minute after adding the starch slurry, as this process fully gelatinizes the starch.
If necessary, you can mix an extra teaspoon of cornstarch with cold water and stir it into the simmering filling until it reaches the desired thickness.
Can I use frozen cherries instead of fresh ones in this recipe?
Yes, you can absolutely use frozen cherries, but do not thaw them first; use them straight from the freezer. You may need to increase the cooking time slightly to account for the temperature difference and to allow the extra moisture released by the frozen fruit to evaporate.
You might also need to slightly reduce the amount of added liquid (water or juice) used initially.
Why is almond extract often recommended in cherry recipes? Can I omit it?
Almond extract contains benzaldehyde, a compound that naturally occurs in small quantities in cherry pits, meaning it subtly enhances and deepens the fruit's inherent flavor profile.
While it is highly recommended for its complementary flavor, you can certainly omit it if you have an allergy or simply dislike the taste. Vanilla extract makes a suitable, albeit less traditional, substitution.
How do I adjust the sweetness if my cherries are particularly tart or sweet?
Start by tasting a few raw cherries to gauge the overall tartness level before mixing the filling. If your cherries are extremely tart, you may need to add an extra tablespoon or two of sugar to the recipe.
Conversely, if the cherries are already very sweet, reduce the total sugar amount by up to a quarter cup, ensuring the final balance is spot on.
What is the best way to store the prepared cherry pie filling?
Properly cooked and cooled cherry pie filling can be stored in an airtight container in the refrigerator for up to one week. It is crucial to ensure the filling is completely cool before sealing it, as residual heat will create condensation that can lead to premature spoilage.
Alternatively, the filling can be jarred and processed using standard canning techniques for shelf stability.
Can I freeze the finished cherry pie filling for future use?
Yes, cherry pie filling freezes exceptionally well, particularly when cornstarch is used as the thickener. Once fully cooled, transfer the filling to a freezer safe zip-top bag or sturdy container, removing as much air as possible, and it will remain good for 4 to 6 months.
Thaw the filling overnight in the refrigerator before using it in a pie or cobbler.
Is it acceptable to use arrowroot or flour instead of cornstarch to thicken the filling?
While cornstarch is preferred for its ability to produce a glossy, bright, and translucent filling, both flour and arrowroot can be used as alternatives. Flour tends to result in a slightly opaque or cloudy filling, requiring about double the quantity of cornstarch for the same thickening power.
Arrowroot is an excellent substitute but should be mixed in near the end of cooking, as prolonged boiling can cause it to lose its thickening efficacy.
Bright Cherry Pie Filling Recipe
Ingredients:
Instructions:
Nutrition Facts:
| Calories | 478 kcal |
|---|---|
| Protein | 3.7 g |
| Fat | 0.2 g |
| Carbs | 122.7 g |
