French Silk Pie Recipe: Decadent Chocolate Mousse
- Time: Active 30 minutes, Passive 4 hours, Total 4 hours 30 mins
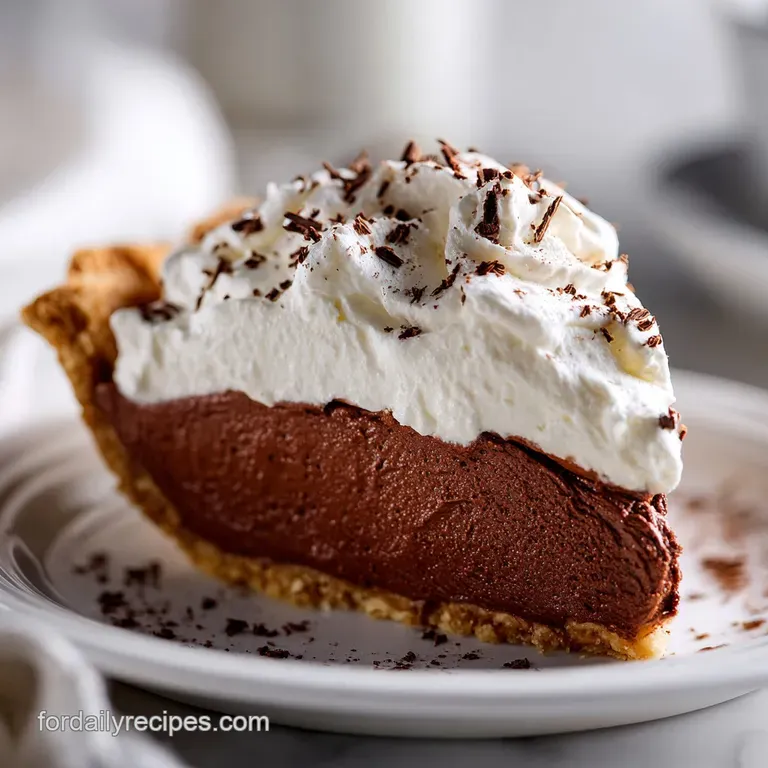
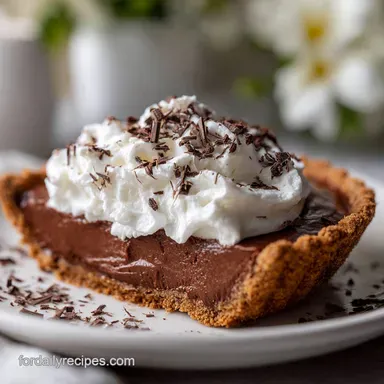
- Flavor/Texture Hook: Shattering flaky crust paired with a cloud like, intensely dark chocolate mousse
- Perfect for: Holiday centerpieces or when you need a high impact dessert with low stress prep
- Everything You Need for This Classic French Silk Pie Recipe
- The Science of Why it Works
- The Component Analysis for Ultimate Success
- Elements for the Best French Silk Pie Recipe
- Essential Tools for a Flawless Finish
- The Path from Prep to Plate
- Common Pitfalls and How to Pivot
- Creative Twists on the Chocolate Classic
- Adjusting the Yield for Any Occasion
- Kitchen Myths and Realities
- Keeping Your Masterpiece Fresh and Stable
- Presentation Tips for the Ultimate Wow Factor
- Recipe FAQs
- 📝 Recipe Card
Everything You Need for This Classic French Silk Pie Recipe
The first time I tried making a silk pie recipe, I ended up with what can only be described as chocolate flavored sand. I followed a random recipe that didn't explain the "why" behind the whipping process, and I didn't realize that sugar needs specific conditions to actually dissolve into butter.
It was a gritty, heavy mess that honestly made me want to give up on dessert entirely. But I’m stubborn, and after a few more attempts some too runny, some too stiff I finally cracked the code on what makes a truly rich french silk pie recipe.
We aren't just making a chocolate pie; we are building an emulsion. The secret lies in how you treat the eggs and the butter. If you've ever been intimidated by the idea of raw eggs in a pie, don't worry. I've adapted this to use a gentle heat method that keeps things safe without losing that signature "silk" feel.
This is the version that will have your friends asking which high end bakery you visited, and you can honestly tell them it came right out of your own kitchen.
Right then, let's talk about the budget aspect. You don't need the most expensive Belgian chocolate in the world to make this taste like a million bucks. By using unsweetened baking chocolate and controlling the sugar ourselves, we get a much deeper, more sophisticated flavor than those overly sweet frozen versions.
It’s about being smart with your ingredients so the results punch way above their weight class.
The Science of Why it Works
Emulsification Stability: Beating the eggs and sugar over heat creates a stable foam that traps air while the fat from the butter surrounds those air bubbles, resulting in a velvety texture.
Protein Denaturation: The gentle heat slightly uncoils the egg proteins, allowing them to bond and thicken the filling into a structure that holds its shape when sliced.
| Method | Total Active Time | Texture Outcome | Best For |
|---|---|---|---|
| Traditional Cold Press | 20 minutes | Dense and fudge like | Quick cravings |
| Cooked Egg Base (This Recipe) | 30 minutes | Airy, silky, and stable | Dinner parties/Safety |
| Stovetop Custard Style | 45 minutes | Heavy and pudding like | Kids' desserts |
Choosing the cooked egg method is a massive win for efficiency. It ensures the sugar is completely dissolved no more gritty bites and it gives the pie enough structural integrity to stand tall on a plate without slumped edges. It’s the difference between a "good" pie and a "professional" one.
The Component Analysis for Ultimate Success
Understanding what each player does in the bowl is how you move from following a script to actually cooking. Every ingredient here has a job, and if one slacks off, the whole pie suffers. We are using simple pantry staples, but we’re using them with purpose.
| Ingredient | Science Role | Pro Secret |
|---|---|---|
| Unsweetened Chocolate | Provides the structural base and intense cocoa flavor without added oils. | Melt it slowly to avoid scorching the delicate cocoa solids. |
| Large Eggs | Acts as the primary emulsifier and provides the "lift" in the mousse. | Use room temperature eggs for a more stable, voluminous foam. |
| Unsalted Butter | Creates the creamy mouthfeel and carries the chocolate flavor. | Ensure it is truly "softened" (around 65°F) so it whips properly. |
The butter is the most common place where people trip up. If it's too cold, it won't incorporate the air needed for that cloud like feel. If it's melted, the pie will never set. You want it soft enough that your finger leaves an indentation with zero resistance, but not so soft that it’s shiny or greasy.
Trust me on this one; the temperature of your butter dictates the entire success of the filling.
Elements for the Best French Silk Pie Recipe
To keep things budget friendly, I always suggest buying store brand basics for the flour and sugar. Save your "splurge" for the butter, as it’s the primary flavor carrier. If you're looking for a zesty contrast to all that rich chocolate, you might consider serving this alongside something tangy, much like how a Rémoulade Sauce recipe cuts through fried seafood.
For the Shattering Crust
- 1.5 cups (190g) All purpose flour: Why this? Provides enough gluten for structure without being tough. (Substitute: Pastry flour for an even more tender crumb)
- 0.5 cup (113g) Unsalted butter, cold and cubed: Why this? Creates the steam pockets that lead to flakiness. (Substitute: Lard or shortening for a more neutral flavor)
- 1 tbsp (12g) Granulated sugar: Why this? Aids in browning and balances the salt.
- 0.5 tsp (3g) Fine sea salt: Why this? Enhances the buttery notes of the dough.
- 4 tbsp (60ml) Ice cold water: Why this? Binds the dough without melting the fat.
For the Silky Chocolate Filling
- 1 cup (200g) Granulated sugar: Why this? Sweetens and provides the crystalline structure for whipping.
- 3 Large eggs: Why this? The backbone of the mousse structure.
- 4 oz (113g) Unsweetened chocolate, chopped: Why this? Deep cocoa punch without excess sugar. (Substitute: Bittersweet chocolate, but reduce the added sugar by 2 tablespoons)
- 1 cup (226g) Unsalted butter, softened: Why this? Adds the "silk" and richness.
- 1 tsp (5ml) Pure vanilla extract: Why this? Rounds out the chocolate profile.
- 1 pinch flaky sea salt: Why this? Makes the chocolate flavors pop.
For the Cloud Topping
- 1 cup (240ml) Heavy whipping cream, cold: Why this? High fat content is necessary for stiff peaks.
- 2 tbsp (15g) Powdered sugar: Why this? Sweetens without adding graininess.
- 1 tsp (5ml) Vanilla extract: Why this? Floral notes to contrast the dark chocolate.
- 10g Chocolate shavings: Why this? Visual appeal and texture.
Essential Tools for a Flawless Finish
You don't need a high end French kitchen, but a few specific tools will make your life significantly easier. A stand mixer is the MVP here because we’re going to be whipping the filling for a long time. If you use a hand mixer, just be prepared for a bit of an arm workout!
- 9 inch Pie Plate: Glass or ceramic works best for even heat distribution during blind baking.
- Stand Mixer: Necessary for the extended whipping times required to dissolve the sugar.
- Double Boiler: Or a heat safe bowl set over a pot of simmering water.
- Instant read Thermometer: To ensure the eggs reach a safe 160°F without scrambling.
- Pastry Cutter: For working the butter into the flour without warming it with your hands.
Chef's Tip: Freeze your butter for 10 minutes before grating it into the flour with a box grater. This creates tiny, uniform shards of fat that guarantee a flaky, professional style crust every time.
The Path from Prep to Plate

This process requires a bit of patience, but each step is straightforward. We’ll start with the crust, then move to the intensive whipping of the filling. Don't rush the cooling process; the chocolate must be at room temperature before it meets the butter, or you'll end up with a soup.
- Pulse the dough. Mix the flour, 1 tbsp sugar, and salt, then cut in the cold cubed butter until it looks like coarse crumbs. Note: Tiny lumps of butter are good they create the flakes.
- Hydrate and chill. Add ice water 1 tbsp at a time until the dough just holds together, then wrap and chill for at least 30 minutes.
- Blind bake the crust. Roll out the dough, fit it into the 9 inch plate, and bake at 375°F for 15 minutes until golden and crackling. Let it cool completely.
- Melt the chocolate. Use a double boiler to melt the 4 oz of unsweetened chocolate until glossy and smooth. Set aside to cool to room temp.
- Cook the egg base. Whisk 3 eggs and 1 cup sugar over simmering water, stirring constantly until the mixture reaches 160°F. This takes about 5-8 minutes.
- Whip for volume. Transfer the hot egg mixture to a stand mixer and beat on high until the bowl feels cool and the mixture is pale and thick.
- Incorporate the fat. Add the softened butter 1 tablespoon at a time, beating well after each addition until fully combined and airy.
- Fold in chocolate. Add the cooled melted chocolate, vanilla, and sea salt, then whip on medium high for another 2 minutes until the filling looks like dark silk.
- Fill and chill. Spread the filling into the cooled crust and refrigerate for at least 4 hours until the center is firm to the touch.
- Top and serve. Whip the heavy cream, powdered sugar, and vanilla to stiff peaks, spread over the pie, and garnish with chocolate shavings.
Common Pitfalls and How to Pivot
Even the best bakers hit a snag now and then. The most common "fail" with this silk pie recipe is a texture that feels grainy or a filling that refuses to set. Usually, this comes down to temperature control or rushing the whipping stage.
Why Your Filling Is Grainy
If your pie feels like it has sand in it, the sugar didn't fully dissolve in the egg mixture. This happens if the eggs weren't heated enough or if the whipping stage was cut short.
You can't really "fix" it once the butter is in, but you can prevent it by ensuring the egg/sugar mix is hot to the touch and whipped until the sugar crystals are gone.
Why Your Filling Is Runny
A runny filling usually means the melted chocolate was still too warm when added, or the butter was too soft. If it’s already mixed, try chilling the whole bowl for 20 minutes, then re whipping it. The cold will firm up the fats, allowing them to hold air again.
| Problem | Root Cause | Solution |
|---|---|---|
| Soggy Bottom | Crust wasn't fully blind baked. | Ensure the crust is golden brown before adding filling. |
| Broken Emulsion | Butter added too fast to hot eggs. | Add butter one tablespoon at a time and ensure egg base is cool. |
| Flat Topping | Cream wasn't cold enough. | Chill the bowl and beaters for 10 minutes before whipping cream. |
Common Mistakes Checklist: ✓ Always use ice cold water for the dough to keep the butter from melting early. ✓ Ensure the melted chocolate is room temperature; if it’s hot, it will melt your butter.
✓ Don't skip the 160°F thermometer check for the eggs it’s about safety and structure. ✓ Let the pie chill for the full 4 hours; cutting it early leads to a messy collapse.
✓ Use the whisk attachment on your stand mixer for the filling, not the paddle.
Creative Twists on the Chocolate Classic
Once you've mastered the basic homemade french silk pie recipe, it's fun to play with the flavor profile. Chocolate is a great canvas for other aromatics. If you're feeling adventurous, you can easily turn this into a "Mocha Silk" by adding a teaspoon of espresso powder to the melted chocolate.
- Peppermint Twist: Add 1/2 tsp of peppermint extract to the filling and top with crushed candy canes for a festive holiday version.
- Salted Caramel: Drizzle a thick caramel sauce over the chocolate layer before adding the whipped cream.
- Nutty Crust: Replace 1/4 cup of the flour in the crust with finely ground pecans or walnuts for an earthy, toasted flavor.
If you enjoy the rich, creamy texture of this pie, you might also love the velvety finish of a well made French s Green recipe during your holiday meal. It’s all about those classic, comforting textures that remind us of home.
Adjusting the Yield for Any Occasion
This recipe is designed for a standard 9 inch pie plate, which serves 10 people generously. If you need to scale it down, I recommend making the full batch of dough and freezing half, then halving the filling.
- Scaling Down (1/2 batch): Use a 6 inch small pie tin. Use 2 small eggs instead of 1.5 large ones to keep the protein ratio correct. Reduce the bake time for the crust by 5 minutes.
- Scaling Up (Double batch): Do not simply double the salt in the filling use 1.5x the salt to avoid over seasoning. Work in two separate batches for the filling to ensure your stand mixer can handle the volume and maintain the aeration.
- Baking for a Crowd: If you double the recipe for two pies, increase the chilling time by an hour to ensure the centers are fully set in a crowded fridge.
Kitchen Myths and Realities
There are plenty of old wives' tales about chocolate pies that just don't hold up under the light of science. Let's clear a few up so you can bake with confidence.
Myth: You must use raw eggs for "authentic" silk pie. Reality: While the original 1950s versions used raw eggs, cooking them to 160°F in a double boiler actually creates a better texture. It ensures the sugar dissolves and the proteins provide better lift.
It's safer and more delicious.
Myth: Over whipping the filling will turn it into butter. Reality: While you can over whip heavy cream, the egg and butter base of a silk pie is very stable once the chocolate is added. You actually want to whip it longer than you think to get that "silk" feel.
Keeping Your Masterpiece Fresh and Stable
Because this pie is high in fat and contains eggs, proper storage is non negotiable. It’s also a great candidate for the freezer if you want to get your holiday prep done early.
- Fridge: Keep the pie covered with plastic wrap or a pie dome for up to 4 days. The crust may soften slightly after day 2, but the filling stays perfect.
- Freezer: You can freeze the filled pie (without the whipped cream) for up to 2 months. Thaw it in the fridge overnight before topping with fresh cream and serving.
- Zero Waste: If you have leftover pie dough scraps, toss them in cinnamon sugar and bake them for 10 minutes. They make "pie fries" that are a perfect snack while you wait for the main event to chill.
Presentation Tips for the Ultimate Wow Factor
A rich french silk pie recipe deserves a grand entrance. Instead of just plopping the whipped cream on top, try using a piping bag with a large star tip to create elegant dollops around the edge. This looks professional and makes it easier to slice.
For the chocolate shavings, use a vegetable peeler on a room temperature block of chocolate. Long, sweeping strokes will give you those beautiful curls that look like they belong in a patisserie. If the chocolate is too cold, it will just flake; if it's too warm, it will smudge.
A quick 10 seconds in your pocket is usually enough to get the perfect shaving temperature.
If you are looking for more French inspired treats to round out your repertoire, don't miss our guide on the French Martini recipe — it's the perfect zesty pairing for a slice of deep, dark chocolate pie. Enjoy every velvety bite!

Recipe FAQs
What's the secret to a perfect silk pie?
Control temperature and time. The secret lies in carefully beating the eggs and sugar over gentle heat to dissolve the sugar completely, followed by a sustained whipping of the butter and egg mixture to create a stable, airy emulsion. Rushing these steps can lead to a grainy or unset filling.
What makes a French silk pie?
A rich, velvety chocolate filling atop a crisp crust. It's characterized by its incredibly smooth, melt-in-your mouth texture achieved through emulsifying eggs, sugar, and butter with melted chocolate. A flaky, buttery crust is essential for contrast.
What is the difference between chocolate pie and French silk pie?
Texture and ingredients. While both are chocolate desserts, a French silk pie specifically uses a technique of emulsifying eggs and butter to create an exceptionally light, airy, and smooth filling, often described as "silky." Other chocolate pies might use pudding bases, custards, or ganaches which
result in denser textures.
Why do they call it French silk pie?
The luxurious, smooth texture. The name "French silk" evokes the feeling of fine silk fabric due to the pie's incredibly smooth, delicate, and rich mouthfeel, which is a direct result of the specific emulsification techniques used in its preparation.
Can I use raw eggs in my French silk pie filling?
No, this is a common misconception. While some older recipes might call for raw eggs, gently cooking them to 160°F ensures food safety and also helps the sugar dissolve completely, resulting in a smoother, more stable filling. If you enjoyed mastering temperature precision here, apply it to our Crawfish Etouffee: Authentic Louisiana Recipe with a Dark Roux for perfectly cooked ingredients.
How do I prevent my French silk pie filling from being grainy?
Ensure the sugar dissolves. A grainy filling typically means the sugar crystals didn't fully dissolve into the egg mixture. This is achieved by heating the egg and sugar mixture until hot to the touch and then whipping it thoroughly until the sugar is gone before adding the butter.
How do I get a stable, non-runny filling?
Proper emulsification and chilling are key. Ensure your butter is properly softened but not melted when you add it, and give the filling ample time (at least 4 hours) to chill and set completely in the refrigerator. If you enjoy creating stable emulsions, see how we achieve a similar controlled texture in our Cake in a Cake Recipe: Seamless Hidden Design.
French Silk Pie Recipe
Ingredients:
Instructions:
Nutrition Facts:
| Calories | 569 calories |
|---|---|
| Protein | 6 grams |
| Fat | 43 grams |
| Carbs | 41 grams |
| Fiber | 2 grams |
| Sugar | 30 grams |
| Sodium | 120 milligrams |
