Blueberry Syrup: a Weekend Breakfast Essential
- Ditch the store-bought Bottles: Crafting the Perfect Fruit Glaze
- The Science of Sweetness: Why a Touch of Lemon is Essential
- Key Components for Your Vibrant Blueberry Syrup
- Mastering the Method: Simple Steps to Gorgeous Syrup
- Chef's Troubleshooting: Avoiding Common Syrup Pitfalls
- Preserving the Jewel Tone: Guide to Storage and Shelf Life
- Beyond Pancakes: Creative Uses for Homemade Berry Glaze
- Recipe FAQs
- 📝 Recipe Card
Ditch the store-bought Bottles: Crafting the Perfect Fruit Glaze
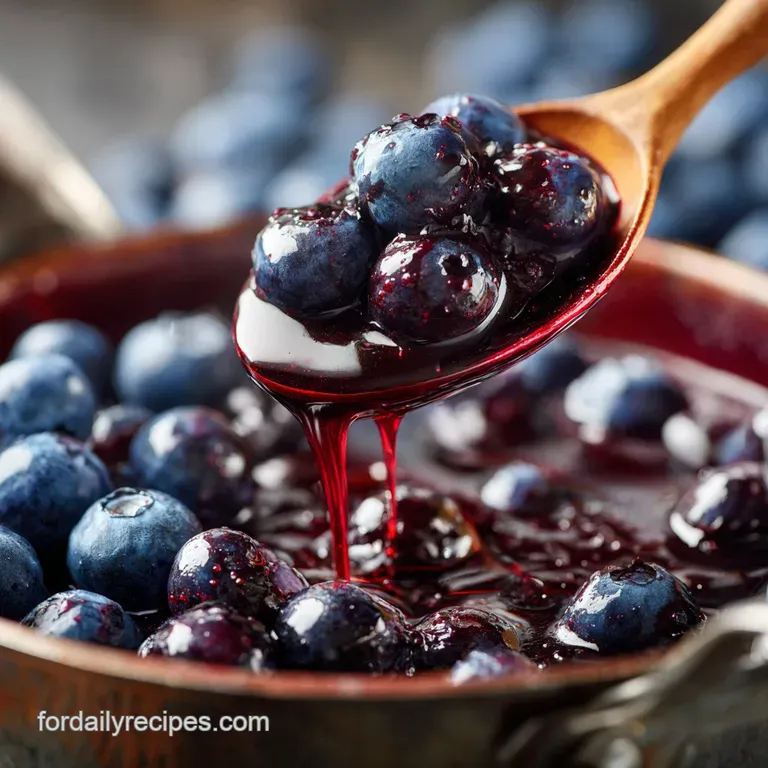
Oh my gosh, you have to try this. Seriously, forget everything you think you know about breakfast drizzles because the homemade Blueberry Syrup we’re making today is liquid gold.
The aroma alone, when those tiny, purple jewels start bursting and marrying with the sugar, is enough to pull anyone out of bed, no matter how much they cherish their weekend lie-in.
This isn't just sweet; it’s vibrant, tangy, and boasts a gorgeous, jewel toned depth you simply cannot replicate with anything manufactured.
We need recipes that are big on flavour but low on fuss, right? That’s why this version of Blueberry Syrup is a total lifesaver it uses four basic ingredients you probably have chilling in your pantry, and it takes less than 20 minutes of active cooking time.
It's shockingly inexpensive to make, especially if you grab a bag of frozen berries when they’re on sale, making it an upgrade that costs next to nothing compared to those sad, high fructose corn syrup bottles.
I promise, once you nail this one simple technique, you’ll be making your own fruit glazes and syrups all year round, and you’ll instantly elevate every pancake stack or cocktail hour you host.
Let's crack on and talk about the simple kitchen logic behind creating the absolute best, most dazzling homemade Blueberry Syrup .
The Science of Sweetness: Why a Touch of Lemon is Essential
The Minimalist Approach: Maximum Flavor, Four Ingredients
The secret to a knockout Blueberry Syrup isn't complexity; it’s quality control and smart balancing. We are strictly sticking to blueberries, sugar, water, and lemon, which keeps the spotlight fiercely focused on the primary fruit flavour.
Using too much water dilutes the berry essence, forcing you to cook it longer, which eventually mutes the brightness. We want deep purple colour and punchy flavor.
Why This Recipe is a True 'Doddle' (Easy Kitchen Wins)
This method is genuinely foolproof because we rely on the natural compounds in the fruit to do most of the work. You don't need fancy candy thermometers or complex reduction techniques.
If you can stir a pot on the stove, you can succeed here, resulting in a rich, restaurant quality Blueberry Syrup without breaking a sweat. It’s a proper ‘doddle,’ as we say here in the UK.
Defining 'Syrup' vs. 'Sauce' in the Context of Berries
In the professional kitchen, the difference is mostly textural. A sauce (like a coulis) is thicker, chunkier, often blended, and definitely retains most of the fruit solids. A syrup, on the other hand, is generally smooth, pourable, and clear achieved by straining the solids out after cooking.
This recipe provides instructions for both, letting you choose between a velvety smooth Blueberry Syrup or a slightly more rustic sauce.
Balancing Act: Sugar Concentration and Viscosity
Sugar doesn't just make our Blueberry Syrup sweet; it is absolutely vital for texture and preservation. When sugar dissolves and then cooks down with the liquid, it inhibits the water molecules from moving freely, making the final product thick and glossy.
If you drastically cut the sugar, your final result will be runnier, more watery, and won't store well in the fridge.
The Power of Pectin: Achieving the Ideal Texture
Blueberries naturally contain pectin, which is a structural carbohydrate that acts as a natural gelling agent when heated with acid and sugar. We encourage this natural gelling action when we crush the berries halfway through cooking.
This is why our Blueberry Syrup thickens beautifully as it cools, without needing any added starches or binders.
Enhancing Depth: How Acidity Amplifies Berry Flavor
This is my favourite trick: adding a tiny splash of fresh lemon juice at the end. That acidity isn't there to make the syrup taste sour, but rather to prevent the final product from tasting heavy and cloyingly sweet.
The lemon acts as a flavour brightener, balancing the sugar and ensuring the final Blueberry Syrup tastes intensely like fresh blueberries, not just sugar water.
Key Components for Your Vibrant Blueberry Syrup
| Ingredient | Substitute/Alternative | Chef's Note |
|---|---|---|
| Granulated Sugar | Maple Syrup (less reduction needed), Honey (stronger flavor), Stevia/Monk Fruit (texture may change) | Standard sugar provides the best viscosity and clarity. |
| Blueberries (Fresh/Frozen) | Mixed berries (raspberries, blackberries) or Lingonberries | Adjust sweetness if using tarter fruit. |
| Water | Orange Juice (for flavour complexity) or just less liquid | Water is best for a pure blueberry flavor profile. |
| Lemon Juice | Lime juice or a tiny splash of white vinegar | Don't skip the acid; it’s non-negotiable for flavor balance. |
Fresh vs. Frozen Blueberries: What Affects Cook Time?
Honestly, this is where you can save a ton of money. Frozen blueberries are generally cheaper, are picked at peak ripeness, and work perfectly for this Blueberry Syrup . If you use frozen, do not thaw them first; simply toss them into the pot straight from the freezer.
You might need to add one or two extra minutes to the initial simmer time to account for the temperature drop, but the final result will be identical.
Choosing Your Sweetener: Granulated Sugar Alternatives
While granulated white sugar delivers the classic texture, you absolutely can switch things up. If you use honey or maple syrup, start with a slightly smaller amount (maybe 2/3 cup) because these are naturally sweeter and have more liquid content.
Warning: If you use artificial sweeteners like Stevia or Monk Fruit, your syrup will likely be much runnier unless you add a pinch of xanthan gum at the end for thickness.
Water Content: Achieving the Perfect Ratio for Reduction
We use exactly half a cup of water, which feels sparse, but this is intentional. The blueberries themselves are mostly water, and as they heat up, they release their own juices, creating our liquid base.
Using too much starting water means you have to boil it for too long, losing that fresh, vibrant flavor of the resulting Blueberry Syrup . Trust the ratio.
Sourcing and Preparing the Lemon Zest and Juice
Use fresh lemon juice. Full stop. The stuff in the bottle is dull and metallic, and it ruins the bright flavor profile we’re building. We only need the juice, but if you want to add an extra layer of complexity, shave off three or four strips of zest before juicing and toss them into the pot during the initial simmer.
Just remember to pull them out before you strain the Blueberry Syrup .
Mastering the Method: Simple Steps to Gorgeous Syrup
This process is broken down into three simple stages. Follow these steps precisely to guarantee you get that glossy, thick texture everyone raves about.
Stage One: Simmering the Berries and Liquid
Start by combining the measured water, sugar, and a pinch of salt in a non-reactive saucepan (stainless steel is best, as cast iron can react and dull the colour). Heat this mixture over medium heat, stirring just until the sugar crystals completely dissolve and the liquid turns clear. You should not let it boil yet.
Once clear, gently pour in your 2 cups of blueberries, frozen or fresh, along with the teaspoon of fresh lemon juice.
Bring the mixture up to a gentle, steady simmer this means small, consistent bubbles around the edge and middle of the pan. Let the whole mixture cook quietly for about five minutes.
The Key Indicator: Knowing When to Remove from Heat
After the first five minutes, you’ll notice the berries softening and releasing intense purple colour. Now is the time to crush them. Use a potato masher or the back of a large spoon to press down on about 75% of the berries. You want to break them open to release the pectin and the deep flavour locked inside.
Continue simmering, stirring occasionally, for another five to seven minutes.
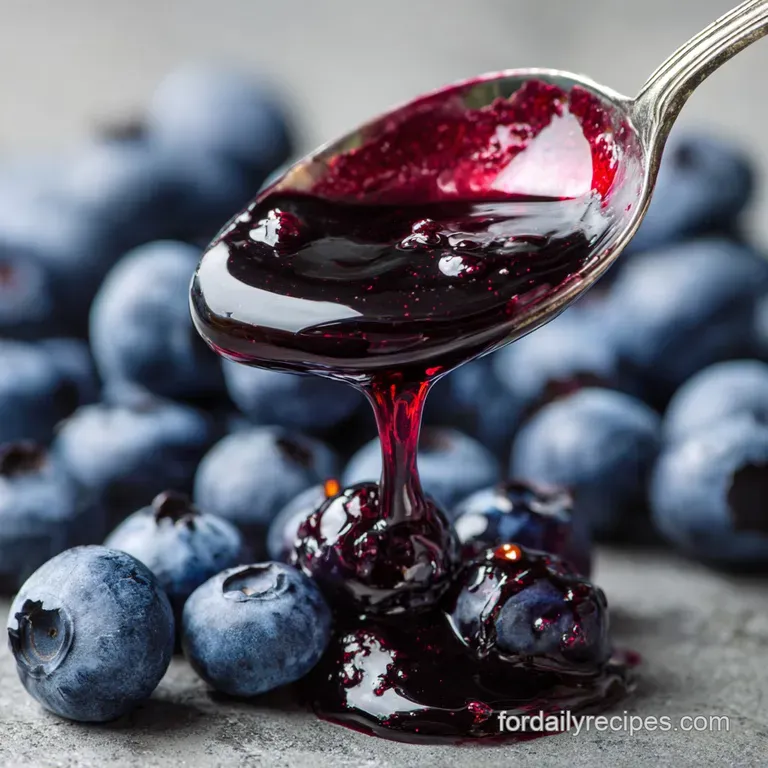
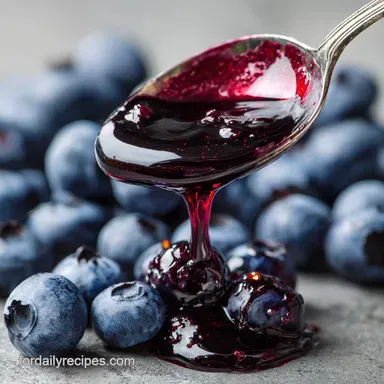
Crucial Test: Dip a cold spoon into the simmering mixture. If the liquid coats the back of the spoon lightly and doesn’t immediately run off like water, it’s done.
Remember this golden rule: It needs to look slightly runny now, because your smooth Blueberry Syrup will thicken dramatically as it cools.
Straining vs. Mashing: Achieving a Smooth Consistency
If you want a rustic, chunky topping (fantastic over ice cream), skip this step entirely and just jar the whole lot. However, if you're aiming for that glossy, clear-as-a-jewel Blueberry Syrup perfect for cocktails or fancy plating, you must strain it.
Place a fine mesh sieve over a clean, heatproof bowl. Pour the entire hot contents of the saucepan through the sieve. Do not use a spoon to push or force the mixture through the mesh. If you push, you’ll force starchy solids and cloudy pulp into your clear syrup, making it look dull.
Let gravity do its job, dripping the clear liquid naturally. It takes patience, but it’s the secret to clarity.
Chef's Troubleshooting: Avoiding Common Syrup Pitfalls
Stage One: Simmering the Berries and Liquid
The biggest mistake here is starting with heat that is too high. If the sugar dissolves too quickly and the water evaporates before the berries have a chance to release their juice, the sugar can burn on the bottom of the pan. Start slow and keep stirring until the mixture is uniform.
You want a gentle simmer, not a violent rolling boil, when preparing this stunning Blueberry Syrup .
My Syrup is Too Thin (How to Reduce Viscosity)
If your fully cooled Blueberry Syrup is still too watery, don't panic. Gently pour the syrup back into a clean saucepan and simmer it over medium low heat for another 5– 10 minutes. This process evaporates more water and concentrates the sugar further.
Keep checking that spoon coating test, tasting frequently, and remove it immediately when it hits that light coating texture.
Preventing Burned Sugar and Scorched Fruit
This happens when you walk away or stop stirring. Once the liquid levels drop, the heavy sugar and fruit solids stick to the bottom of the pan and scorch, giving the entire batch a bitter, burnt taste.
Always use medium or medium low heat during the final stage, and use a silicone spatula to scrape the bottom of the pan regularly.
Chef’s Note: If you smell burnt sugar, transfer the syrup immediately to a clean, cool bowl without scraping the scorched bits from the bottom of the old pan. Sometimes you can save the top layer!
Dealing with Excess Foam During Cooking
As the fruit heats and boils, a thin layer of grey or white foam often rises to the surface. This is totally normal. For a clear, beautiful Blueberry Syrup , simply use a clean spoon to skim off that foam toward the end of the cooking process, just before you take it off the heat.
Preserving the Jewel Tone: Guide to Storage and Shelf Life
This homemade Blueberry Syrup is so rich in flavour, you will definitely want to make a big batch and store it. Proper cooling and sterilisation are key to ensuring longevity.
Proper Cooling Methods for Jarring
After straining, allow the Blueberry Syrup to cool completely to room temperature before jarring and refrigerating. Pouring hot syrup into the fridge can trap moisture and cause condensation, which speeds up spoilage.
Cooling slowly on the counter allows the pectin to set up properly, giving you that beautiful, thick viscosity we want.
Refrigerator Longevity: How Long Will It Last?
If you pour the finished, cooled Blueberry Syrup into a properly sterilised glass jar (run the jar through a hot cycle in the dishwasher, or boil it for 10 minutes), it should happily last in the refrigerator for two to three weeks.
I find mine rarely survives that long, honestly, but it’s comforting to know it keeps well!
Freezing Blueberry Glaze for Extended Use
Yes, you can absolutely freeze this! If you plan to store the Blueberry Syrup for longer than three weeks, freezing is the answer. Pour the cooled syrup into a freezer safe, airtight container, leaving about an inch of headspace because liquids expand when frozen.
This frozen Blueberry Syrup will maintain its peak quality for up to six months. Just thaw it overnight in the fridge when you’re ready to use it again.
Beyond Pancakes: Creative Uses for Homemade Berry Glaze
Don’t limit this gorgeous creation solely to breakfast. This vibrant Blueberry Syrup is one of the most versatile items you can keep stocked in your kitchen.
Elevating Dessert: Glazes and Fillings
This syrup is the perfect filling for layer cakes just brush it between the layers for moisture and intense flavour. It's spectacular drizzled over a simple vanilla panna cotta or used to dress up store-bought ice cream.
I also love folding a generous amount of this rich Blueberry Syrup into whipped cream, creating a quick, vivid 'blueberry fool' that pairs wonderfully with biscuits or shortbread.
Mixing the Perfect Cocktail: Syrup as a Sweetener Base
Move over, simple sugar water! Homemade Blueberry Syrup is an absolute star in the cocktail world. Use it in place of standard simple syrup in a Gin Fizz or an Old Fashioned for a fruity twist.
It also makes incredible non-alcoholic refreshers: just add a splash to sparkling water with some fresh mint and a squeeze of lime for a homemade soda. We also love adding a dash to a cold brew or a warm matcha latte for a morning boost.
Savory Pairings: Unexpected Applications (e.g., cheeses)
You might think fruit syrup is strictly sweet, but the hint of acidity in this glaze makes it a perfect companion for savory items. Try drizzling a little of this thick, bright Blueberry Syrup over a charcuterie board, particularly next to soft, tangy goat cheese or a sharp aged cheddar.
It also works beautifully as a slightly sweet glaze for pork loin or duck breast, giving a gorgeous, caramelized crust. Once you see how versatile this easy Blueberry Syrup is, you'll never look at the store-bought bottles again.

Recipe FAQs
How long will this homemade blueberry syrup last in the refrigerator?
Properly stored in a clean, airtight container, like a sterilized mason jar, this syrup will keep beautifully for up to two weeks in the refrigerator. The high sugar content acts as a natural preservative, but freshness is key. Always ensure the syrup is completely cooled before sealing and refrigerating.
My syrup came out too runny. How can I fix the consistency?
If your syrup is too thin, it simply means it hasn't cooked long enough to reduce the water content adequately. Return the mixture to a gentle simmer and continue stirring for an additional 5 to 10 minutes, allowing the liquid to evaporate until it easily coats the back of a spoon.
Remember that syrup thickens considerably as it cools.
Can I use alternatives to granulated white sugar, such as honey or maple syrup?
Yes, you can substitute the granulated sugar, though this will slightly alter the syrup’s clear appearance and flavor profile. If using a liquid sweetener like maple syrup or honey, you may want to slightly reduce the amount of water used in the initial cooking phase.
Taste and adjust the lemon juice if the alternative sweetener throws off the balance.
Should I strain the blueberry syrup, or leave the berries in?
This choice is entirely personal and depends on your desired application. Straining the syrup through a fine mesh sieve yields a clear, vibrant glaze perfect for cocktails or elegant plating.
Leaving the softened berries in creates a beautiful, rustic, chunky sauce that works wonderfully over ice cream, cheesecake, or yogurt parfaits.
Can I freeze blueberry syrup, and what is the best method?
Absolutely, this syrup freezes exceptionally well, making it ideal for bulk preparation. Pour the cooled syrup into freezer safe containers or heavy duty zip-top bags, leaving about half an inch of headspace, and it will remain fresh for up to three months. To thaw, simply move it to the refrigerator overnight.
What are some creative ways to use this syrup beyond pancakes and waffles?
This versatile syrup is perfect for mixing into cocktails, especially gin-based drinks, or stirring into sparkling water for a refreshing homemade Italian soda. Try using it as a glaze for roast pork tenderloin, or drizzle it over Greek yogurt and granola for a quick, flavourful breakfast.
How can I incorporate different spices to give the syrup a richer flavor profile?
To deepen the flavor, introduce aromatic spices during the simmering process. Try adding a cinnamon stick, a few cracked cardamom pods, or a slice of fresh ginger to the pot alongside the berries and remove them just before bottling the syrup. These warm spices pair particularly well with blueberries.
Easy Homemade Blueberry Syrup
Ingredients:
Instructions:
Nutrition Facts:
| Calories | 41 kcal |
|---|---|
| Protein | 0.0 g |
| Fat | 0.5 g |
| Carbs | 9.2 g |
