Christmas Cookies: Classic Cut-Outs for Icing

- The Grand Duchess's Cut-Outs: The Ultimate Festive Cookie Recipe
- The Science of the Perfect Holiday Biscuit
- Essential Components for Spiced Sugar Cookie Success
- Baking the Grand Duchess's Cut-Outs: Method and Technique
- Mastering Cut-Outs: Pro Tips and Troubleshooting Guide
- Preparation and Preservation: Keeping Your Holiday Cookies Fresh
- Elevated Presentation: Serving Your Festive Treats
- Recipe FAQs
- 📝 Recipe Card
The Grand Duchess's Cut-Outs: The Ultimate Festive Cookie Recipe
When the weather turns crisp and the scent of pine needles starts wafting through the house, there is truly only one scent that matters: butter, vanilla, and spice. That is the smell of truly classic Christmas Cookies .
Forget those fussy recipes that require endless chilling and still spread into puddles; this is the recipe I swear by every single December. It delivers a perfect snap on the edge and a soft, slightly chewy middle, making it the ideal canvas for your wildest decorating dreams.
This particular recipe is a total lifesaver during the manic holiday rush. It uses pantry staples and requires minimal active time, meaning you can whip up the dough while the kids are at school and let the fridge do all the heavy lifting.
Plus, making a huge batch of these Christmas Cookies is significantly cheaper than buying those disappointing, pre-made packs from the bakery. This recipe gives you maximum holiday impact for minimum effort.
So grab your apron and your favourite mixing bowl, because we are skipping the chaos and diving straight into festive, buttery perfection. We’re going to talk through the crucial science of keeping those sharp edges and ensuring your decorated Christmas Cookies look exactly like the cutters you used.
Let's crack on with the dough that holds its shape like a champion.
The Science of the Perfect Holiday Biscuit
The Heritage of Classic Spiced Sugar Cookies
A lot of classic holiday cookie recipes rely on molasses or strong ginger, which is wonderful, but sometimes you just need a clean slate. My "Grand Duchess" recipe pulls its heritage from the traditional German Ausstecherle , or cut-out cookies, but we amp up the richness.
We rely on a higher proportion of butter and use just a touch of brown sugar alongside the granulated sugar, which adds moisture and a subtle chewiness. This isn't just one of those boring, chalky sugar cookies; these are the best Christmas Cookies because they have character and stability.
Why This Dough Holds Its Shape for Intricate Designs
The secret weapon here is two-fold: technique and temperature. First off,, we are only mixing the flour until just combined over mixing develops gluten, which makes the dough elastic, and elastic dough shrinks and warps when baked. You don’t want that.
Next,, the double chill is non-negotiable. Cold butter takes longer to melt in the oven, meaning the cookie sets before the fat leaks out and causes the dreaded spread. If you skip chilling, you might as well wave goodbye to those reindeer antlers!
Chef’s Note: For extra structure, some recipes call for creaming cold butter, but I find softened butter yields a richer flavour. The key is chilling it thoroughly afterward. If you’re struggling to make sure your Sugar Cookies: The Ultimate Roll and Cut Classic Recipe don't spread, try adding 2 tablespoons of cornstarch to the flour blend!
Deciding on Your Christmas Cookie Theme
This dough is versatile enough for absolutely any shape, from tiny detailed snowflakes to giant gingerbread men. Because the flavour profile is classic vanilla and spice, it pairs beautifully with almost any icing, glaze, or sprinkle combination. Are you going for whimsical pastels or traditional deep reds and greens?
The recipe stays the same; the canvas is ready for whatever festive vision you have. These classic Christmas Cookies are designed to let your creativity shine.
Preventing Spread: The Cold Butter Technique
As mentioned, we rely on temperature control. When you incorporate cold chunks of butter into flour (like when making scones), the fat is layered. When you cream softened butter with sugar, you incorporate air, creating microscopic pockets. When the dough is chilled, the fat solidifies around those air pockets.
When it hits the hot oven, the dough structure has already set before the butter can fully melt, locking those crisp edges in place. This makes these Holiday Cookie Recipes sturdy and reliable.
The Medium Difficulty Level Explained
I rate this medium because while the mixing is easy, the chilling, rolling, and handling take practice. You need patience. If you rush the chill, the dough will fight you and tear, making your beautifully decorated Christmas Cookies look sloppy.
If you don't roll evenly, some will burn while others remain raw. Take your time, trust the process, and you’ll find it’s totally manageable, even for beginner bakers who want to impress.
Achieving Soft Centers and Crisp Edges
This is where the baking powder comes in, along with careful timing. We use just enough baking powder for lift without causing a massive dome. Crucially, we use granulated sugar, which promotes spreading slightly more than powdered sugar, but we counteract that spread with the chill.
Baking until the edges are just kissed gold, but the centre is still pale, achieves that perfect textural contrast. You want them cooked through, but not brittle.
Essential Components for Spiced Sugar Cookie Success
If you're making the ultimate Christmas Cookies , you can't skimp on ingredients. Using good vanilla extract and quality spices really makes a difference here, especially since the flavour profile is relatively simple.
The Role of Brown Sugar vs. Granulated Sugar in Texture
We use mostly granulated sugar because it creates the crisper edges and allows the dough to hold its shape sharply. However, I add a small amount of brown sugar because it contains molasses.
This little addition boosts the moisture content, ensuring the interior of the cookie remains soft and chewy, rather than dry and crumbly. It’s a tiny tweak that delivers a huge payoff in texture and keeps these delicious Christmas Cookies from getting brittle.
Achieving Subtle Warmth: Cinnamon and Nutmeg Ratio
The key to holiday spice isn't overwhelming heat; it's subtle warmth. We use half a teaspoon of cinnamon and only a quarter teaspoon of nutmeg. Why so little? Because these cookies are often covered in royal icing, which is intensely sweet. We want the spice to complement the icing, not fight it.
If you have fresh whole nutmeg, grate it yourself. It adds ten times the aroma and depth compared to pre-ground versions.
Ingredient Notes and Swaps for Dairy/Gluten Sensitivities
I firmly believe that everyone should enjoy fantastic Christmas Cookies ! Don't let dietary restrictions hold you back. Here are my tried and true substitutions for the main components.
| Ingredient | My Top Tip | Viable Substitute |
|---|---|---|
| Unsalted Butter | Use high fat dairy butter for best flavor. | high-quality plant based baking sticks (avoid margarine spreads). |
| Granulated Sugar | Don't swap this for liquid sweeteners. | Use cane sugar or fine baker's sugar. |
| Large Eggs | Must be room temperature for emulsion. | Flax eggs (1 tbsp flax + 3 tbsp water per egg) or commercial replacer. |
| All-Purpose Flour | Weigh your flour accurately! | A 1:1 gluten-free Blend containing xanthan gum. |
Baking the Grand Duchess's Cut-Outs: Method and Technique
Creaming Butter and Sugar to the Perfect Consistency
This first step is crucial. You need to beat the softened butter and sugars (both white and brown) until the mixture lightens dramatically in colour and becomes incredibly fluffy. This process incorporates the air pockets we discussed earlier. It should take a full 3- 4 minutes in a stand mixer.
Don't rush it! Once the mixture looks like whipped frosting, you’re ready for the eggs. This foundational step is what separates good Christmas Cookies from great ones.
The Critical Two-Hour Chill for Stable Dough
After gently incorporating the flour, the dough will be slightly crumbly but manageable. Pat it into two flat discs, wrap them tightly in plastic wrap, and place them in the coldest part of your fridge. Two hours is the absolute minimum, but I prefer chilling overnight.
A mistake I once made was trying to roll the dough after only 30 minutes, and it was a sticky, messy disaster that resulted in flat, sad cookies. Do not cheat the chill.
Rolling and Cutting Without Distortion
When you take the dough out, it will be rock hard. Let it sit on the counter for about 5 minutes just so it doesn't crack when you hit it with the rolling pin. Roll it between two pieces of parchment paper this minimizes the need for extra flour, which keeps your dough tender.
Roll to a consistent 6mm (1/4 inch) thickness. Cut your shapes, and here is the pro move: peel away the surrounding dough first, then lift the cut shapes onto the baking sheet.
Visual Cues for a Perfectly Baked Cookie
You are looking for subtle signs here. After 10- 12 minutes, the edges of the cookies should be set and ever so slightly golden. The center should still look pale and perhaps a little puffy. If the center looks deeply golden, you’ve gone too far!
Remember, they continue to cook slightly on the hot tray after they come out of the oven. A beautiful batch of these Christmas Cookies should look uniform in colour, which indicates perfect texture.
Mastering Cut-Outs: Pro Tips and Troubleshooting Guide
How to Prevent Dough from Sticking During Rolling
Parchment paper is your best friend. Seriously, it's better than flouring the surface. If you must use flour, only dust the top of the dough and the pin very lightly. If the dough starts getting sticky while you are rolling, throw it back in the fridge for 10 minutes. Warm dough is weak dough.
Solving the Problem of Cracking or Crumbling Edges
Cracking happens for two reasons: 1) the dough is too cold, or 2) you added too much flour. If the dough is too cold, let it sit for another 5 minutes before rolling.
If it's too dry because you added too much flour during the mixing or rolling stage, try misting the surface lightly with water and kneading it quickly once or twice, or simply blend the problematic dough with a fresh, less floured batch of dough scraps.
These tips help keep your decorated Christmas cookies flawless.
Adjusting Bake Time for Different Cookie Cutter Sizes
A large cutter (8+ inches) will need 14- 16 minutes, while a tiny cutter (under 2 inches) might only need 8- 10 minutes. The key is monitoring the edges, not the clock. Always check at the lower end of the time estimate.
If you are baking mixed sizes, group similar sizes together on the same tray for consistency. Having a variety of bake times is common with these Christmas Cookies , so patience is key!
Best Practices for Storing Baked Christmas Cookies
Once the cookies are completely cooled (this means 100% cold, usually 1 hour minimum), they can be stored in an airtight container at room temperature for up to 5 days. If they are heavily decorated with royal icing, ensure the icing is rock hard before layering them.
I put a small sheet of parchment between layers just to be extra careful with those beautiful festive designs.
Freezing the Dough vs. Freezing the Decorated Cut-Outs
Both are brilliant options! If you want to freeze the dough, wrap the chilled discs tightly in plastic wrap, then put them in a zip-top freezer bag. They last 3 months. Thaw them overnight in the fridge before rolling.
If you want to freeze the finished, decorated Christmas Cookies , let the icing set completely. Place them in a single layer in a freezer safe container, placing parchment between layers. Thaw slowly at room temperature, but avoid humid days which can ruin the icing.
Preparation and Preservation: Keeping Your Holiday Cookies Fresh
You can be a baking hero just by planning ahead. Making and freezing dough in advance is my absolute favourite trick for easy holiday baking. When you’re ready, simply pull out the pre-portioned dough, let it thaw, roll, and bake.
This makes producing massive quantities of these Easy Christmas Cookie Recipes totally stress free.
If you’re planning a holiday cookie exchange, baking and cooling the cookies 2 3 days ahead of time gives you plenty of time for detailed decorating. Just remember that moisture is the enemy of crispiness, so always use airtight containers once they are fully cool. If you are looking for another fantastic recipe to add to the exchange, try these chewy Snickerdoodle Cookies: Classic Chewy Recipe with Perfect Tang — they are always a huge hit.
Elevated Presentation: Serving Your Festive Treats
Ideal Icing Choices: Royal Icing vs. Simple Glaze
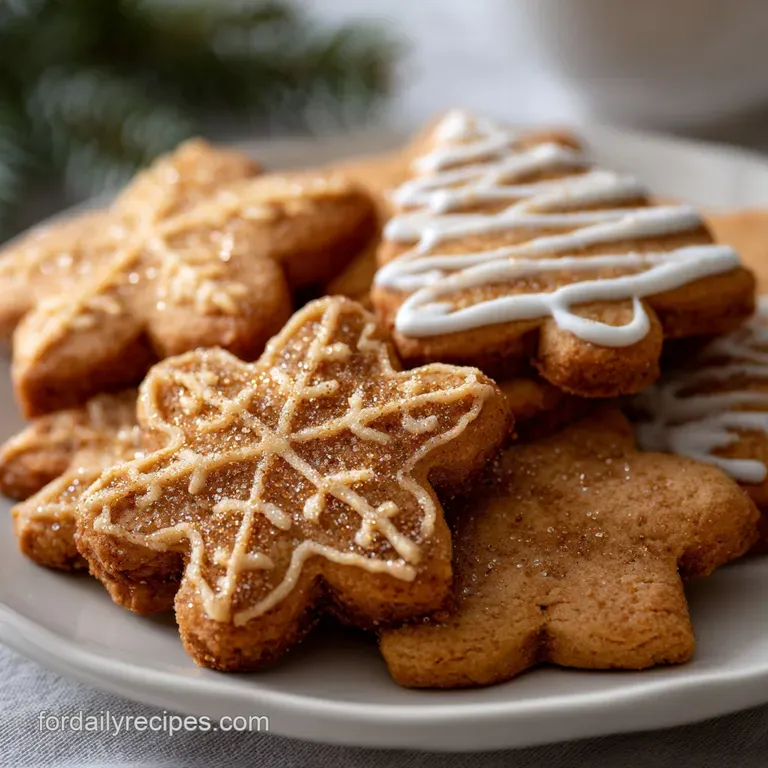
For proper, structured, and giftable Christmas Cookies , royal icing is the only answer. It dries hard, transports perfectly, and allows for intricate detail (like the fine lines you see on my snowflake designs).
If you want something faster and softer, a simple glaze made from confectioner’s sugar and a splash of milk or lemon juice is fantastic, though it will never harden completely, making stacking tricky.
If you opt for royal icing, remember consistency is everything. You need one thick consistency (like toothpaste) for outlining and one thinner consistency (like honey) for flooding or filling the centres. And please, only use gel food colours! Liquid colours disrupt the icing structure.
These gorgeous Grand Duchess cut-outs are the heart of the holidays. They truly are the definition of homemade love, and they show off your baking skills perfectly. Whether you decorate them simply or spend an entire evening creating edible masterpieces, you’ll find that this Best Christmas Cookie Recipe is the one you come back to year after year.
Happy baking!

Recipe FAQs
Why did my Christmas cut-out cookies spread or lose their sharp edges during baking?
This is usually due to the dough being too warm or having too much softened butter or leavening. Ensure you thoroughly chill the cut-out shapes on the baking sheet for at least 15 minutes before they enter the oven to firm up the fat.
Also, avoid using excessive flour during the rolling process, as this can make the dough brittle; instead, use parchment paper underneath and a light dusting on top.
My finished cookies came out too hard or dry. What went wrong?
This almost always indicates over baking or accidentally incorporating too much flour, especially if you scooped it directly instead of weighing or spooning it into the measuring cup. Watch the oven carefully and remove the cookies the moment the edges turn light gold, as they continue to cook slightly on the tray.
How long will these cookies last, and what is the best way to store them?
Store completely cooled, undecorated cookies in an airtight container at room temperature for up to two weeks, or slightly less if they are elaborately decorated with moist buttercream.
If using royal icing, ensure the icing is fully hardened (typically 24 hours) before layering them in the container with parchment paper between the layers to prevent damage.
Can I prepare the cookie dough a few days in advance to save time during the holidays?
Absolutely. The dough can be wrapped tightly in plastic film and stored in the refrigerator for up to 5 days, which is often preferable as cold dough handles easier.
If freezing, shape the dough into thick discs, wrap tightly, and it will keep for up to 3 months; thaw it overnight in the fridge before rolling.
Is it possible to make a gluten-free or dairy-free version of this recipe?
Yes, you can substitute the all-purpose flour cup-for-cup with a good quality gluten-free blend that contains xanthan gum for structure, though the texture may be slightly different.
For a dairy-free variation, substitute the butter with a high-quality plant based butter alternative or solid vegetable shortening, ensuring it is chilled thoroughly before mixing.
Why is chilling the dough so crucial for cut-out cookies?
Chilling firms the butter within the dough, which is essential for preventing the cookies from melting and spreading too quickly when exposed to the high heat of the oven.
This ensures that your detailed cut-out shapes, such as trees and bells, retain their sharp edges and distinct appearance.
Can I freeze the raw, unbaked cut-outs instead of just freezing the dough?
Yes, freezing the cut-outs is an excellent method for 'bake-as-you-go' convenience. Simply cut the shapes, place them on a parchment lined tray, and freeze until solid.
Once frozen, transfer them to an airtight container and bake them directly from frozen, adding 2 4 minutes to the specified baking time.
Classic Spiced Cut Out Christmas Cookies

Ingredients:
Instructions:
Nutrition Facts:
| Calories | 180 calories |
|---|---|
| Fat | 9 g |
| Fiber | 0.5 g |
