Baked Chicken Thighs: Spiced Crust
- Time: Active 10 minutes, Passive 25 minutes, Total 35 minutes
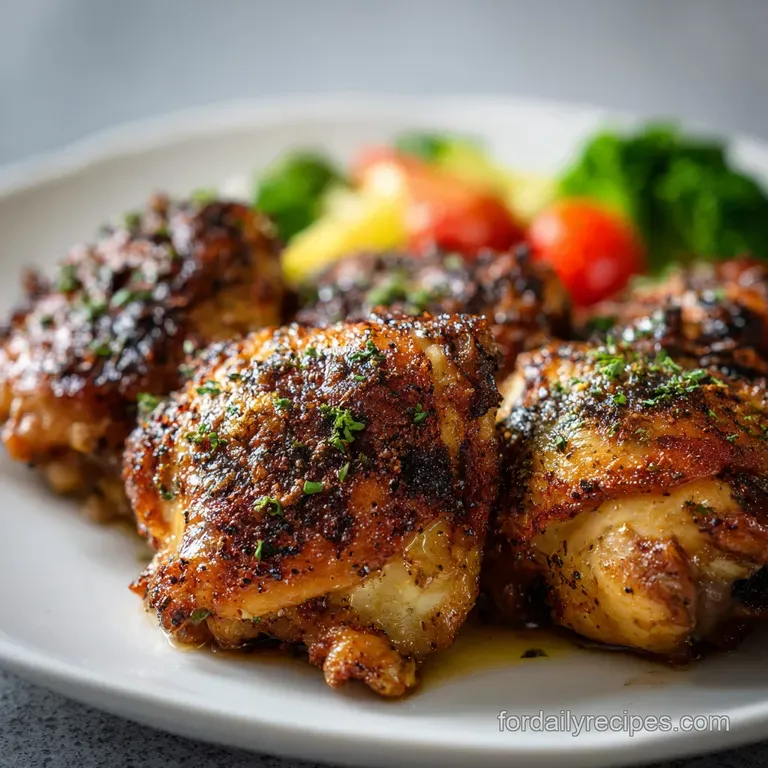
- Flavor/Texture Hook: Glistening, smoky sweet crust with a tender, melt in-the mouth interior
- Perfect for: Stress free family dinners, weekly meal prep, or beginner cooks seeking fail proof results
- Mastering Golden Heritage Baked Chicken Thighs
- The Science of Succulent Poultry
- Selecting Finest Components for Results
- Simple Tools for Kitchen Success
- Step by Step Golden Results
- Correcting Texture and Flavor Issues
- Modifying for Specific Nutritional Needs
- Preserving Leftovers and Reducing Waste
- Completing Your Table With Sides
- Baked Chicken Thighs FAQs
- 📝 Recipe Card
Mastering Golden Heritage Baked Chicken Thighs
The scent of smoked paprika and garlic hitting a hot oven is, to me, the ultimate "welcome home" signal. I remember watching my mother pull a blackened sheet pan from the oven, the chicken thighs sizzling and releasing that savory, heady steam that filled every corner of the kitchen.
For years, I struggled with poultry that came out either rubbery or bone dry, but after decades of trial and error, I realized the secret lies in the simple, time honored marriage of high heat and a well balanced rub.
We are moving away from the bland, skinless breasts of the past and leaning into the rich heritage of the thigh. It’s a forgiving cut, marbled with just enough fat to stay moist even if you leave it in the oven a few minutes too long.
In this recipe, we’re using 1.5 lbs boneless skinless chicken thighs to create a meal that feels like a warm embrace, much like the hand me-down cast iron skillets we still use today.
The magic happens when the spices toast against the meat, creating a landscape of flavor that doesn't require hours of marinating. If you’ve ever felt frustrated by chicken that looks pale and uninviting, this approach will change your perspective.
We are going for a deep, mahogany finish that promises a satisfying bite every single time. Let's get the oven preheated and talk about why this method actually stands the test of time.
The Science of Succulent Poultry
Maillard Reaction: High heat triggers a chemical reaction between amino acids and reducing sugars, resulting in the deep brown color and complex, savory aromas.
Protein Denaturation: Roasting at 400°F allows the proteins to cook quickly enough to retain internal moisture before the cellular structures collapse and squeeze out the juices.
Fat Rendering: The modest intramuscular fat in the thighs melts during the 25 minutes of roasting, essentially "confit ing" the meat from the inside out for a velvety texture.
Osmotic Pressure: Applying the sea salt rub early helps break down lean muscle fibers, allowing the seasonings to travel deeper into the meat rather than just sitting on the surface.
To ensure your family dinner is a success, choosing the right method for your schedule is essential. While many folks swear by a slow roast, I find that a vigorous, high temp environment provides the best contrast between the exterior and the interior.
| Method | Cook Time | Resulting Texture | Best For |
|---|---|---|---|
| over High heat Roasting | 25 minutes | Bronzed, firm, and juicy | Quick weeknight heritage meals |
| Slow Roasting (325°F) | 50 minutes | Very soft, falling apart | Shredding for tacos or soups |
| Pan Searing First | 35 minutes | Extra crispy, dark crust | When you have extra prep time |
There is a distinct difference between using fresh ingredients and reaching for those shortcut pantry staples we all keep for emergencies. While I'm a fan of efficiency, some things are worth the extra minute of effort to honor the flavor of the dish.
| Component | Fresh/Whole Approach | Shortcut/Pre mixed | Flavor Impact |
|---|---|---|---|
| Spices | Individual toasted spices | Pre made poultry rub | Fresh spices offer a more vibrant, nuanced aroma |
| Oil | Extra virgin olive oil | Cooking spray | Oil provides better heat conduction and a lusher mouthfeel |
| Chicken | Hand trimmed thighs | Pre marinated strips | Trimming yourself ensures higher quality and better fat balance |
Selecting Finest Components for Results
To get that time honored flavor, we need to be specific about what goes into our bowl. I always reach for 1.5 lbs boneless skinless chicken thighs because they cook evenly and allow the rub to coat every nook and cranny.
You'll also need 2 tbsp extra virgin olive oil to help those spices stick and to encourage that beautiful browning we’re after.
The dry rub is where the personality of the dish truly shines. I use 1 tsp sea salt and 1/2 tsp black pepper as our foundation. Then, we build the "mahogany" profile with 1 tsp smoked paprika, 1 tsp garlic powder, 1 tsp onion powder, and 1/4 tsp dried oregano. For just a tiny hint of warmth the kind that makes you want another bite add 1 pinch cayenne pepper. If you find yourself out of these individual spices, you might consider using a high-quality Poultry Seasoning recipe to bridge the gap.
| Ingredient | Science Role | Pro Secret |
|---|---|---|
| Sea Salt | Denatures proteins | Apply at least 10 mins before cooking to lock in moisture |
| Smoked Paprika | Adds color/antioxidants | Use "pimentón" for a deeper, earthier aroma that mimics wood firing |
| Extra Virgin Olive Oil | Heat conductor | Ensures even heat distribution across the irregular surface of the thigh |
When it comes to substitutions, I always tell my friends to use what they have, but keep the fat content in mind. If you swap the oil for butter, you'll get a richer flavor, but be careful as the milk solids can burn at 400°F.
- 1.5 lbs boneless skinless chicken thighs: You can use bone in thighs, but you'll need to add about 15 minutes to the clock. Why this? Thighs stay juicy under high heat compared to lean breast meat.
- 2 tbsp extra virgin olive oil: Avocado oil is a great swap if you want a higher smoke point.
- 1 tsp sea salt: Kosher salt works too; just use a bit more if the grains are very large.
- 1 tsp smoked paprika: Regular paprika works for color, but you’ll miss that campfire scent.
- 1/4 tsp dried oregano: Dried thyme or marjoram offers a lovely, woodsy alternative.
- 1 pinch cayenne pepper: Swap with smoked chipotle powder for a different kind of heat.
Simple Tools for Kitchen Success
You don't need a professional kitchen to make legendary Baked Chicken Thighs, but a few specific items make the journey much smoother. I prefer a heavy rimmed baking sheet or a large cast iron skillet. The weight of the pan helps maintain a steady temperature even when you open the oven door to check on things.
A large mixing bowl is essential for tossing the chicken with the oil and spices. Don't be afraid to use your hands here! It’s the best way to ensure every fold of the meat is seasoned. Finally,, an instant read meat thermometer is your best friend.
It takes the guesswork out of the equation and prevents that "cut and peek" habit that lets all the precious juices escape.
Chef's Note: I like to line my baking sheet with parchment paper, not just for the easy cleanup, but because it prevents the spices from sticking to the metal and burning, which can happen with foil.
step-by-step Golden Results

- Preheat the oven. Set your oven to 400°F and ensure the rack is in the center position. Note: This temperature is high enough to brown the meat without drying it out.
- Dry the meat. Pat the 1.5 lbs boneless skinless chicken thighs with paper towels until they are completely matte and moisture free.
- Whisk the rub. In a small bowl, combine the 1 tsp sea salt, 1/2 tsp black pepper, 1 tsp smoked paprika, 1 tsp garlic powder, 1 tsp onion powder, 1/4 tsp dried oregano, and 1 pinch cayenne pepper.
- Coat with oil. Place the chicken in a large bowl and drizzle with 2 tbsp extra virgin olive oil, tossing until every surface is glistening.
- Season thoroughly. Sprinkle the spice mixture over the chicken. Use your hands to massage the spices into the meat, ensuring the underside is just as coated as the top.
- Arrange the pan. Place the thighs on your prepared baking sheet, leaving at least an inch of space between each piece.
- Roast the chicken. Slide the pan into the oven and bake for 25 minutes. Listen for the rhythmic sizzle of the fat rendering that’s the sound of flavor developing.
- Check for doneness. Use a thermometer to ensure the internal temperature has reached 165°F. The meat should look opaque and the juices should run clear.
- The aroma check. At the 20 minute mark, the kitchen should smell like toasted garlic and warm pepper; if it smells "steamy," you might need to increase the heat slightly next time.
- Rest the meat. Remove the pan from the oven and let the chicken sit for 5 minutes. Wait until the bubbling oil settles before serving to ensure the juices stay inside the meat.
Correcting Texture and Flavor Issues
Even the most seasoned home cooks run into a snag now and then. One mistake I made for years was overcrowding the pan. I wanted to cook everything at once, but the chicken ended up "steaming" in its own moisture rather than roasting. The result? Pale, floppy meat that lacked that signature bronzed crust.
If your chicken comes out a bit tough, it’s usually a sign that it was either overcooked or not rested long enough. The resting period is not just a suggestion; it’s a mandatory part of the process where the muscle fibers relax and reabsorb the liquid.
Think of it as the chicken taking a quick nap after the intense heat of the oven.
| Problem | Root Cause | Solution |
|---|---|---|
| Sogginess | Overcrowded pan | Use a larger pan or two pans to allow air circulation |
| Lack of Flavor | Moisture on surface | Pat the chicken dry very aggressively before adding oil |
| Burnt Spices | Oven rack too high | Move the rack to the center and use parchment paper |
Why is the meat tough?
If you find the texture is unpleasantly firm, you likely pushed past the 175°F mark. While thighs are forgiving, they eventually lose their suppleness. Always pull them at 165°F to allow for carryover cooking.
Why is the chicken pale?
This usually happens if the oven wasn't fully preheated or if the chicken was cold when it went in. Try taking the meat out of the fridge 15 minutes before you plan to season it to take the chill off.
Common Mistakes Checklist:
- ✓ Forgot to pat the chicken dry (results in steamed, rubbery texture)
- ✓ Skipping the resting period (causes all the juices to run out on the plate)
- ✓ Using "old" spices from the back of the pantry (diminishes the vibrant aroma)
- ✓ Overcrowding the pan (prevents the edges from getting that golden brown color)
- ✓ Relying on sight alone instead of using a meat thermometer
Modifying for Specific Nutritional Needs
This recipe is naturally quite versatile. For those following a Mediterranean lifestyle, you can swap the smoked paprika for dried lemon peel and extra oregano. It transforms the dish into something bright and zesty that pairs beautifully with a fresh salad.
If you are looking for a more "set it and forget it" style for a busy week, you might find that Shredded Chicken Recipes offer a different kind of convenience, though you’ll trade off that beautiful roasted crust for a softer, pull apart texture.
- To Scale Down (1-2 people): Use a smaller toaster oven pan and reduce the spices proportionally. You can use half an egg white as a binder if you want an even thicker spice crust.
- To Scale Up (8+ people): Use two large baking sheets and swap their positions halfway through the 25 minutes to ensure even browning. Keep the spices at 1.5x for every double batch of meat to avoid over salting.
- Baking for a crowd: Lower the temperature to 375°F and extend the time to 35 minutes if you have multiple trays, as the oven’s thermal mass will be higher.
Preserving Leftovers and Reducing Waste
Baked Chicken Thighs are one of the best items to have in your fridge for a "planned over" meal. They stay moist much longer than breasts, making them the star of the next day's lunch.
Storage: Keep any leftovers in an airtight glass container in the fridge for up to 4 days. If you want to keep them longer, they freeze beautifully for up to 3 months. Just make sure to wrap them tightly in foil and then place them in a freezer bag to prevent freezer burn.
Zero Waste Tip: Don't throw away any of the juices left on the baking sheet! That liquid gold is full of rendered fat and toasted spices. I like to toss some leftover roasted vegetables in it, or even stir it into a pot of rice to add a rich, savory depth to a side dish.
If you have extra raw thighs that you won't use, you can freeze them in the oil and spice marinade so they are ready to go the moment they thaw.
Completing Your Table With Sides
When I think about what to serve with these thighs, my mind immediately goes to comfort. A side of fluffy mashed potatoes or a heap of green beans simmered with a bit of bacon is the heritage way to do it. The savory, smoky notes of the chicken really sing when paired with something slightly creamy or earthy.
For a truly hearty meal that would make any grandmother proud, this chicken pairs incredibly well with a CattleRanch Casserole recipe. The combination of the spiced poultry and the rich, potato based bake creates a spread that feels substantial and celebratory.
- If you want a crunchier finish, try turning on the broiler for the last 2 minutes of cooking.
- If you want a brighter flavor, squeeze half a fresh lemon over the tray the second it comes out of the oven.
- If you want a hint of sweetness, add a teaspoon of brown sugar to the spice rub to encourage caramelization.
My Chicken Myth Busting
A common misconception is that you need to wash chicken before cooking it. Please, for the sake of your kitchen's hygiene, don't! Washing doesn't kill bacteria; it just splashes it around your sink. The high 400°F heat of the oven is what does the real work.
Another myth is that "clear juices" are the only sign of doneness. While helpful, a thermometer is the only way to be 100% sure without overcooking the meat into a dry mess. Trust the science, trust your thermometer, and most importantly, trust your nose it’ll tell you when those spices have reached their peak.

Baked Chicken Thighs FAQs
What temperature should I bake chicken thighs at?
400°F (200°C) is ideal for a golden, crispy crust. This high heat promotes the Maillard reaction for browning and helps render the fat, keeping the chicken moist. It cooks them quickly without drying out the interior.
How long does it take to bake chicken thighs at 400°F?
About 25 to 30 minutes. You're looking for an internal temperature of 165°F (74°C) and juices that run clear. Overcrowding the pan can increase the cooking time.
Can I use bone-in chicken thighs?
Yes, but adjust the cooking time. Bone-in thighs will typically take about 10-15 minutes longer to bake than boneless ones. Ensure they reach an internal temperature of 165°F (74°C) to be safe.
What's the secret to crispy skin on baked chicken thighs?
Pat the thighs completely dry and don't overcrowd the pan. Moisture is the enemy of crispiness; drying the skin allows it to brown and crisp up properly. Ample space between thighs ensures hot air circulates around them.
Why is my baked chicken tough?
It's likely overcooked or wasn't rested. Chicken thighs are forgiving, but even they can become tough if cooked significantly past 165°F (74°C). Always let them rest for 5-10 minutes after baking to allow juices to redistribute.
Can I marinate chicken thighs before baking?
Absolutely, and it's highly recommended for flavor. Marinating for at least 30 minutes, or up to 24 hours in the refrigerator, infuses them with taste. Acidic ingredients in the marinade can also help tenderize the meat.
What are good side dishes for baked chicken thighs?
Simple starches and greens complement them well. Think mashed potatoes, roasted vegetables, or a fresh salad. For a hearty, heritage style meal, consider pairing them with a comforting bake like our CattleRanch Casserole recipe.
Baked Chicken Thighs
Ingredients:
Instructions:
Nutrition Facts:
| Calories | 264 kcal |
|---|---|
| Protein | 33.5 g |
| Fat | 13.6 g |
| Carbs | 1.2 g |
| Fiber | 0.3 g |
| Sugar | 0.1 g |
| Sodium | 588 mg |
